


I was having trouble finding complete installation and programming instructions so with the permission of original creator I am re-posting the following information to create one thread with complete installation and programming instructions.
This is a great first DIY for someone who hasn't done DIY work yet as it is very easy and there is very little screw-up/damage potential.
INSTALLATION (Thanks to Kayger12)
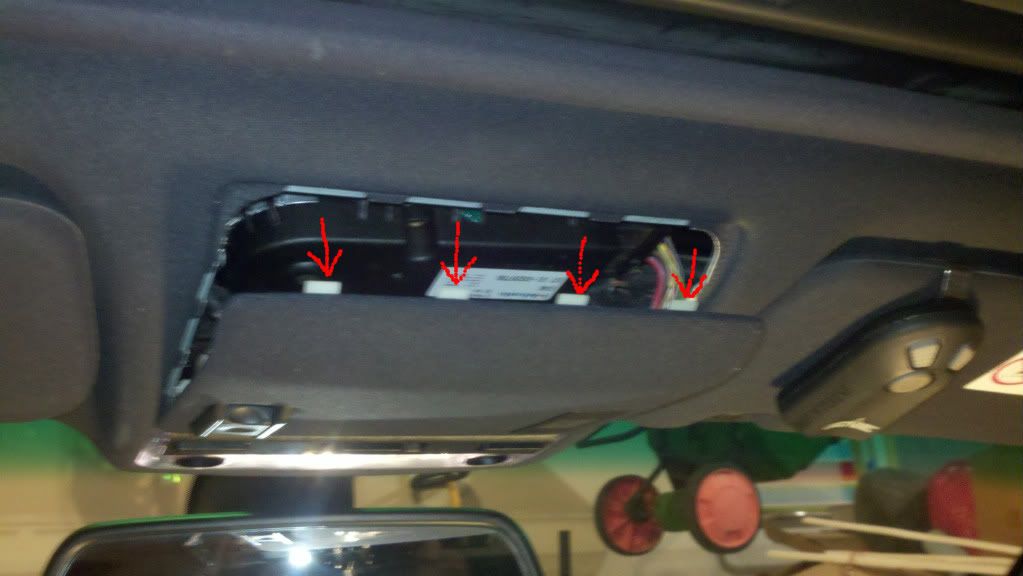
For starters, removing the headliner trim panel is very simple. Use a plastic non-marring pry tool or trim removal tool to release the tabs at the front of the trim piece. Now you can pull it towards you and away from the sunroof motor cavity.
The things to remember when dealing with any trim piece are 1) Dull tools and 2) CLEAN HANDS!!
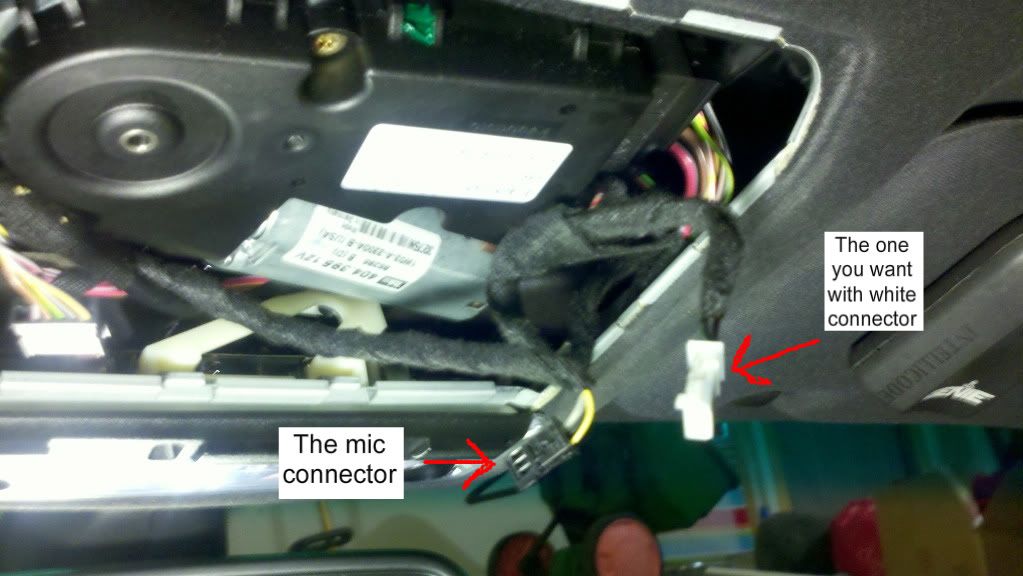
Disconnect sunroof switch connector by pulling it straight out.
Do the same for the mic connector on the opposite side if you have one hooked up.
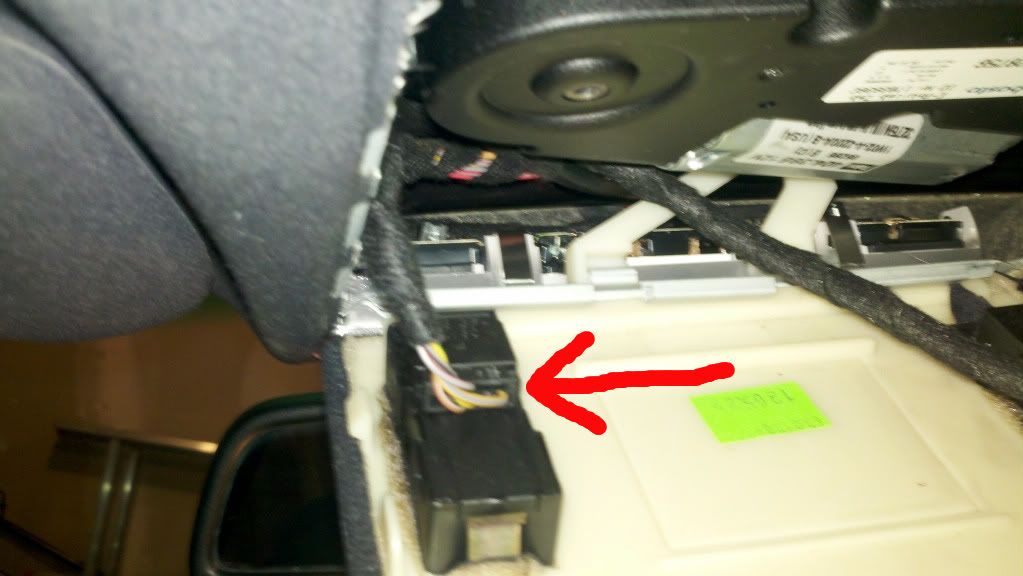
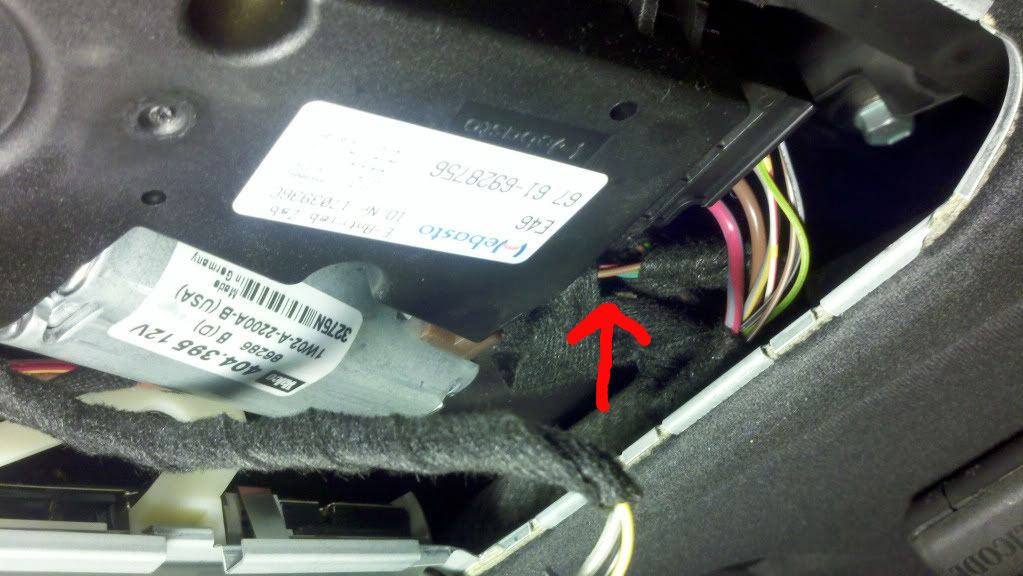
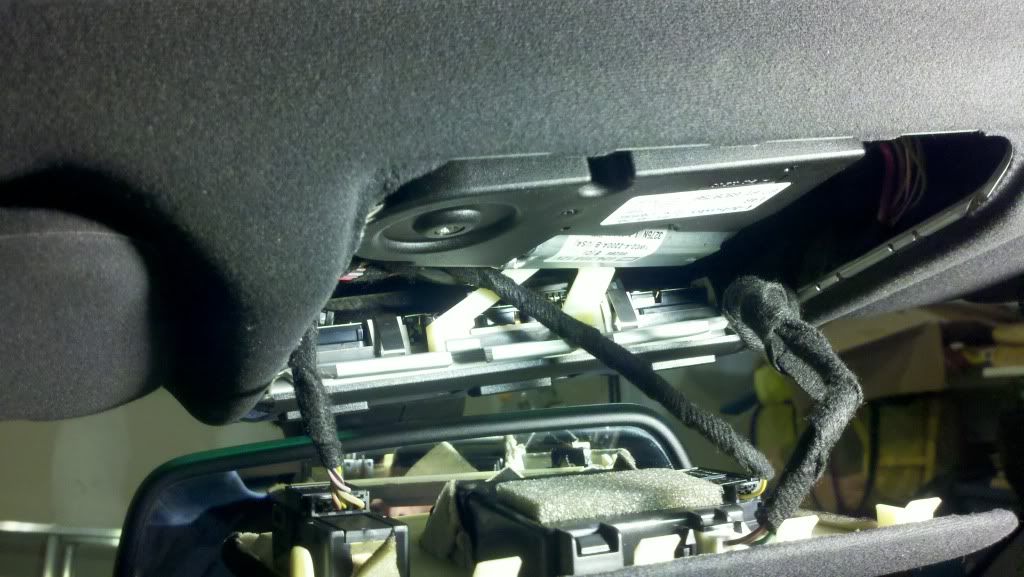
Now you have to hunt for the wiring harness. Mine was wrapped on the right side of the cavity where the red arrow is pointing below. All that was visible were the brown and green wires.
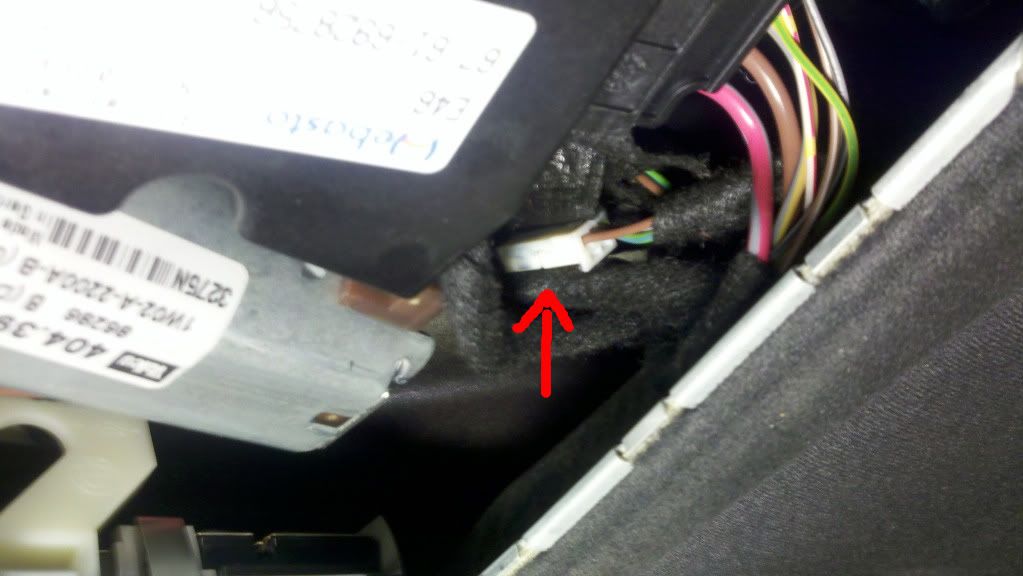
Gently unwrap the black adhesive wrapping material and you will expose the business end of the harness.
Now you can pull out the connector. You'll need some slack to get it plugged into the receptacle on the Homelink unit.
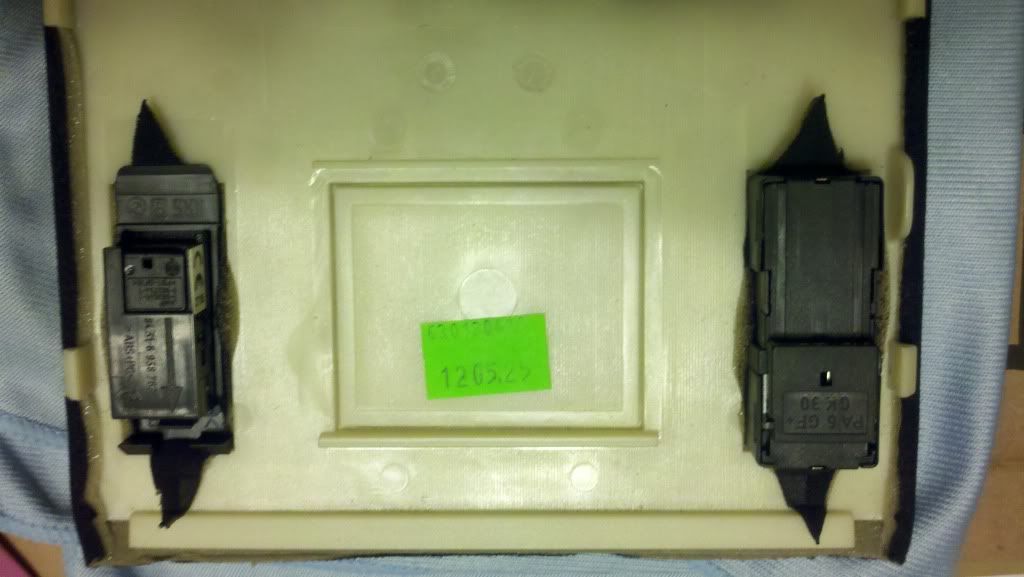
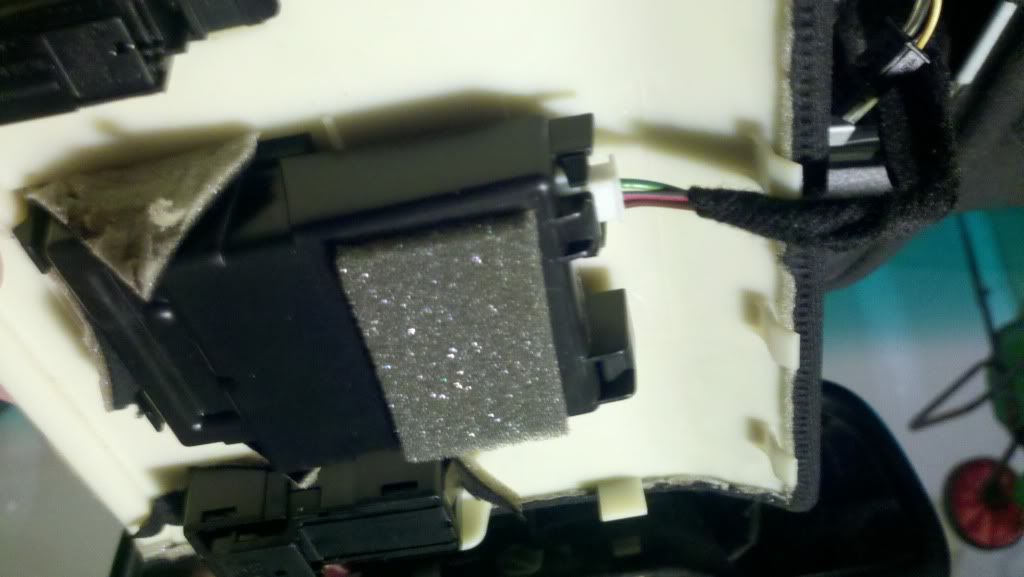
The square area you see below is where you want to score with your cutting tool. I used a hobby knife to score it and then applied a little pressure from underneath (with clean hands) to break the plastic free. I also chose to leave the sunroof switch and mic in the trim piece, but you could just as easily remove them by pushing them out from the top.
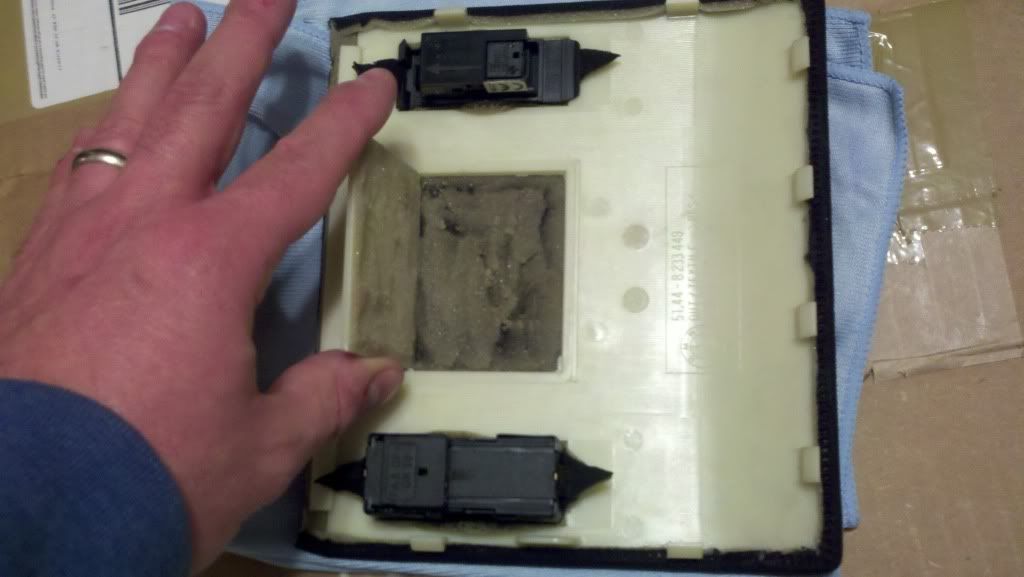
Now the plastic will be cut free, but it is still attached to the cloth by an adhesive. I used a sharp hobby knife to gently cut the adhesive free while simultaneously pulling up on the square plastic piece. Just remember to make sure you're placing your trim on a clean surface while you're working-- don't want to damage that beautiful anthracite...
Cut an "X" in the exposed fabric and work the Homelink unit in from the bottom. Take your time and make sure that you don't crimp the anthracite fabric.
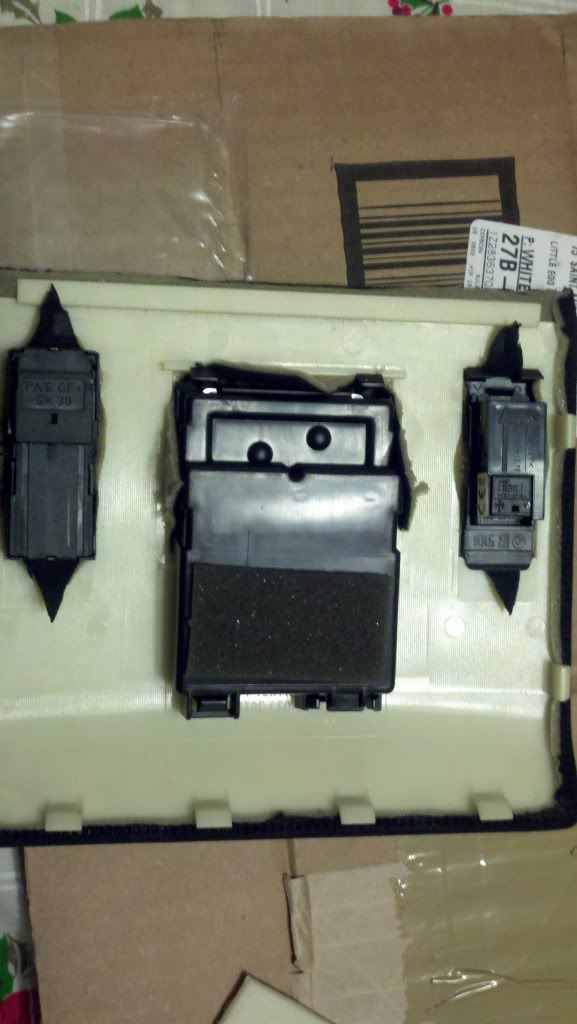
Now you're ready to button her up. Plug the newly retrieved connector into the Homelink unit. Make sure you push until you here it click.
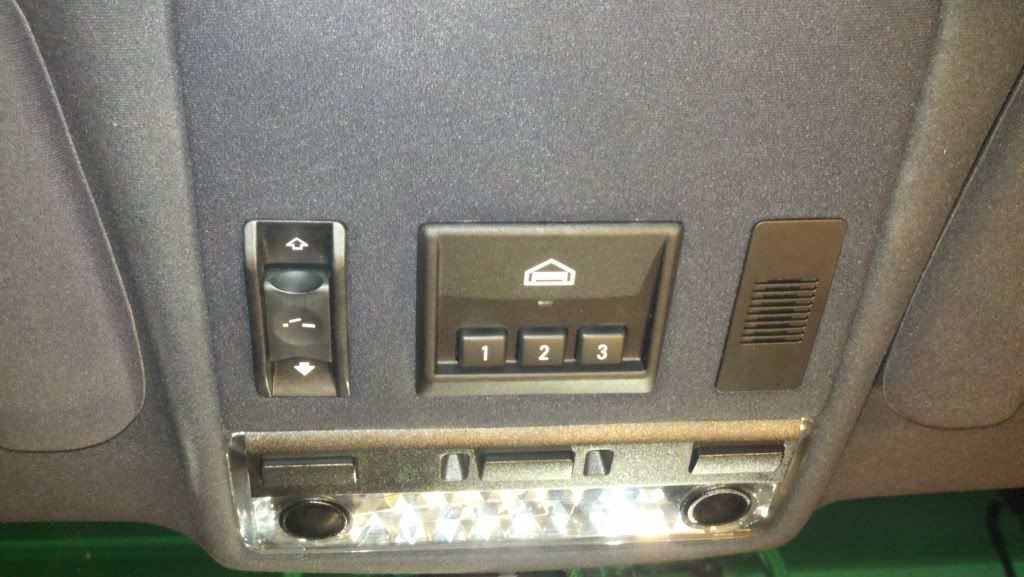
Now plug the sunroof connector and mic connector back in and she should look like this.
Finish up by replacing the trim panel and you're good to go.
PROGRAMMING
RESET PROGRAMMING MODE:
You do not need to reset but you might wish to erase all buttons when you obtain the car or sell the car.
To reset all three Homelink buttons at once:
1. Set the ignition with your key to the ACC2 position (no need to start the engine).
2. Simultaneously press and hold the two outside buttons (#1 and #3) of your Homelink control unit
3. Keep holding both outside buttons until the Homelink LED flashes rapidly (this will take about 20 seconds).
That's it; the old settings are now wiped out for all three buttons.
Note: Do not repeat this step unless you wish to wipe out all existing settings!).
RE-PROGRAM PROGRAMMING MODE:
0. You can program the Homelink after a reset or you must put the Homelink into "programming mode".
1. To put the Homelink buttons into programming mode, press the desired button that you would like to reprogram and keep it pressed until the LED starts to flash slowly.
2. Let the LED flash slowly for about 20 seconds.
3. Only then (after the LED flashes slowly for about 20 seconds) should you release the button.
The Homelink system is now in programming mode.
Note: You will have five minutes to carry out the re-programming.
PROGRAMMING FOR STANDARD CODES:
This first procedure assumes a fixed code GDO (not rolling codes - instructions for which will come later).
0. Position your hand-held remote transmitter 1 to 3 inches away from the HomeLink surface (located on your overhead sunroof panel), keeping the HomeLink indicator light in view (the closer the better in most cases).
1. Using both hands, simultaneously press and hold both the desired HomeLink button (e.g., button #1) and the hand held remote's transmitter button.
2. DO NOT release both buttons until the HomeLink indicator light flashes slowly and then rapidly.
3. When the Homelink indicator light flashes rapidly, both buttons may be released.
That's it (if you have a simple GDO); the rapid flashing indicates successful training of Homelink.
Note: Apparently "Canadian Instructions" are slightly different; go figure.
HOW TO TELL IF YOU HAVE ROLLING CODES: (i.e., encrypted codes)
1. Press and hold the now-trained HomeLink button and observe the indicator light.
a) If the Homelink indicator light is solid and continuous, training is complete and your garage door should activate when the HomeLink button is momentarily pressed and released.
b) If the indicator light blinks rapidly for 2 seconds and then turns to a solid and continuous light, proceed with the following training instructions for a rolling code device.
Note: A second person may make the following steps quicker and easier. Please use a ladder or other device. The Homelink people warn "Do not stand on your vehicle to perform the next steps".
PROGRAMMING FOR ROLLING CODES:
0. Apparently, you have to do the non-rolling code stuff above first; then, if you find you have rolling codes (based on the indicator light action described in 1b avove), then proceed as described below ...
1. At the garage door opener receiver (aka, at the motorhead unit) in the garage, locate the "learn" or "smart" button (usually near where the hanging antenna wire is attached to the unit). If there is difficulty locating the training button, reference the garage door opener's manual or contact Homelink at +1-800-355-3515.
2. Press and release the "learn" or "smart" button (the name and color of the button may vary by manufacturer but a black button with a red LED is common).
NOTE: Once the button is pressed, you generally have about 30 seconds in which to initiate the next step.
3. Return to the BMW and firmly press and hold the previously trained HomeLink button for three seconds & then release.
4. Do step 3 again (they actually told me to do this when I called for help).
5. Do step 3 yet another time (just to be sure).
6. HomeLink should now activate your garage door with rolling codes.
Note: You can re-program any button at any time. If this procedure fails, you can call Homelink at 1-800-355-3515 for help.


 Reply With Quote


![http://s900.photobucket.com/user/othibau/media/Junesig.jpg.html][IMG]http://i900.photobucket.com/albums/ac208/othibau/Junesig.jpg](image.php?s=98da0187f0e88f954336e9fa4b3e7a80&u=605&type=sigpic&dateline=1367713585)


