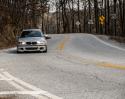
Below is a little writeup on what I did to fix my saggy front bumper on my 330i.
Things I used:
1 Permatex PermaPoxy - 5 Minute Plastic Weld Epoxy
~20 BMW Plastic Spread Rivets 51118174185
A C Clamp
A flat head screwdriver
wire cutters
~1hr of work
~4hrs to let the plastic weld do its job
**My front bumper didn't have foglights and fender liners so you might additional equipment/parts if you have this.
First some background story. You can skip this and just go down to the pics.
When I got my ZHP the first thing I noticed was that it had a loose front bumper.
At the lot, I couldn't tell what the issue was, I noticed that the bumper brackets didn't seem to be in place so I assumed the brackets needed to be reseated.
I went ahead and purchase the car and decided to deal with the bumper later.
When I took the bumper off, I noticed that both bumper brackets were cracked.
I looked for the bracket panels online but didn't find them even though they both have their own OEM Part #.
At first I thought I had to either get a new bumper or find a used one.
I found a craigslist ad for bumper repairs, I send them pics of my broken brackets but was told that they couldn't fix it.
One day, I was in autozone and saw something called Plastic Weld and decided to give that a try.
There's probably different and better ways of doing this, but below is a description of what I did.
First, I took off all the front black moldings.
I removed all the black rivets and two small bolts from the bumper.
I'm missing the foglights and the fender liners so I didn't have to worry about those.
I removed both trim pieces below the headlights and pulled the bumper out.
This is my right bracket panel.
Only the top part of the bracket was cracked, the bottom part was fine.
I forgot to take a picture of the Plastic Weld I use but here's a pic I found online.
Squeeze, mix and apply.
I applied the plastic weld between the crack and used a C clamp to hold the piece in place.
I did a light coat first, above and below the crack.
Once it hardened; ~5mins, I removed the C clamp. I got a little happy and applied a generous amount on the top and smeared some in the bottom but made sure I didn't leave any plastic weld bumps so I wouldn't have a problem putting the bumper back.
This is my left side bumper bracket panel.
The top part was cracked, same as the right side but this one had a broken piece at the bottom.
The good thing was that the broken piece was still in the car, somebody had screwed into the plastic piece were the bumper bracket rests.
I plastic welded the broken piece first. Same as before, first with a light coat between the crack, top and bottom.
Once the broken piece was welded, I repeated the same procedure I did earlier on the right bracket to weld the crack on top of the left bracket.
I put a light coat of plastic weld between the crack, top and bottom.
I used a C clamp to hold the cracked piece in place for about ~8mins.
Once it hardened, I took the the C clamp off and put a generous amount of plastic weld.
I left the bumper sit for about 4 hours.
After about 4hrs, I checked the plastic weld and it was really hard so I went ahead and put the bumper back into the car. No more saggy bumper for me.
It's been about a month since I did this and the plastic weld is still holding strong.
I hope this writeup helps or at least give you some ideas to do it better.


 Reply With Quote