Since this is a common failure item for our cars, I figured I'd throw a DIY in here.
For starters, this is what a bad CAB looks like:
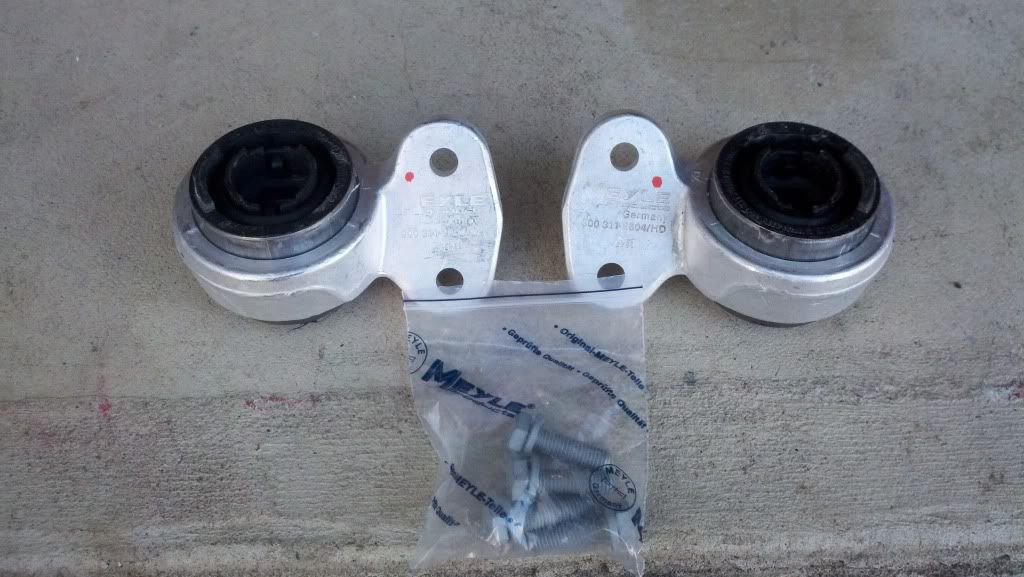
Make sure that you have new bolts for your new CABs. If you don't, I've been told by independent mechs that it is acceptable to reuse the old bolts with some blue locktite.
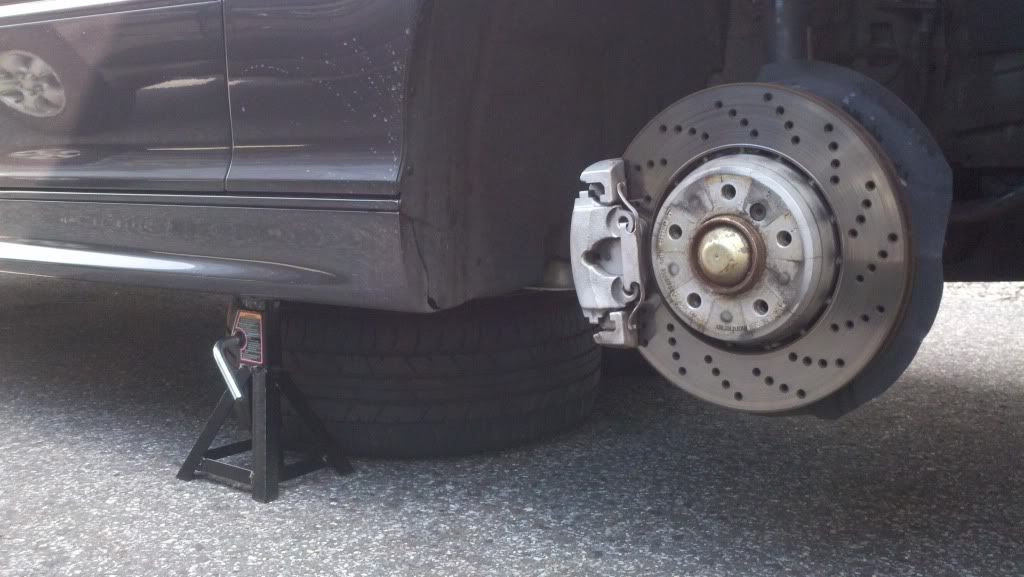
1. Get the car up on jack stands and remove the front tires. I like to put the tires under the car as an extra safety measure so I feel a little better while crawling around under the car.
2. Remove the splash shield. Now's a good time to Simple Green or otherwise clean up the splash shield so you can easily spot any leaks in the future. Mine had some oil on it from either my former leaking VCG or the Vanos job.
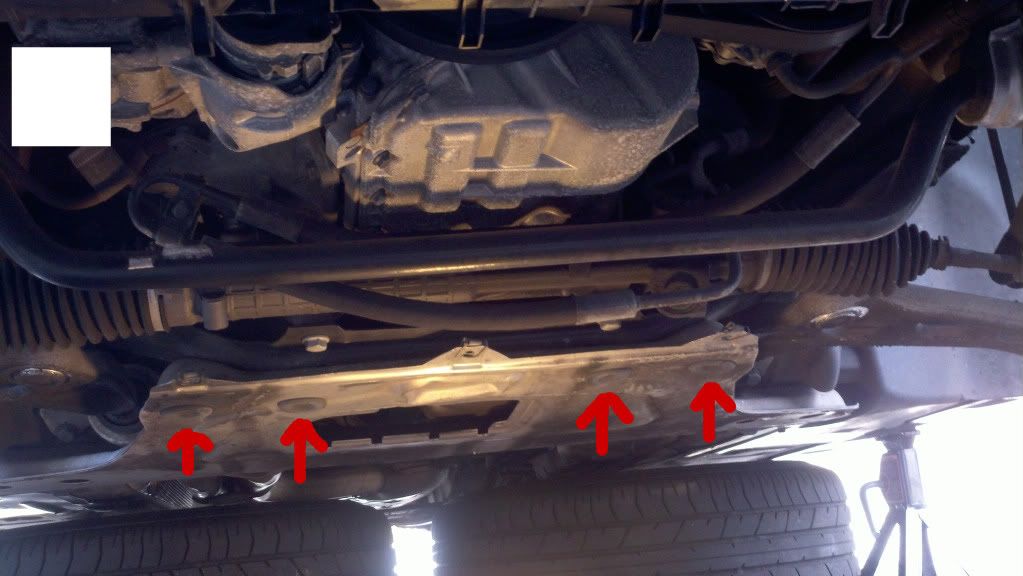
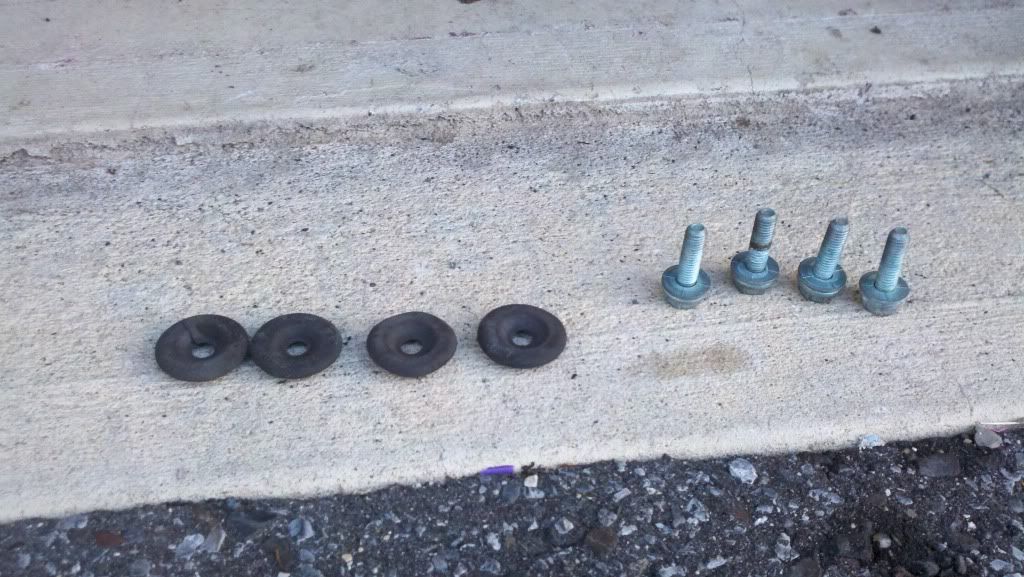
3. Now we're moving on to the aluminum sub frame brace. Start by removing the 4 rubber plugs that cover the access holes for the bolts (pictured below) Note: my 325 did not have these-- was surprised to see them when I got under the ZHP
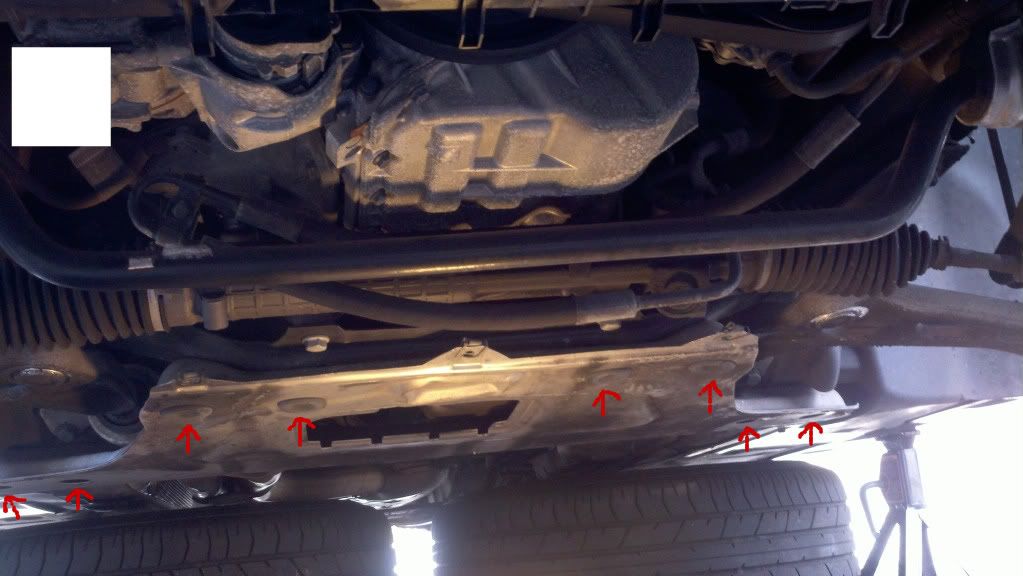
4. Now Remove the aluminum sub frame brace by removing the 8 bolts shown below (picture still shows rubber plugs which you should have just removed).
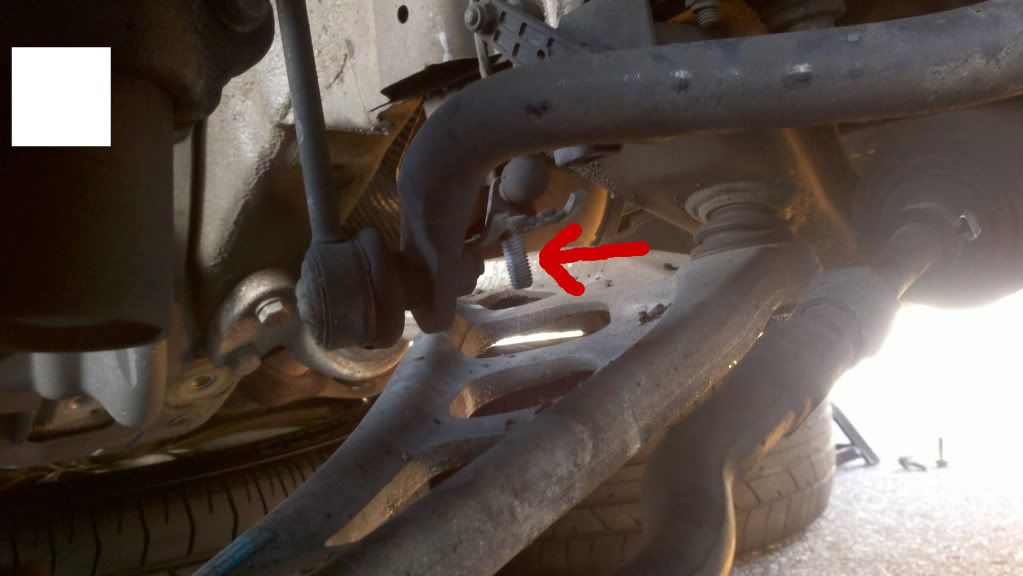
5. If you have auto-leveling headlights, remove the nut that secures the auto-leveling sensor to the passenger side control arm and pull the leveler straight up and clear of the control arm (pic below). If you don't do this and push down too hard on the control arm during the removal of the CABs, you risk breaking the sensor.
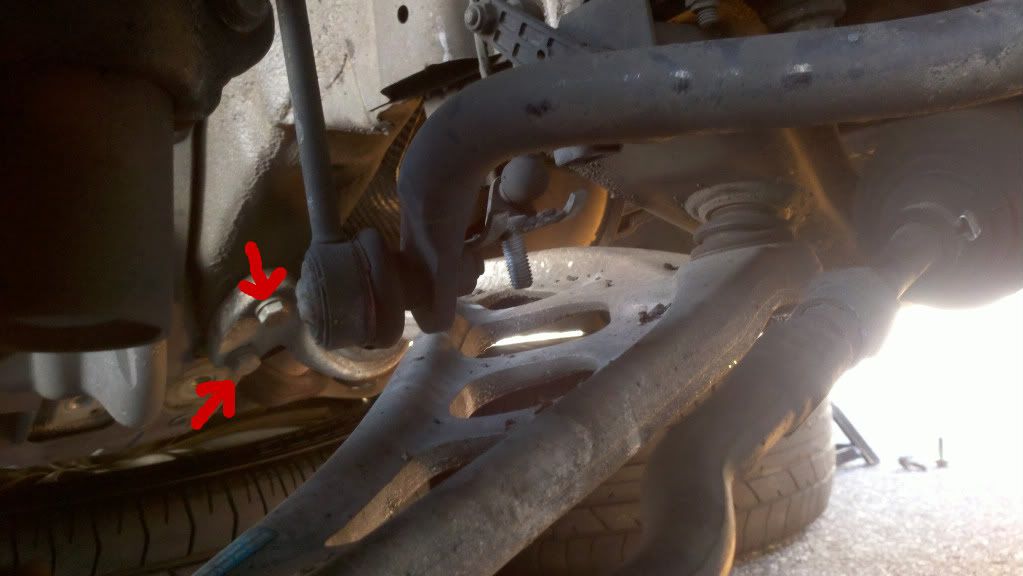
6. Remove the 2 bolts that secure the passenger side control arm bushing (pic below).
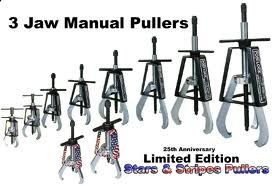
7. Get your three-jaw puller and remove the old bushing. In my case, the puller removed the carrier but left the inner portion of the bushing on the control arm. I had to keep at it for a little while with the puller to get the inner portion off. Just be patient and it will come.
8. Repeat steps 6/7 for the drivers side.
9. Use some cheap dish soap to lubricate the inside of the new passenger side bushing and press the new bushing onto the control arm. This takes a fair amount of force. You can use a dead blow hammer. I didn't have a dead blow so I used a block of wood and a 4 lb sledge.
10. Lift the control arm so the holes of the carrier line up to the mounting holes on the car. It may be necessary to twist the bushing on the control arm a little to get it to line up properly.
11. Secure with your new bolts (or old bolts with blue locktite). Torque to 44 ft lbs.
12. Repeat steps 10/11 for drivers side.
13. Lower the auto-leveling sensor back into the hole in the passenger side control arm and secure with the nut.
14. Replace the aluminum sub frame brace using the 8 bolts. Do not tighten the bolts when you start replacing them. You may need some play to get all of the holes lined up properly. Once you have all 8 bolts properly seated, torque the bolts to 43 ft lbs and then 90degrees plus 30 degrees with a torque angle gauge. I do not have an angle gauge so I went 43 ft lbs plus Uncle Keith's eyeball 30 degrees...
15. Replace the splash shield.
16. Remount your tires.
17. Lower your ride and torque your lug bolts to 88 ft lbs. Make sure you get the front tires back on the ground to load the suspension before the soap dries up. You should have plenty of time to do this, so don't rush and dump your car off of the jack stands-- just don't leave her up in the air for another couple of hours.
18. Have a beer, cigar, yoo hoo, or whatever else you use to celebrate a job well done.
Short cut Method: Courtesy of Lespaulman, here is a short cut and much faster way to get the LCABS off:
Originally Posted by Lespaulman16

Sent from my kick-A Galaxy S3


 Reply With Quote