Fixed my possessed side mirrors. I had to pull the fuse on my road trip home after I bought the car because they would move on their own while I was driving, which was so bizarre and really dangerous. They also didn't respond to the mirror switch, making things wonderfully infuriating. Some research and reading indicated that a lot of E46 owners have this issue and no one came up with a definitive solution. Some say the ribbon cables, some say the driver's mirror motor, some say the passenger mirror motor, some say the switch, no one really seemed to know.
Well for one thing, the ribbon cable is all one with the motor, so you have to replace them together. In my case, I can confidently say it was the driver's mirror motor, as my ribbon cable looked perfect and swapping them proved to be a success. Of course, take the donor mirror and plug it into the car first to make sure it fixes your problem. As soon as I did, the mirror switch immediately worked and controlled both mirrors. Once you pull the good motor and ribbon out, do the same test just to be sure everything still works and nothing got damaged.
Here are some pics...I grabbed a driver's mirror from a '04 Mystic blue E46 in the junkyard. I couldn't just swap the whole mirror mainly because the base was matte black and not the gloss black of the ZHP. Plus it was more beat up than mine anyway.
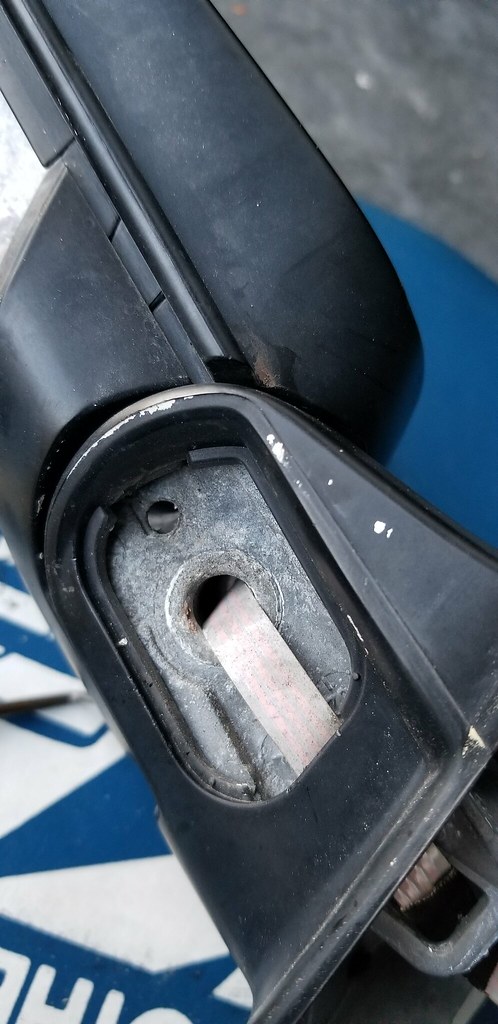
Remove the glass to expose the motor assembly. I've already removed the 3 screws that hold the motor to the housing.
 20190401_191505 by racer2086, on Flickr
Remove the mirror cover and foam to expose the ribbon cable where it wraps around the housing and dives into the base.
 20190401_191519 by racer2086, on Flickr
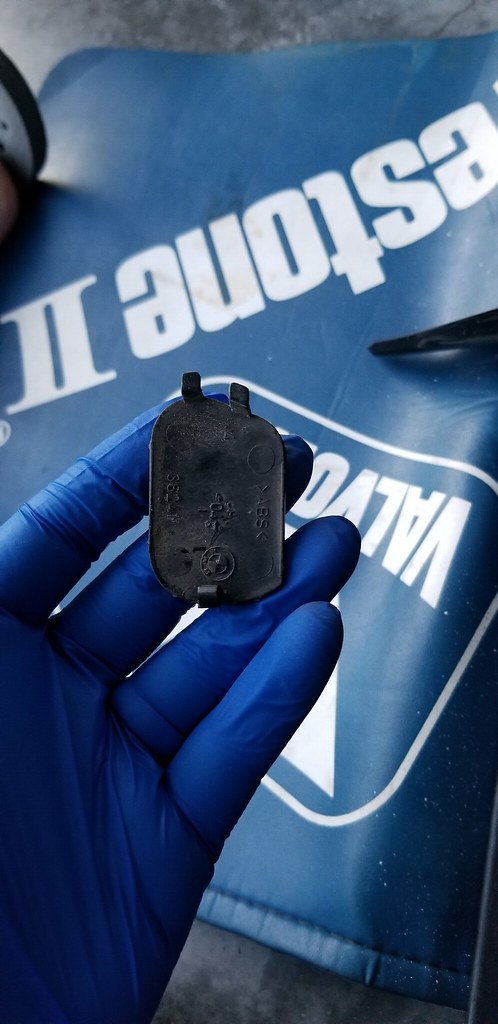
Remove the cover on the under side of the mirror so you can get better access to were the ribbon cable comes through. Pry from the middle of the cover...the edge closest to the outside of the mirror has a tab that will pull out. The opposite side toward the base has two long tabs on it that will not pry out.
 20190401_191948 by racer2086, on Flickr
 20190401_193949 by racer2086, on Flickr
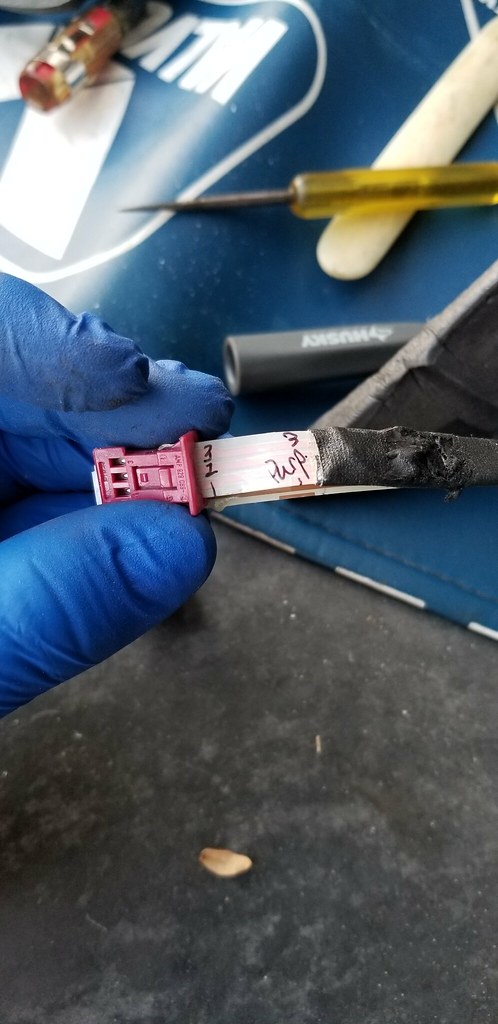
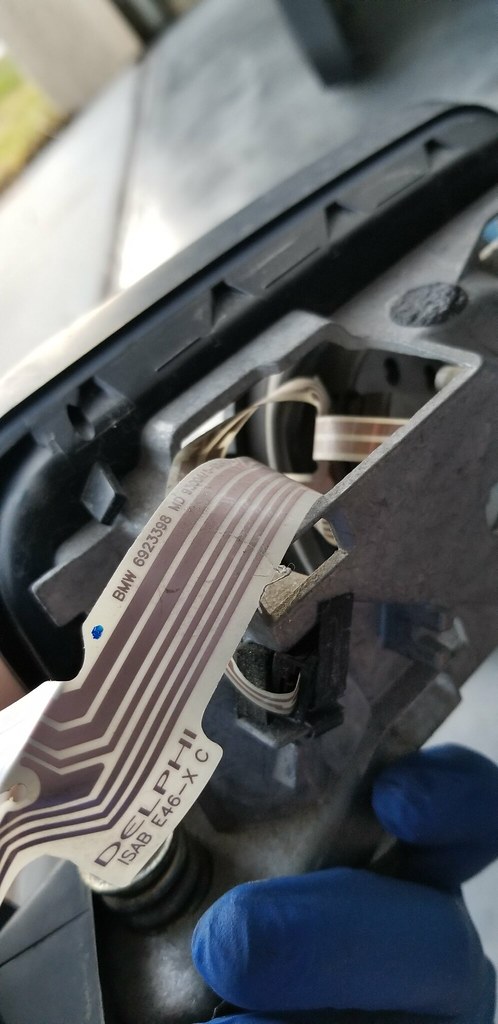
Mark the ribbon cable for each connector. You will be removing the plastic connectors from the ribbon cable so you can slide the ribbon out of the housing. If you look close on the connectors, you will see where it is marked for pin 1 and 3.
 20190401_191723 by racer2086, on Flickr
 20190401_191719 by racer2086, on Flickr
 20190401_191911 by racer2086, on Flickr
Remove the foam on the base to make it easier to get the ribbon cable out.
 20190401_191941 by racer2086, on Flickr
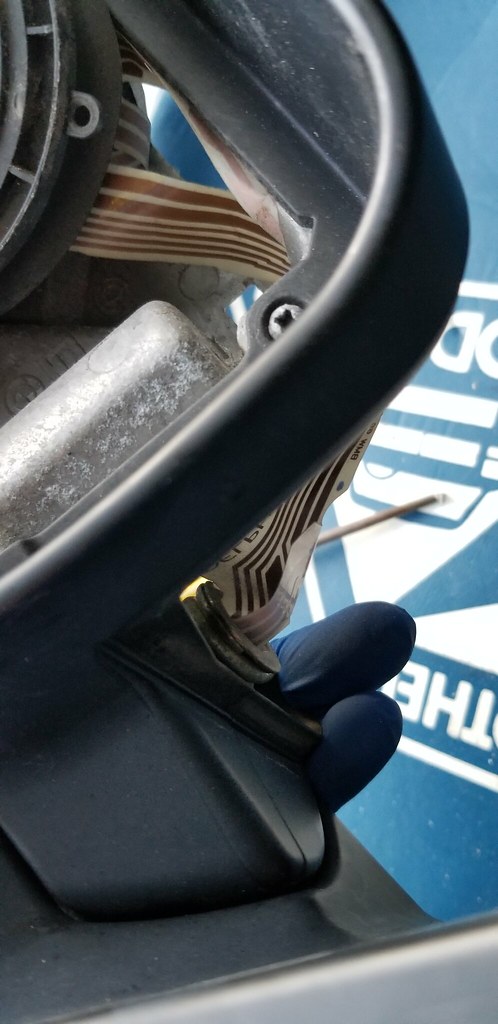
Watch how the ribbon cable is routed so you can put it back the same way. If you notice, the ribbon is wrapped at places with black tape. You will have to play this by ear, since some will slide through, but others you may have to unwrap to pull through the base and the rewrap after. The wrap is where the cable is folded and taped for protection.
 20190401_191944 by racer2086, on Flickr
 20190401_191952 by racer2086, on Flickr
 20190401_192916 by racer2086, on Flickr
 20190401_192039 by racer2086, on Flickr
Then it is just the reverse to slip that good motor/ribbon into your good housing. Then, enjoy your newly working mirrors 
After that, I decided to wash her for the first time (yikes, I know). Threw a quick layer of wax on for protection. I was trying to hold out until I had enough time to clay, compound, polish, seal, and wax. I was surprised the paint wasn't as bad as I thought. The trunk lid has a bunch of scratches on it. Will be hard to get those completely out. But overall not bad. Cleaned up nice and looks so good with the wheels cleaned. Sorry for the night time shots...doesn't do the paint or the color justice. I LOVE this blue. Was thinking Orient, but I wouldn't have been happy with how dark it is. This still looks blue in darker lighting.
 20190402_200841 by racer2086, on Flickr
 20190402_200835 by racer2086, on Flickr
'04 330i ZHP sedan | Mystic blue | Alcantara | 6MT | 111k
'98 740il | Schwartz 2 | Sandbeige | 5AT | 238k | lowered on Bilsteins w/ B&G springs
'00 540i sport | Titanium silver | Black | 5AT | 120k
'85 Mustang GT convertible | Medium charcoal metallic | Gray | 5MT | 215k | one owner, all original


 Reply With Quote