No way, kudos to the shop that did the work. The attention to detail and quality of work was fantastic!Originally Posted by Oli77

Sent from my Pixel 5 using Tapatalk


 Capo
Capo
No way, kudos to the shop that did the work. The attention to detail and quality of work was fantastic!
Sent from my Pixel 5 using Tapatalk
BP
2005 330i ZHP / 6MT
Imolarot / Naturbraun
2003 330iT / 6MT
Orientblau / Naturbraun
It's not the car you drive, it's how you drive it.

 Consigliere
In regards to the driveshaft issue alot of people have used this place to have them rebuilt.
http://www.driveshaftspecialist.com/...0html/BMW.html
Sent from my Pixel 4 XL using Tapatalk
His - 2004 Imola Red / Alcantara 330i | 6MT | ZHP |
Her's - 2005 Black Sapphire Metallic / Black Leather 330i | 6MT | ZHP |
Capo
Thanks for posting that; the stress levels have reduced. Their pricing is a LOT better than I expected. Worldpac was showing remanufactured driveshafts at about $799-900, and I was told those are garbage anyway. I will give the Driveshaft Specialist a try when I recuperate financially!
Sent from my Pixel 5 using Tapatalk
BP
2005 330i ZHP / 6MT
Imolarot / Naturbraun
2003 330iT / 6MT
Orientblau / Naturbraun
It's not the car you drive, it's how you drive it.
 Enforcer
This is super awesome! It's great that everyone's tourings on the forum are getting insane amounts of love!
I have a Driveshaft Specialist rebuilt M3 driveshaft in my touring, can recommend them 100%. Super easy to order, arrived very quickly, and they give you everything you need to ship your driveshaft back easily.
I've had no vibrations whatsoever, will probably buy from them again for other projects.
Capo
This was my other concern. I'm not good at shipping things; I usually just pay someone else to pack and ship, and that is $$$. I'm glad they provide what is needed to just pack it and ship it. Perhaps sometime in May I'll order one. Thanks for the info!
BP
2005 330i ZHP / 6MT
Imolarot / Naturbraun
2003 330iT / 6MT
Orientblau / Naturbraun
It's not the car you drive, it's how you drive it.
Capo
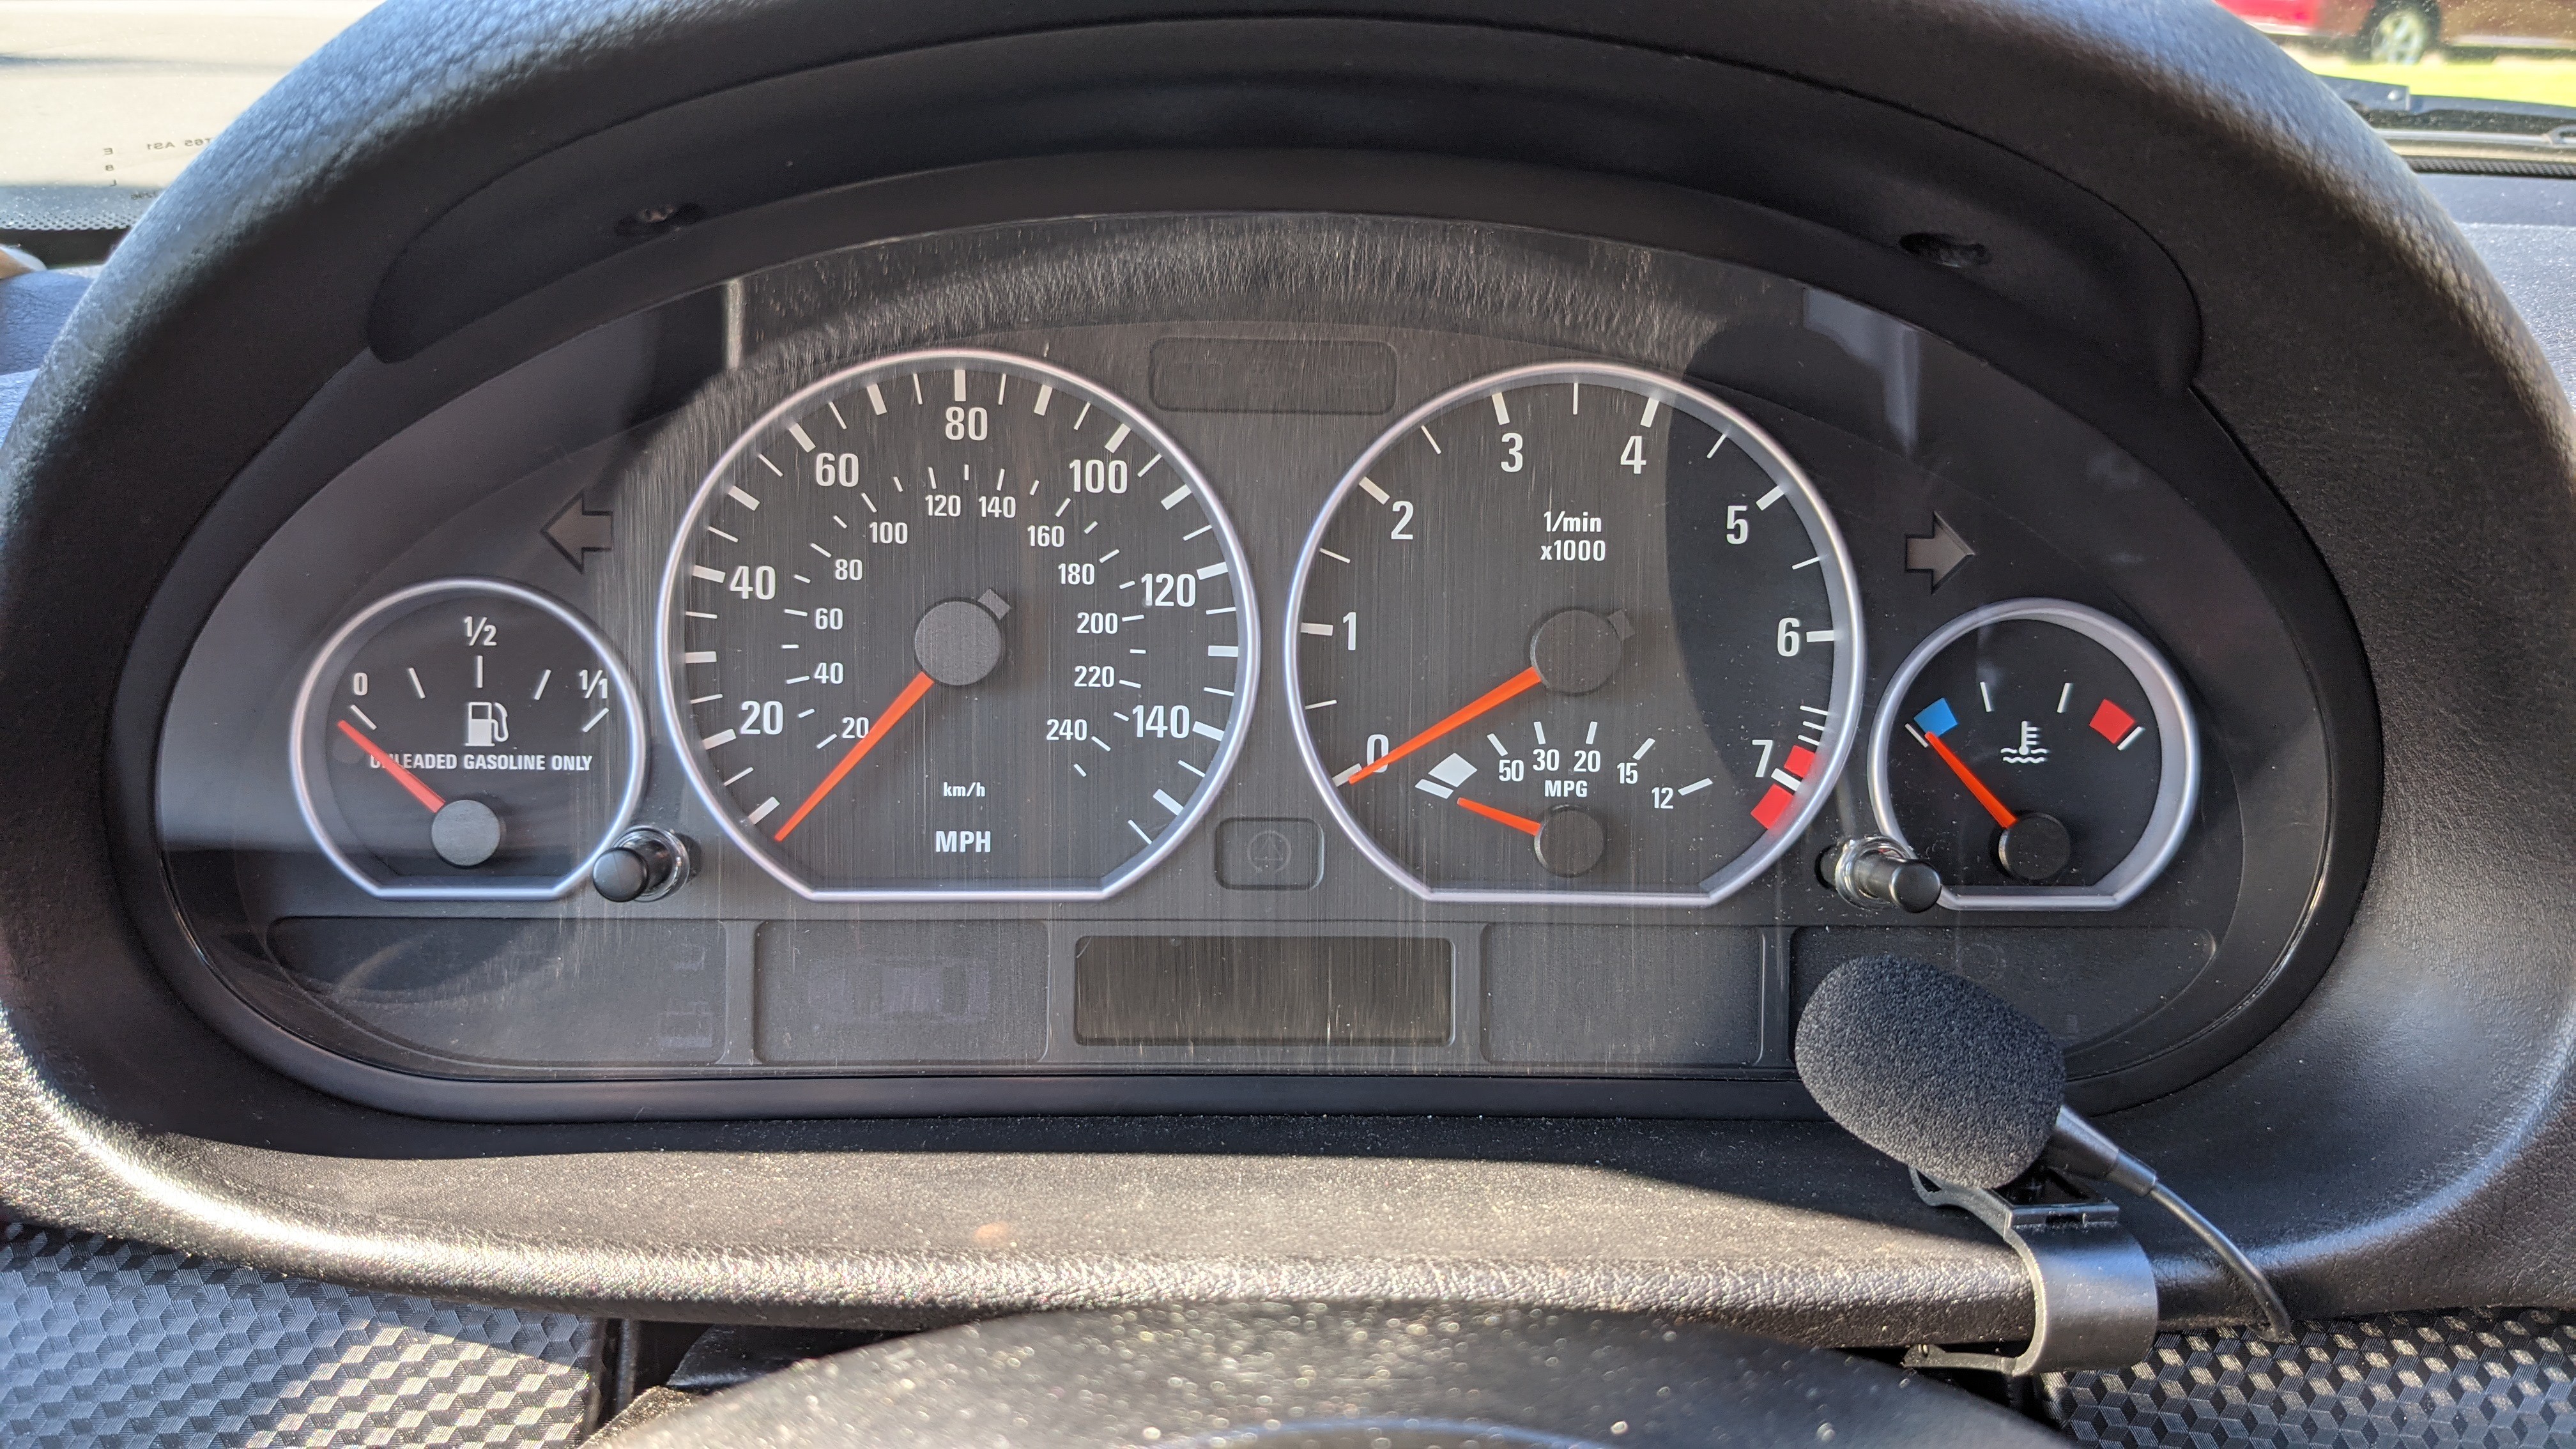
Found a used ZHP instrument cluster for dirt cheap online (about $90) so I scooped it up. I took the gauge face and the needles and transferred to my cluster, so now I have a true ZHP cluster!
I'll use the ZHP cluster I took the face and needles from and use that to learn how to virginize clusters. Hopefully this will be a helpful service to those on here who need to buy a used instrument cluster. I need to buy the programmer and go through the process, but should make for an interesting learning process.
BP
2005 330i ZHP / 6MT
Imolarot / Naturbraun
2003 330iT / 6MT
Orientblau / Naturbraun
It's not the car you drive, it's how you drive it.
 Messaggero
Nice Botond! That is a very good price for ZHP cluster. Now you just need cams to make it ZHP engine?
Did you kept 3.46 diff when you did a manual conversion?
Sent from my SM-G960U using Tapatalk
 Enforcer
Great mod! How hard was the needle swap? I hear they are tough to line up afterwards.
2004 BMW 330CI ZHP, Silver Grey Metallic, Dinan: Stage 2 Software, High Flow Intake,
Free Flow Exhaust, Front Strut Bar, Stage 2 Suspension System, Staggered Hartge Replica Wheels,
M3 Mirrors (Side and Interior), M3 Seats
Messaggero
I think it took me like 10 times to install needles and my fuel gauge is like hair line off. I gave up because I didn't want to cause any damage since gears are pretty fragile.
Sent from my SM-G960U using Tapatalk
Capo
This engine already has the cams; it came from another ZHP. We also did the full MS45.1 swap. The car it came from was actually built the month before my actual ZHP, and the VIN is only 81 numbers off!
Before taking any needles off, you need to take pictures of the exact position of each one from a head-on position, as it's not consistent from needle to needle. For example, the fuel gauge needle is supposed to be a little bit below the lowest line, where there's a sliver of empty space between the needle and the line, whereas the rest of the needles aren't like that at all. Taking the needles off the first time is the hardest part as they are fully pressed on.
When putting the needles back, I don't push them all the way on. Just pushing them on a little bit is enough to hold them, so I only push them only lightly in case I need to make adjustments or take them off again. Then, I take the cluster unit (without the housing) back to the car, plug in the right-side connector very lightly and let the needles fall into their resting positions, unplug it, and compare where the needles rest compared to where they should be. To put them in the correct position, I'll make micro adjustments on the needles by pushing on them in the direction they need to adjust. This needs to be done in very small increments sometimes as to not go over, otherwise you have to push them in the opposite direction and start over.
I've done this several times already so it's not too hard for me, but I can see why it would be daunting for someone who hasn't done it before. Getting the needles off without breaking them is the hardest part.
BP
2005 330i ZHP / 6MT
Imolarot / Naturbraun
2003 330iT / 6MT
Orientblau / Naturbraun
It's not the car you drive, it's how you drive it.
 Posting Permissions


 Reply With Quote