I'm gonna start this out by saying that I took a lot of pictures since I know some people will get stuck without them. This is probably an all day job as you might get distracted and start cleaning your car since you're gonna see parts of it you probably won't ever see again. There are other ways to fix the rattle (primarily the tennis ball technique) but that's not good enough for me. I want it done right the first time so there doesn't need to be a second time. If your rear shelf (as BMW apparently calls it, not a rear deck, parcel shelf, hat tray, etc.) has been sun-bleached a blue/purple color this is the time to fix that too since in order to do get that out it requires a lot of stuff to be removed, mainly the things that are rattling.
Oh, one last thing before I start. There might be a few steps that are coupe specific due to the way the rear windows open. It shouldn't be too different for a 4dr but I could be wrong (also some sedans don't have fold down rear seats).
With the exception of a few things, you're basically gonna make the back of your car look like this diagram:
Here is a list of what each part # on this diagram is called as I will be referring to them by that name:
No. Description
01 Rear Window Shelf
02 Grid
03 Hex head screw
04 Prestol Cage
05 Clip
06 Through-Loading Cross Member Trim
07 Cover, belt outlet
08 Head Rest Cover
09 Cover, loudspeaker top hi-fi Harman Kardon
10 Cover, child protection
11 Cover, loudspeaker left
12 Cover
For vehicles with Sun-blind, rear
13 Roller sun shield
14 Hex head screw
For vehicles with Sun-blind, rear
15 Drive Sun Blind
16 Covering left
17 Expanding Rivet
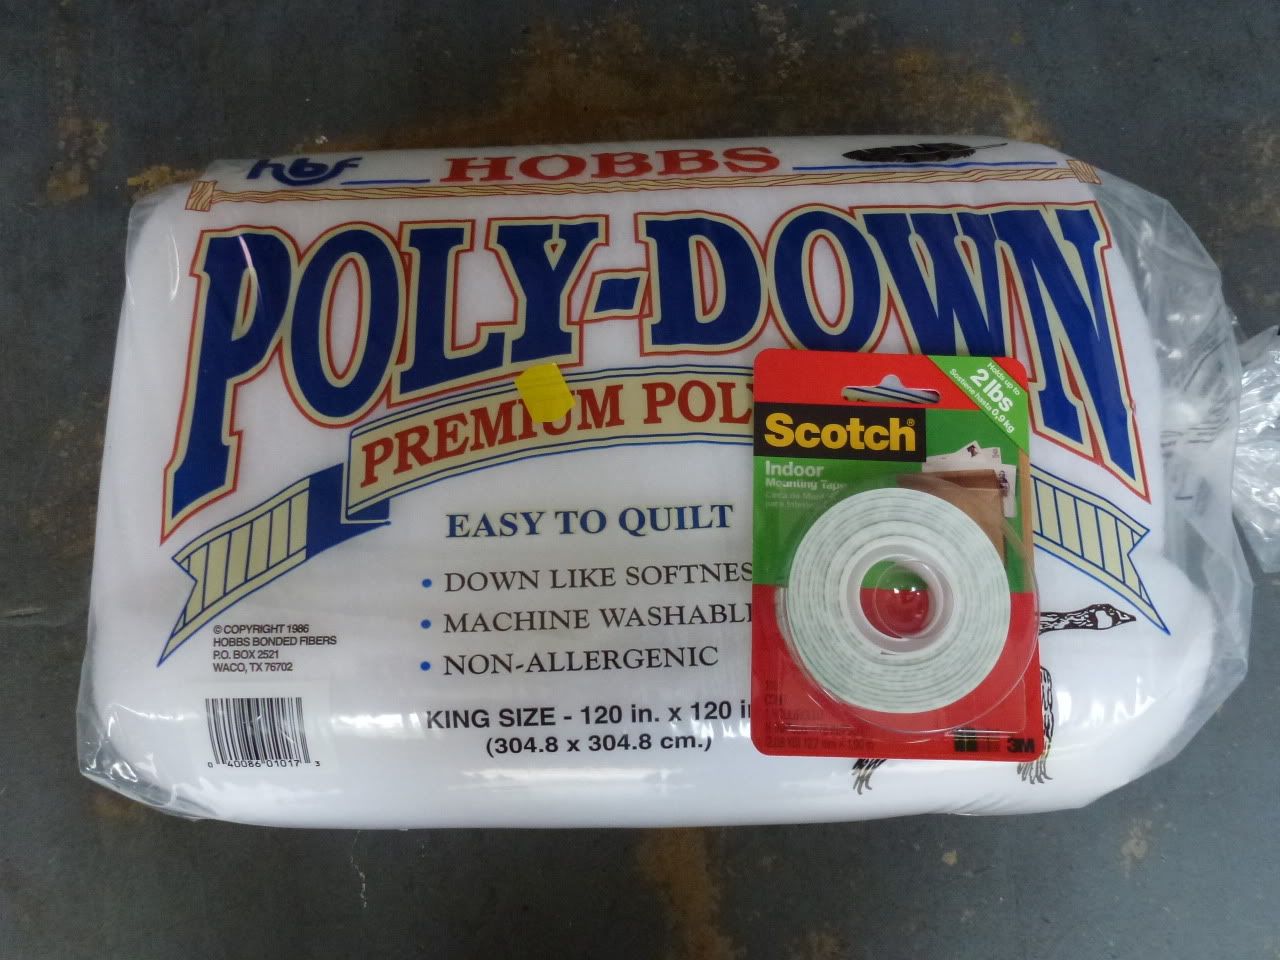
This is the list of tools/supplies you will need:
T-25 Torx driver for C-pillar
T-50 Torx driver for seat belt anchor
7mm socket for grid
8mm socket for speakers
13mm socket for tether points on the shelf
flathead screwdriver
Narrow punch (or screwdriver from eyeglass kit)
Duplicolor Vinyl & Fabric color HVP106 (flat black)
some sort of batting/insulation/cotton (I used polyester batting from a quilt shop)
double sided indoor mounting tape
First, here's some before shots so you kinda see the faded shelf. You can't really tell but the silver part of the speaker cover where it says Harmon Kardon is like a concrete color gray, not shiny at all.
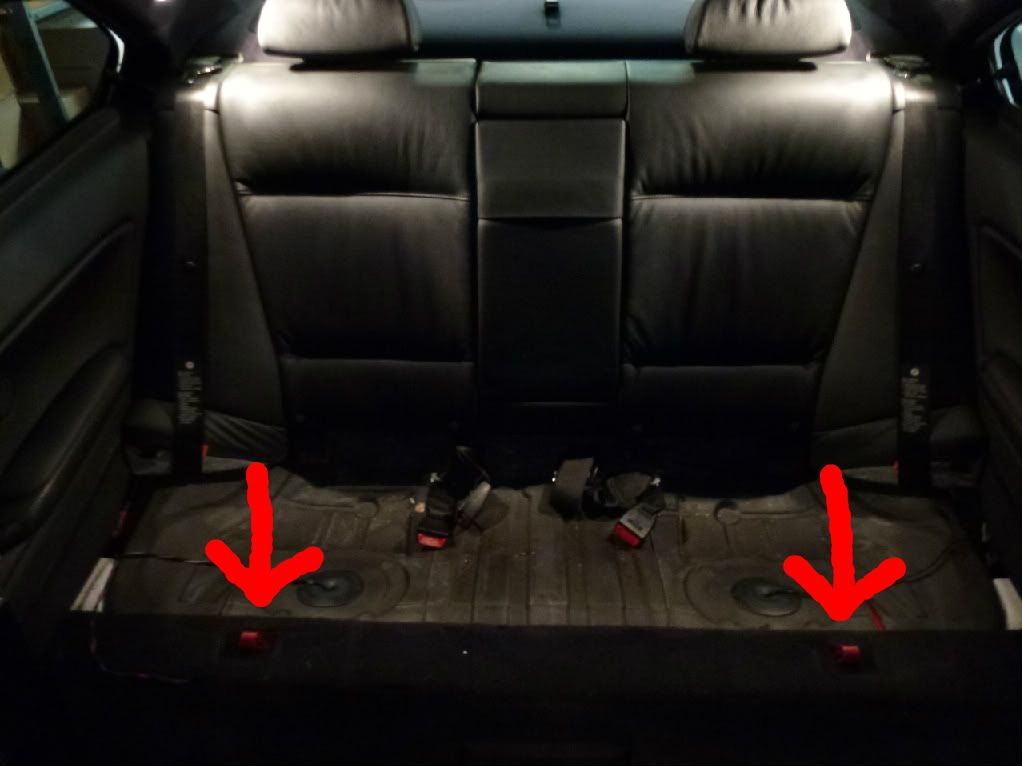
STEP 1: REMOVE BACK SEAT
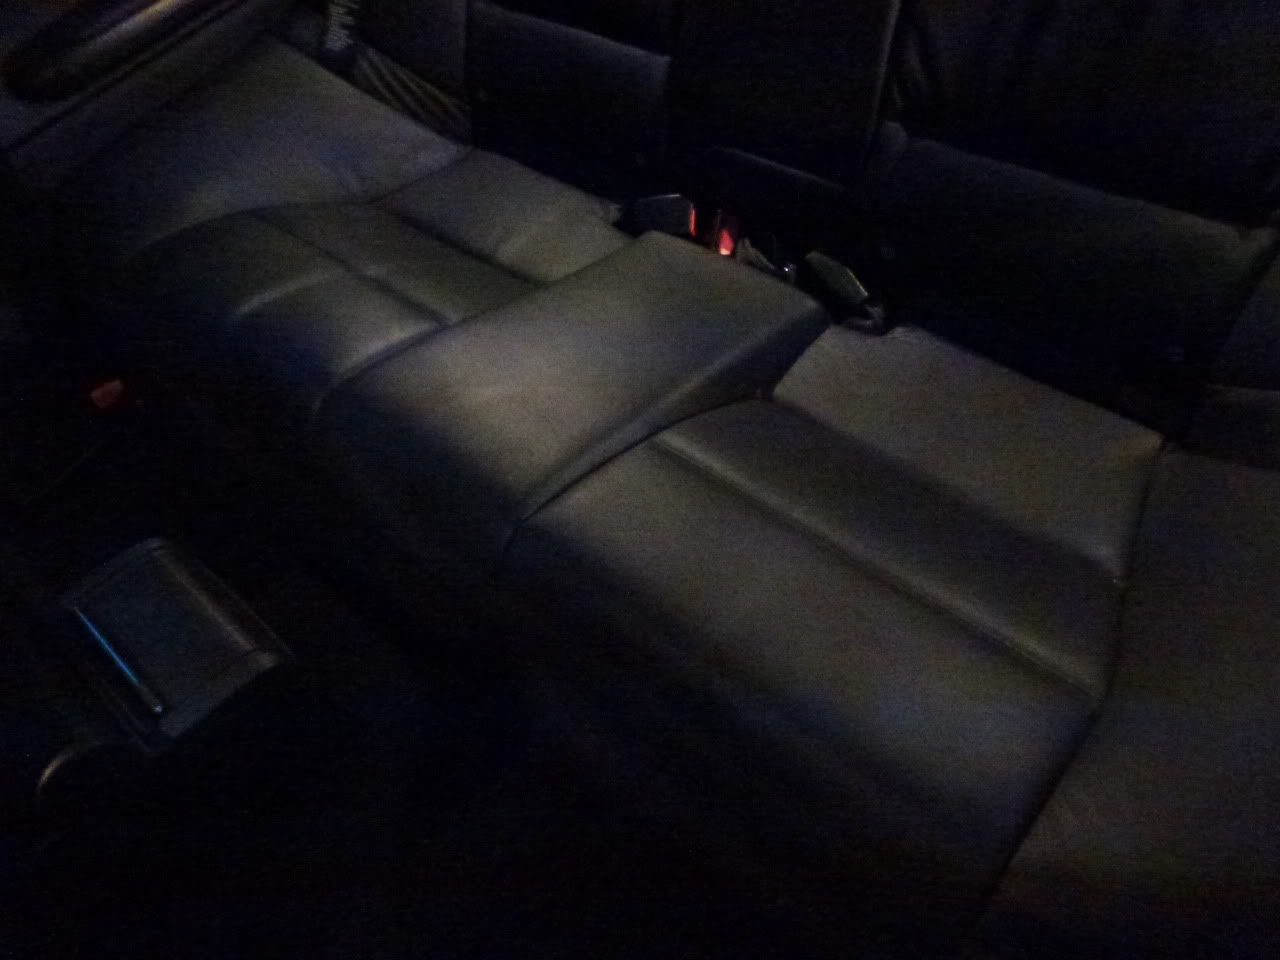
there are 2 points where its held in place, just use some muscle and yank it up
see the to red spots in the carpeting? That's where you grab
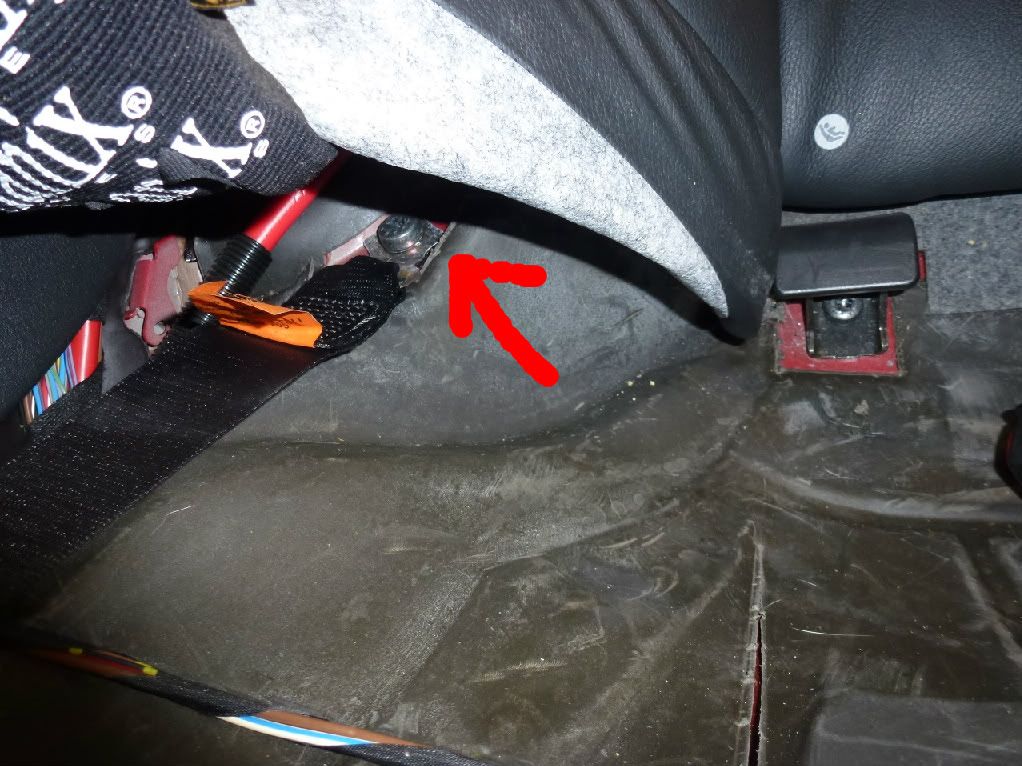
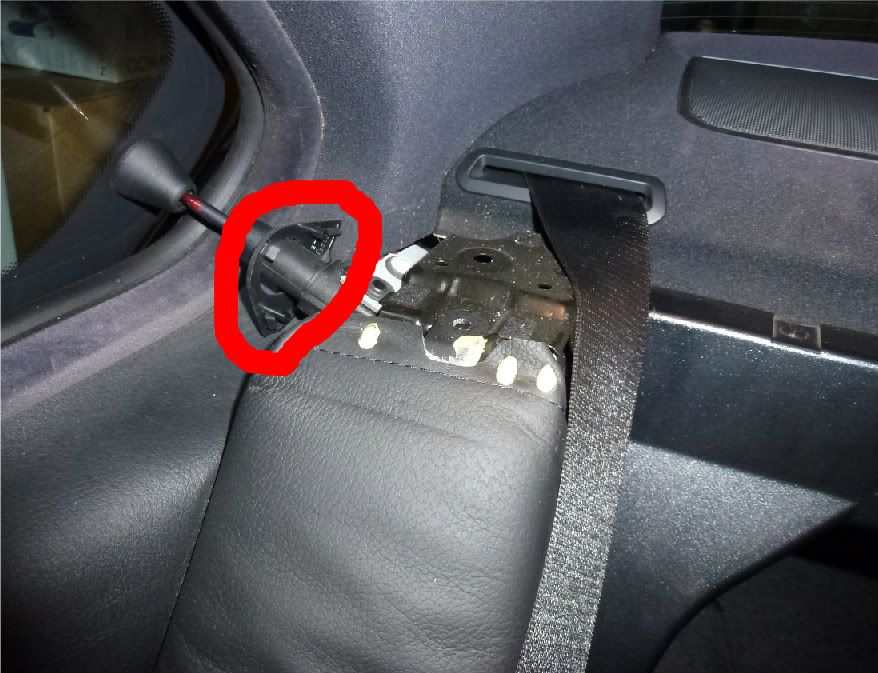
now you need to undo the seatbelts but the bolt that holds it in place is under the side bolsters
can you see it?
well since you're not gonna be able to get to it you need to remove whats in your way
STEP 2: REMOVE BOLSTERS
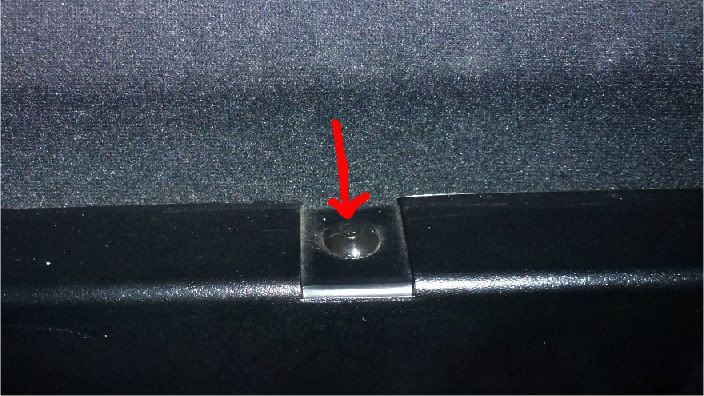
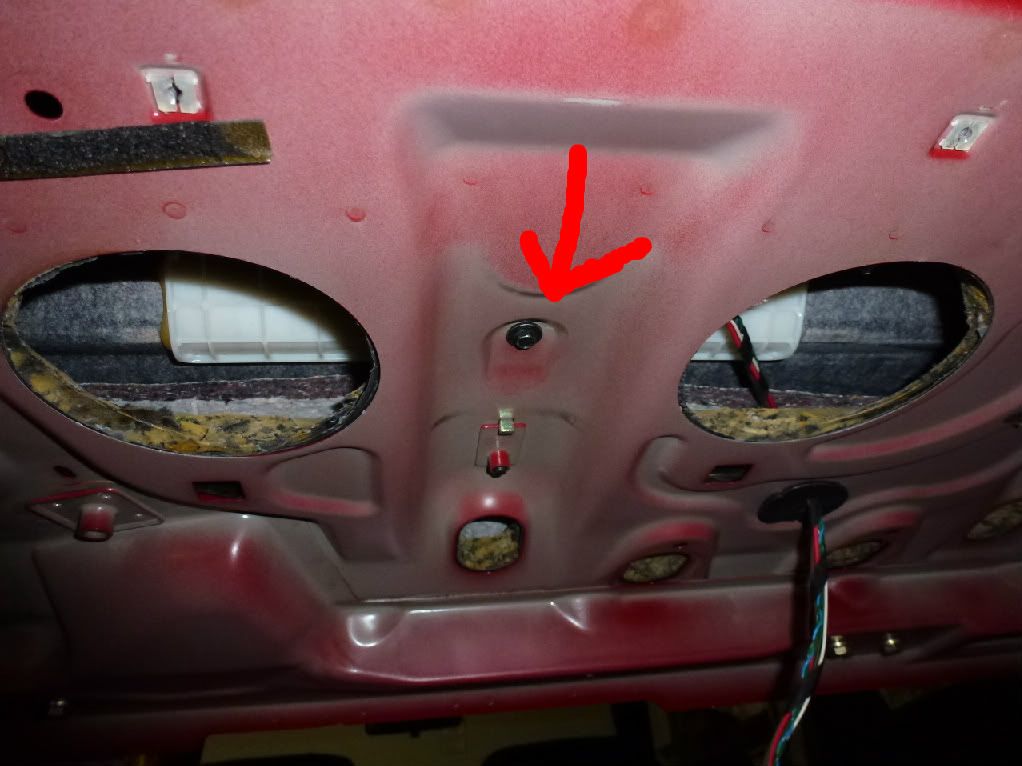
At the top under the seat belt is a clip that you need to remove first
using your narrow punch, push the center circle in just a little so it releases. you can then just pull the whole thing out. Should look like this:
You need to take off one last clip that's on the side where the pushrod for the window is, then it should just come out.
What it looks like when you take it off and the piece that I was talking about above:
Now you can take off the bolsters, just start at the bottom and work your way to the top, lift up and out to get the top off.
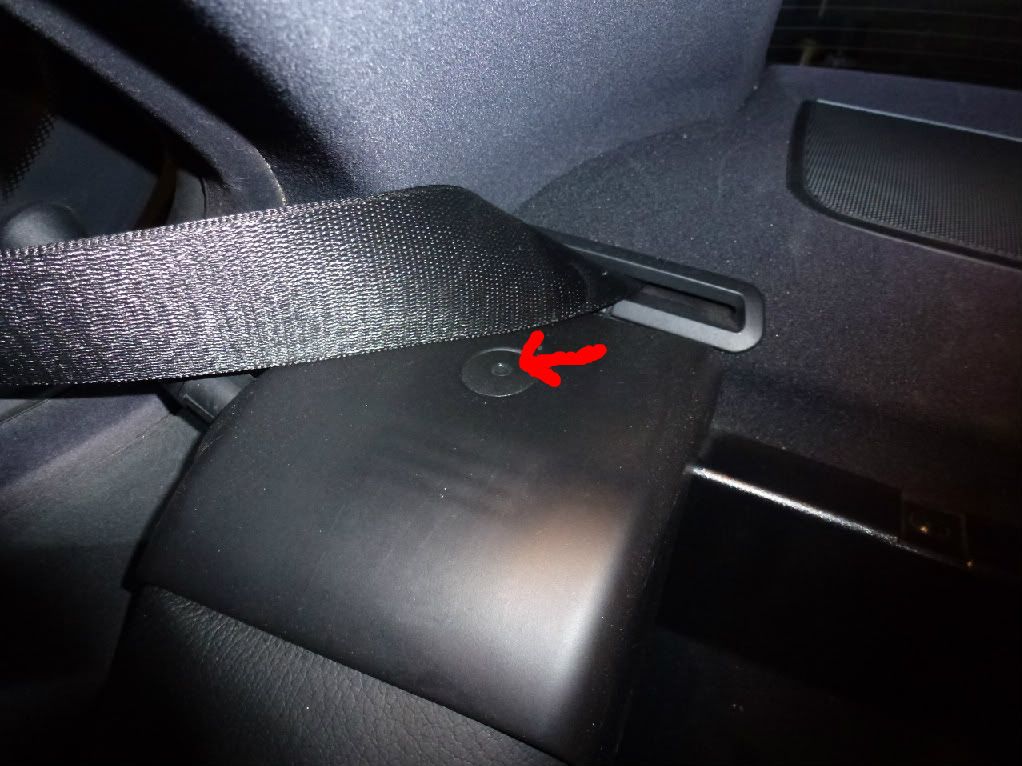
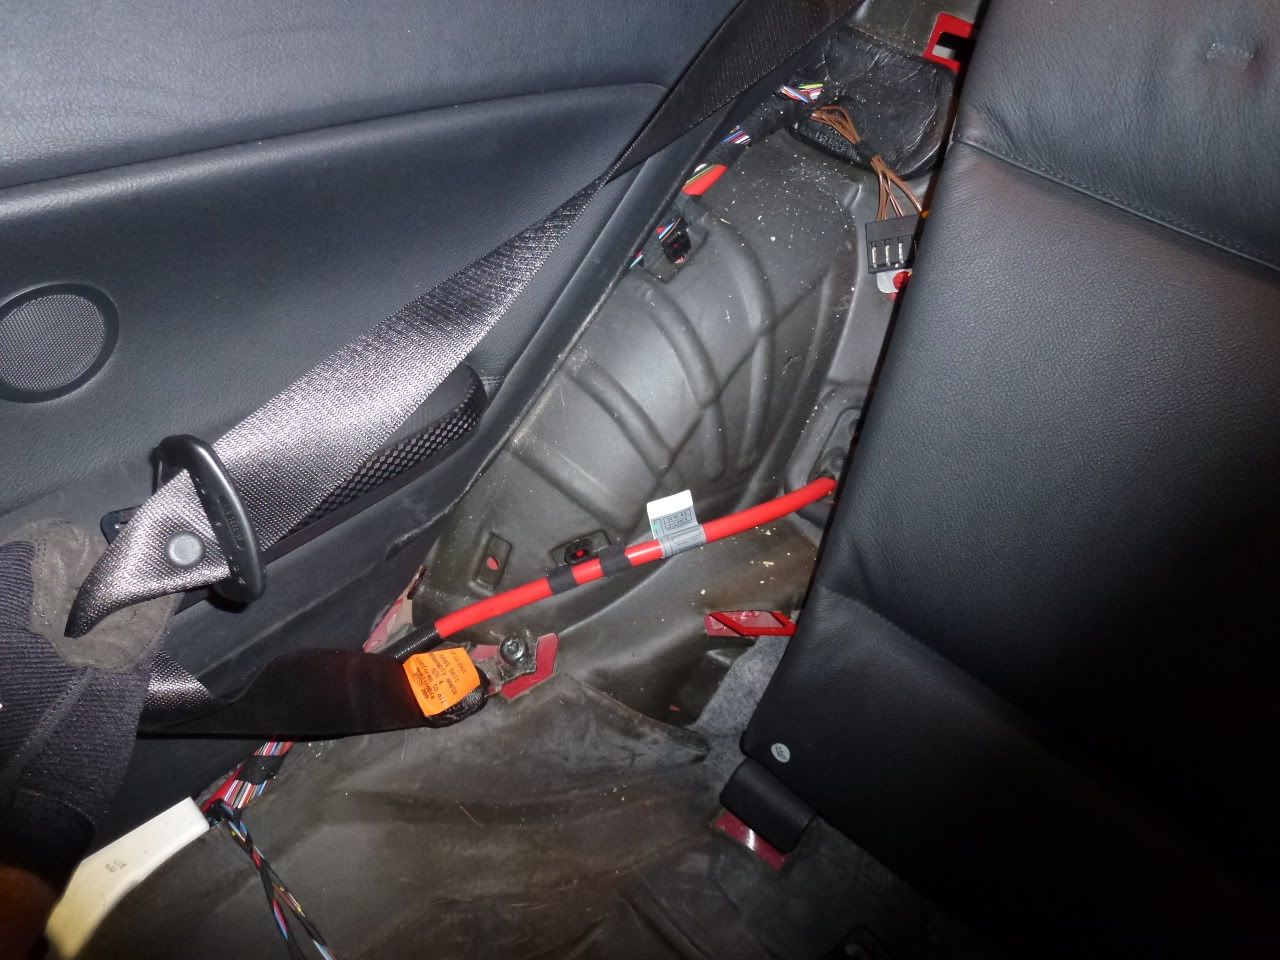
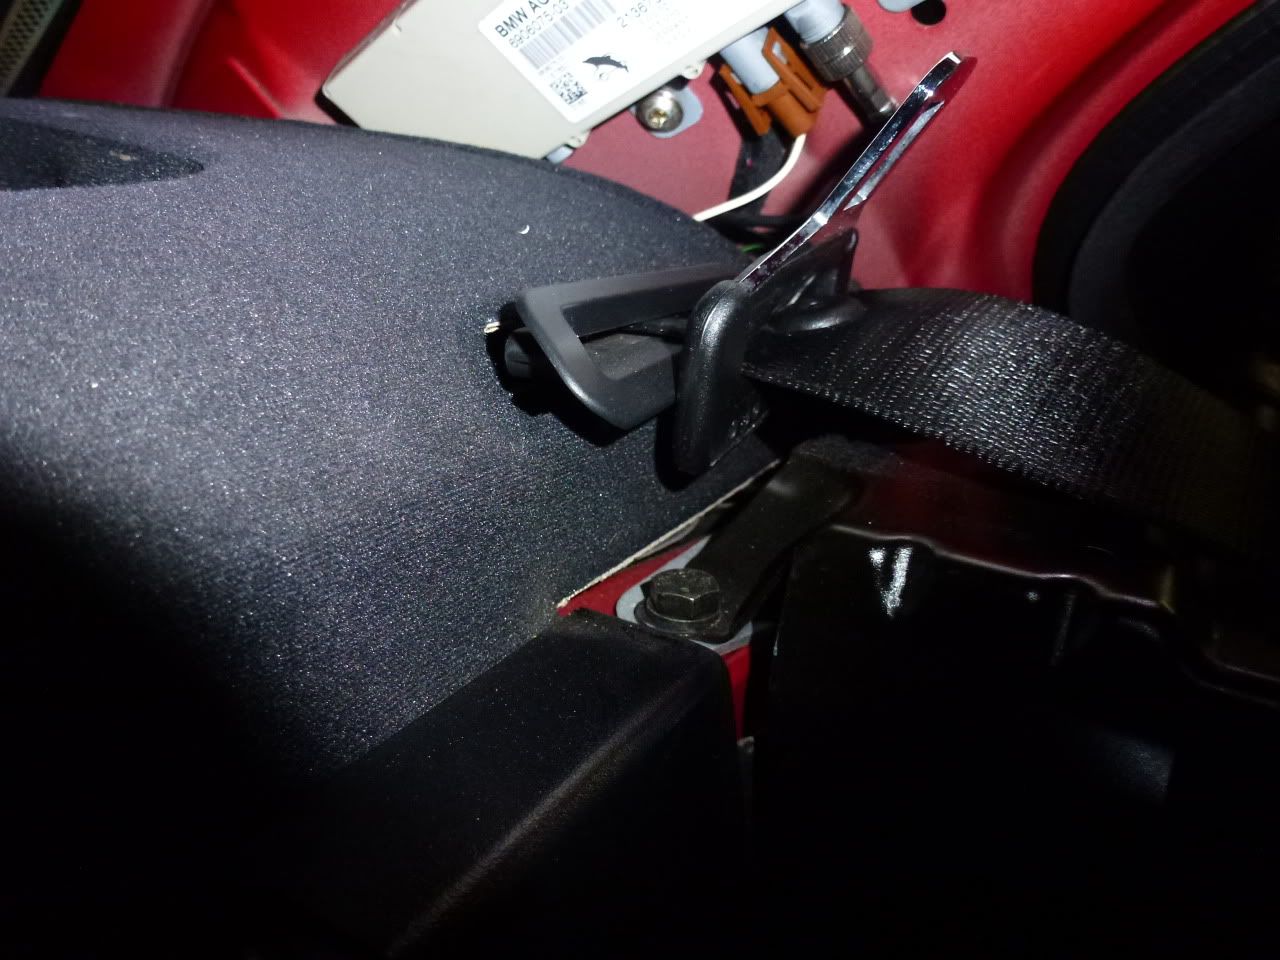
Next, we return to the seatbelt which is still attached. Using your T-50 torx remove the bolts.
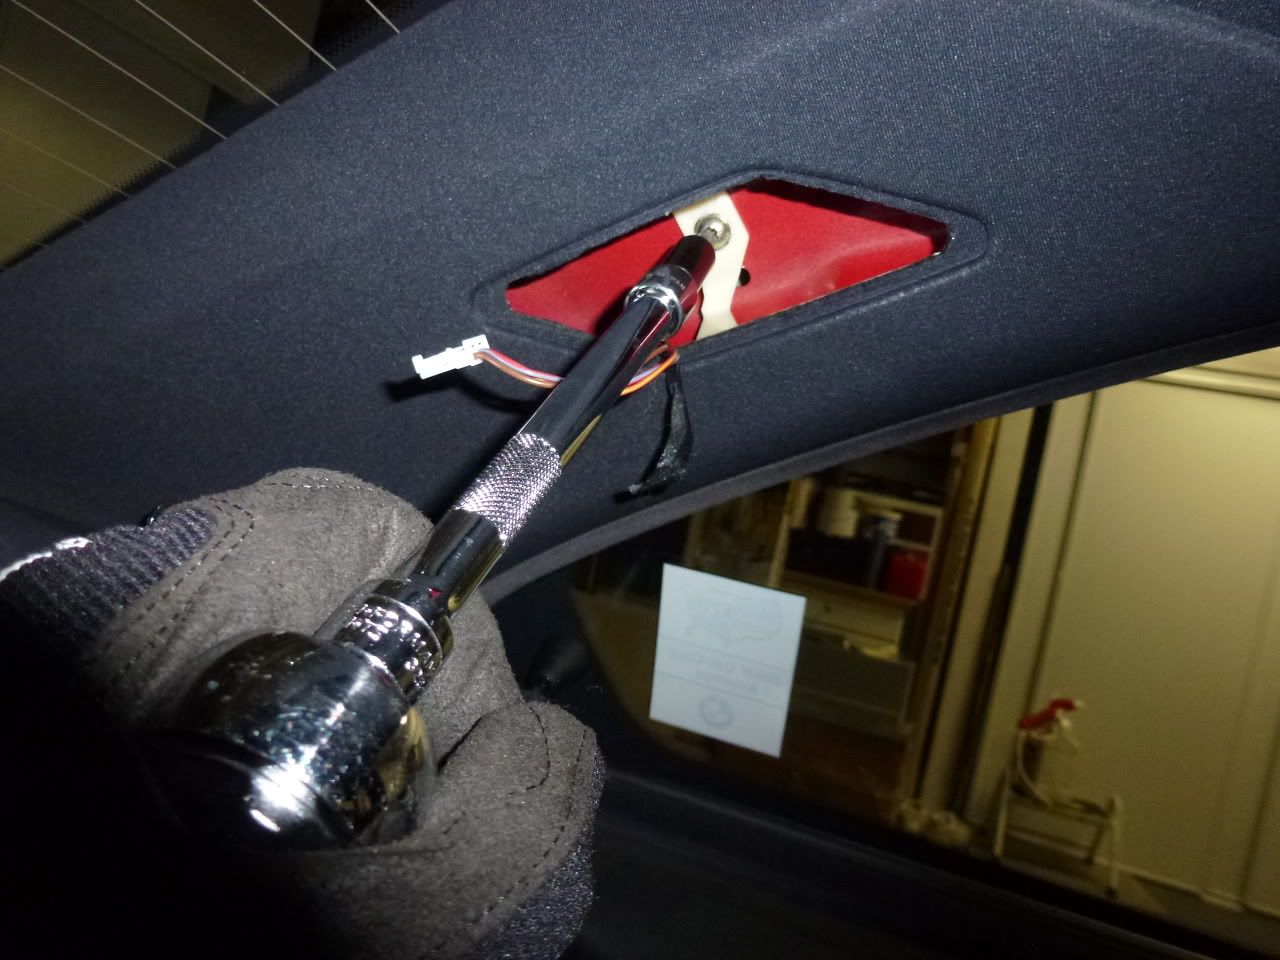
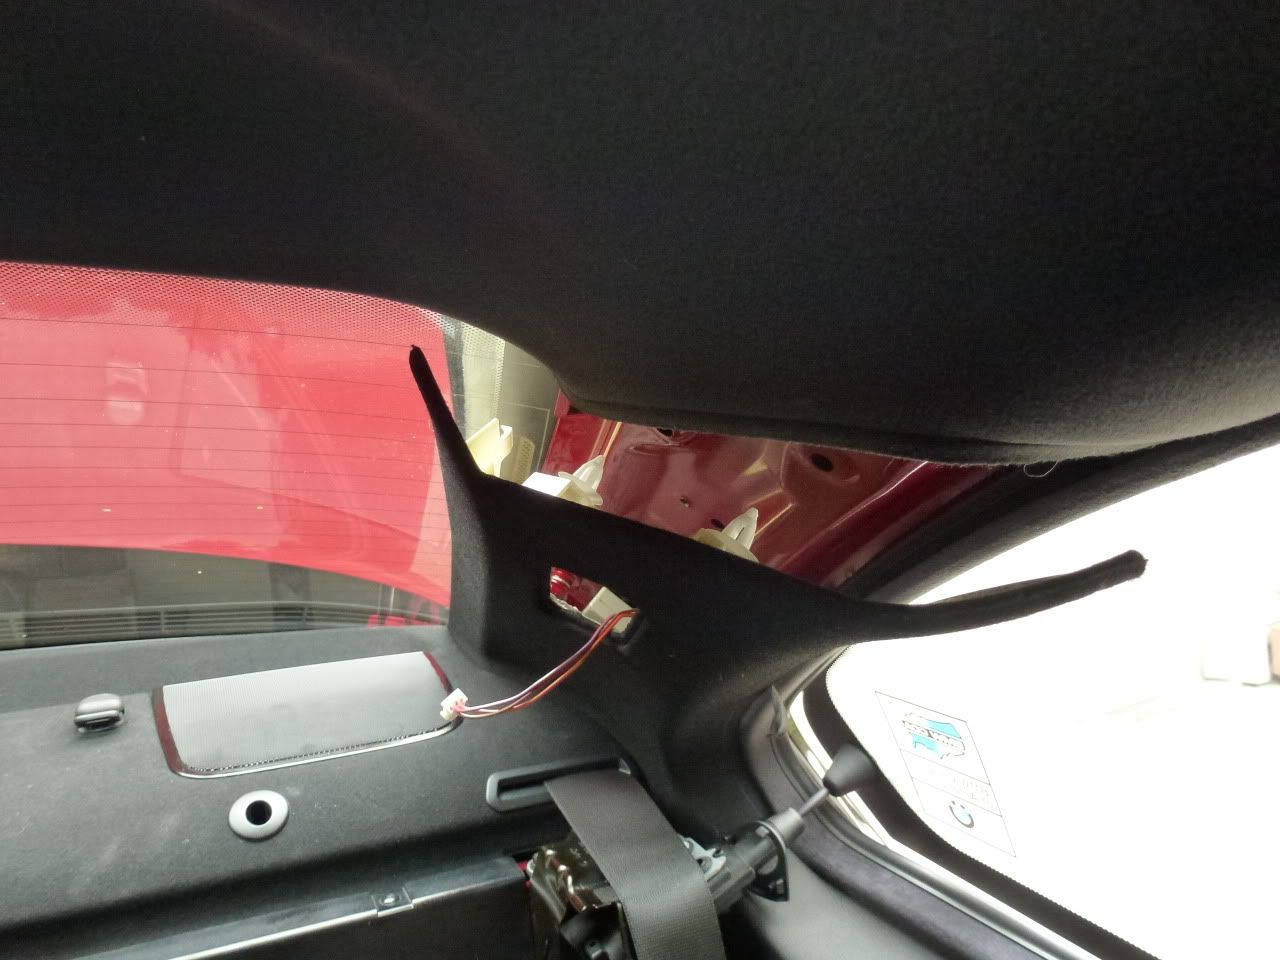
STEP 3: REMOVE C-PILLAR
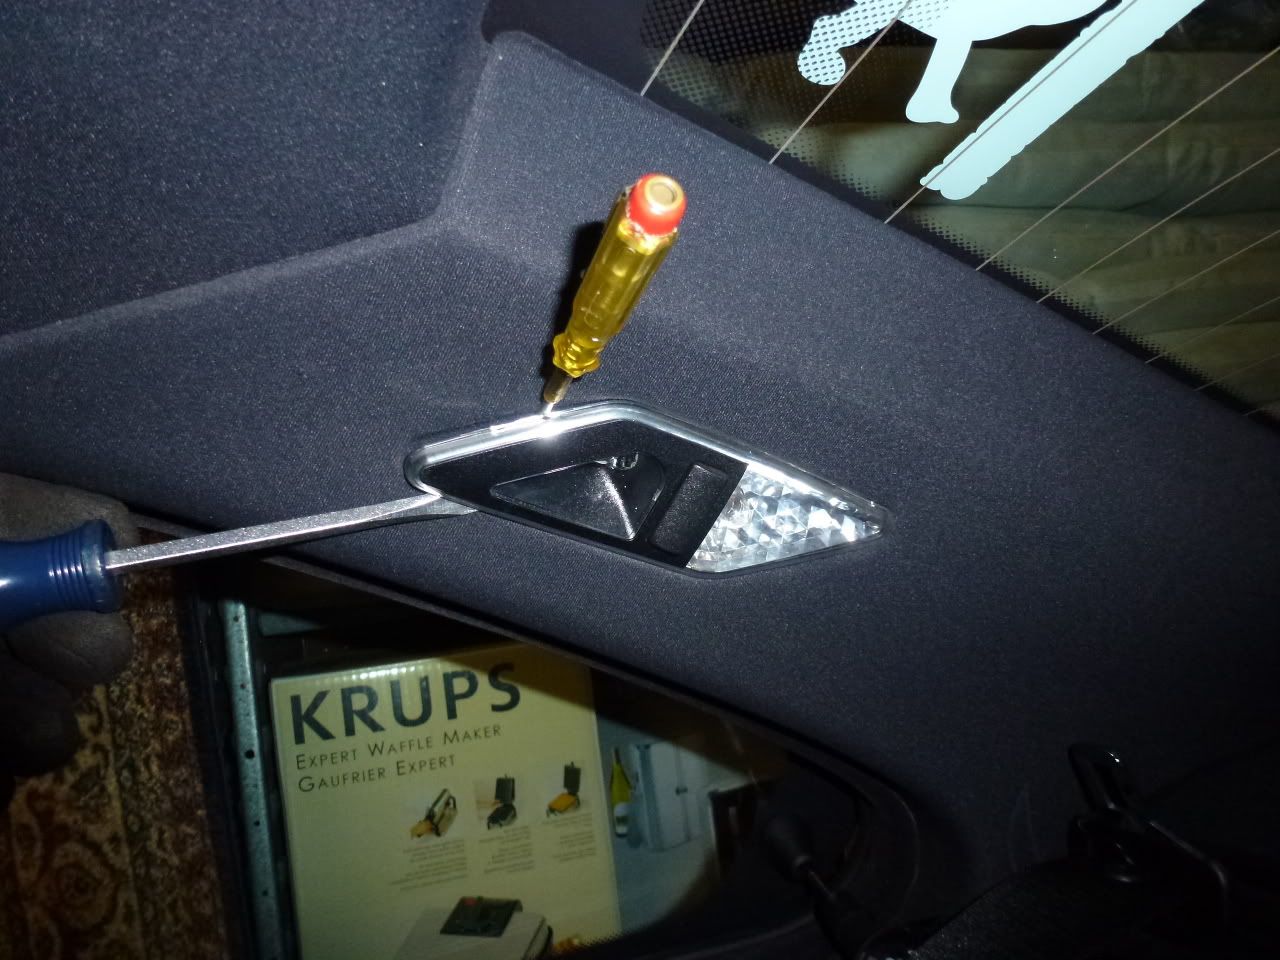
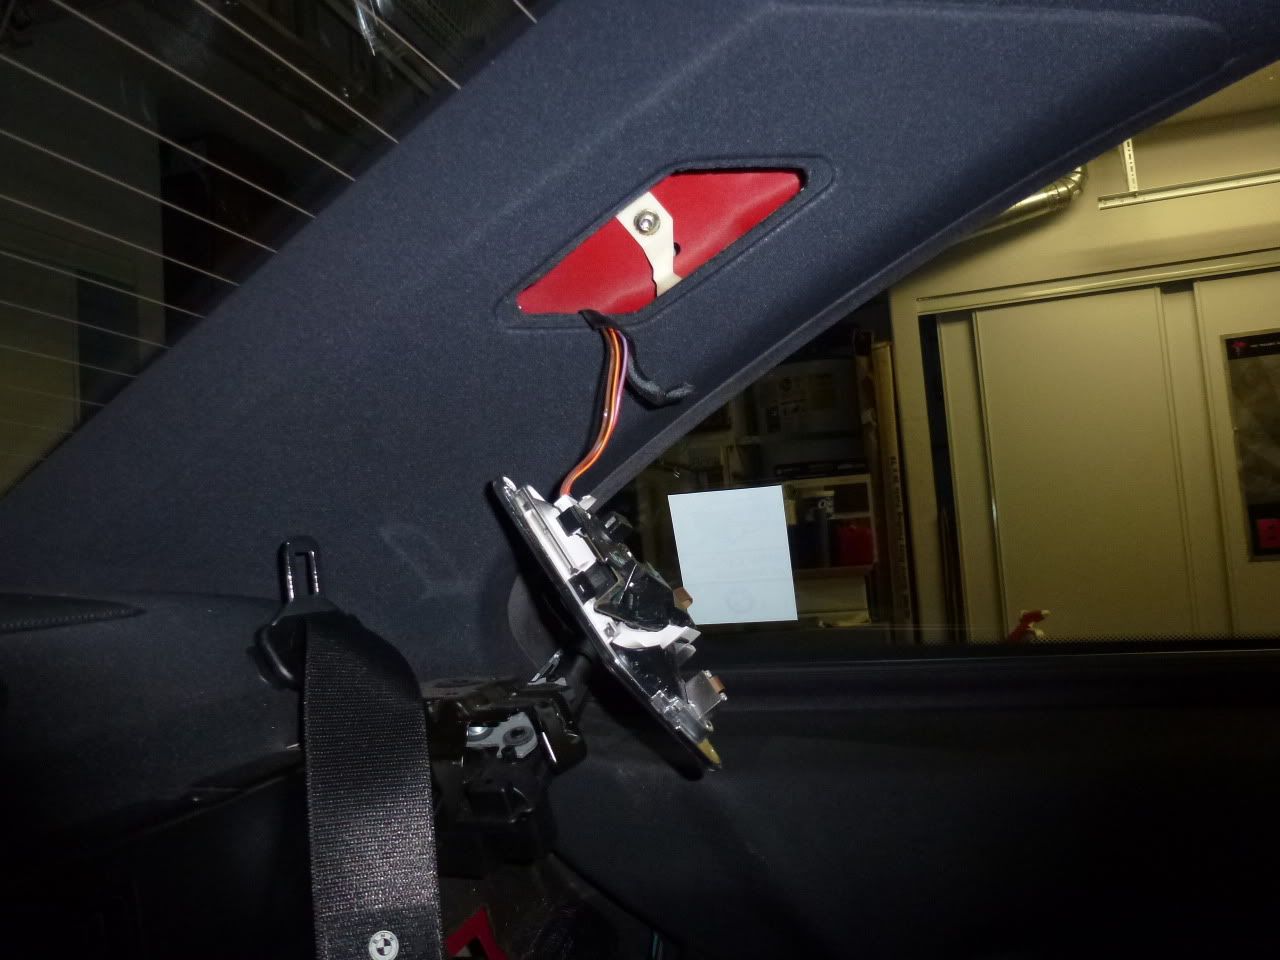
First you have to remove the lights, pry them out and unplug. Try to be careful and not break them.
Behind the light is a screw you need to take out, use your T-25 torx driver.
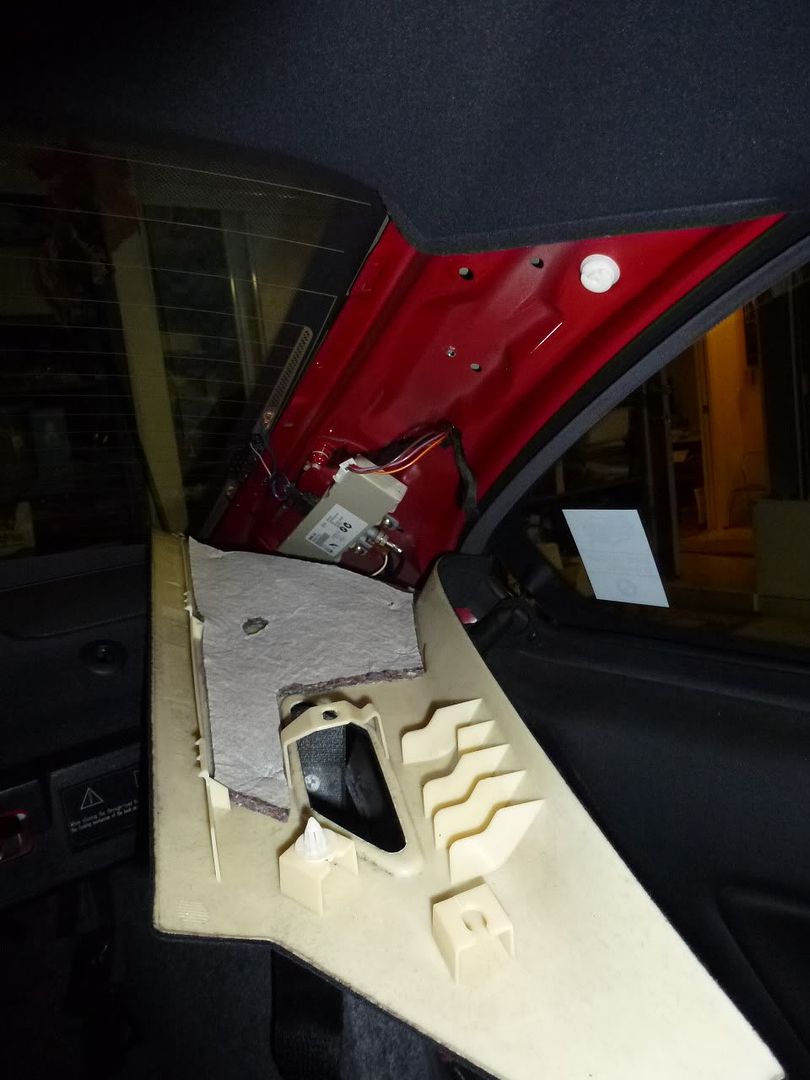
OK- be careful now, I broke a few clips and had to go pick up some more from the dealer on this part. The clips that hold it in place are at the top where the C-Pillar meets the headliner. You just have to pull it out to undo the clips, then up to pull out the cover.
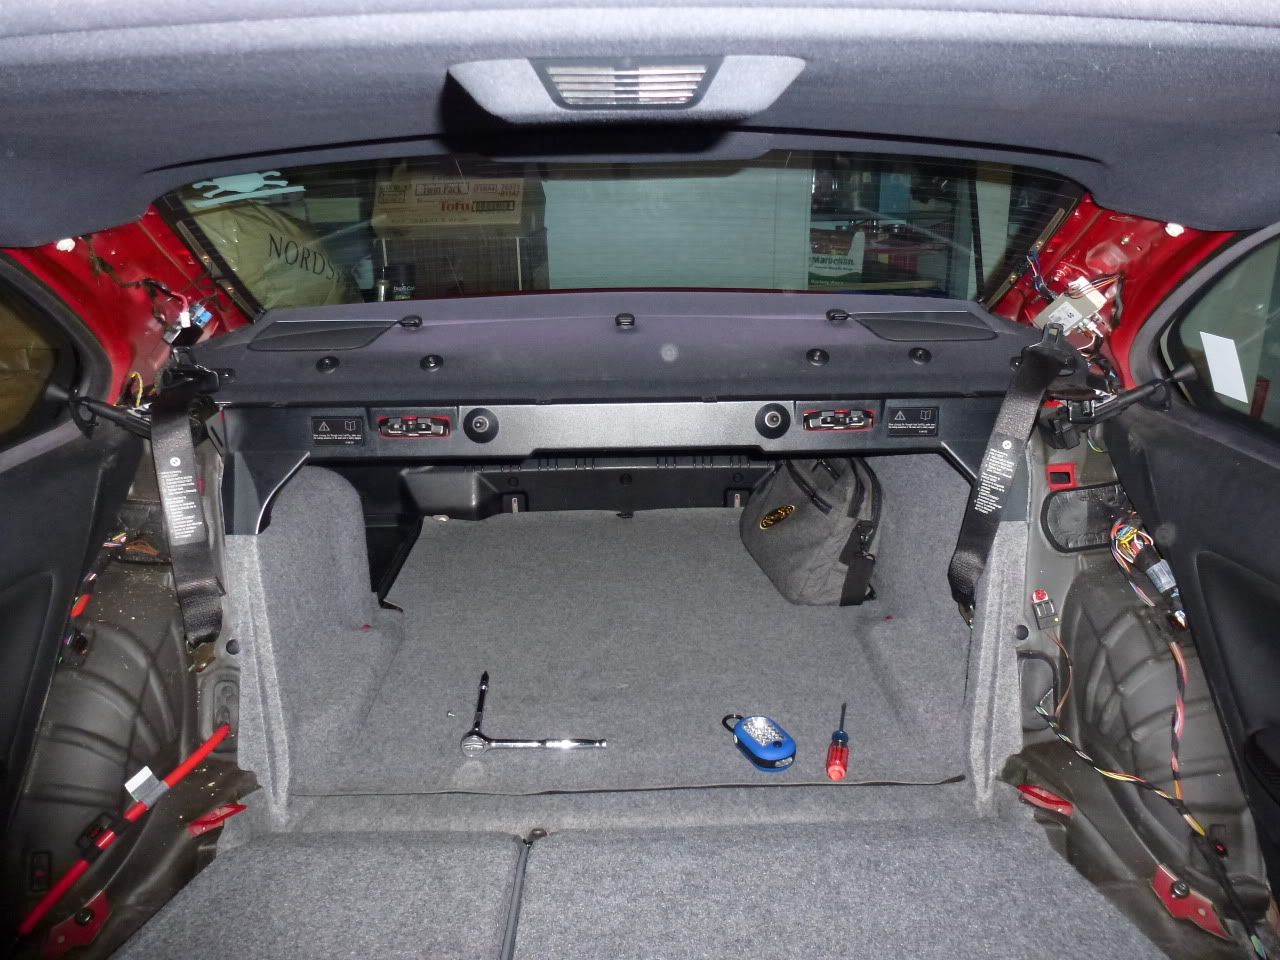
Your car should now look like this:
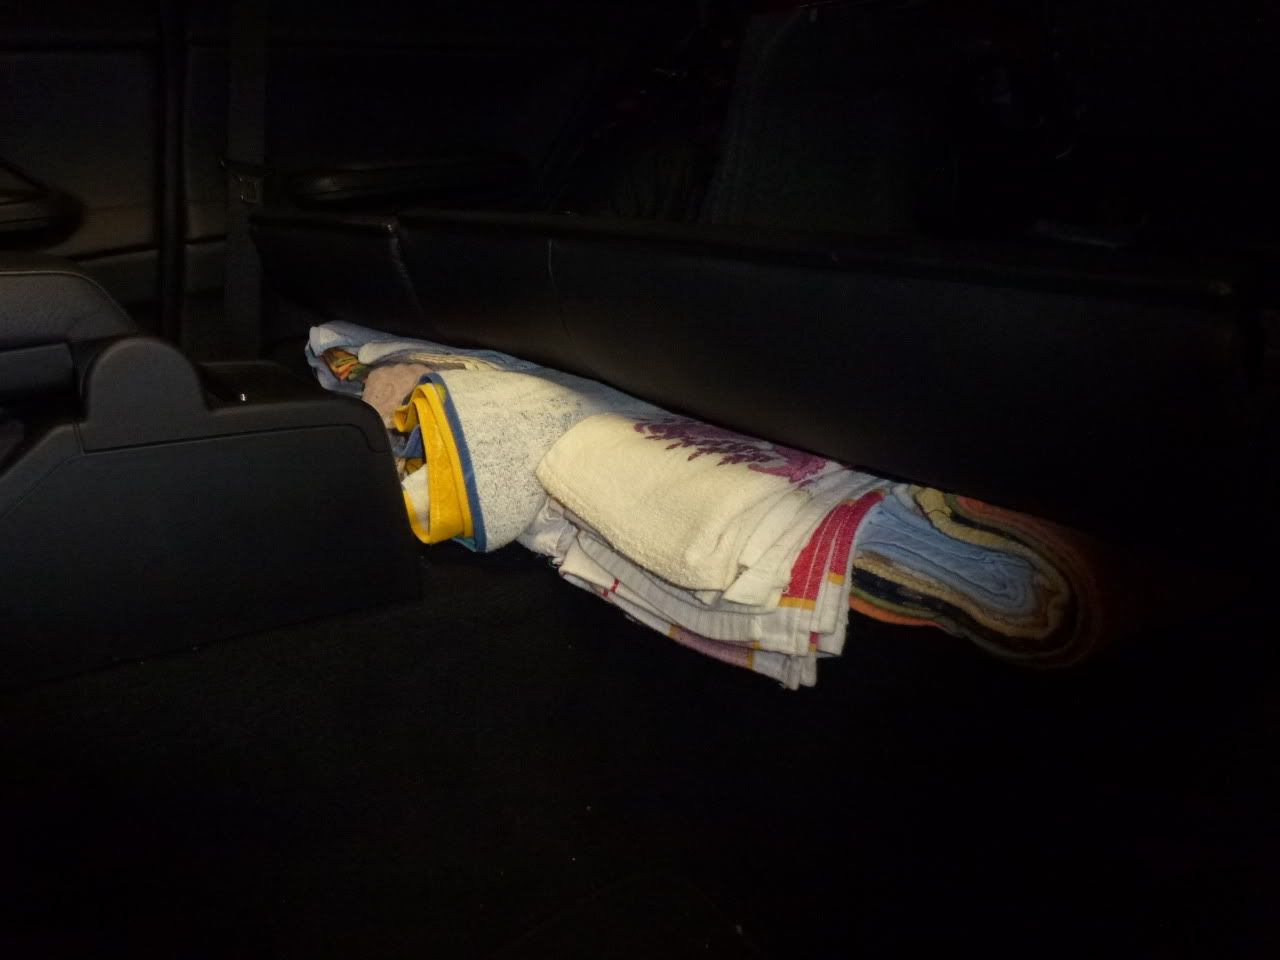
VERY IMPORTANT!!! Before you lay the rear seats down, put a pile of towels down about the same thickness as the seat bottom. If you don't remember to do this you're gonna have a huge dent if not a cut in your leather. Don't say I didn't warn you!
STEP 4: REMOVE SPEAKERS & SUB
We have now come to one of the sources of issue. Take out whichever you want first, it makes not difference.
Pry of speaker covers
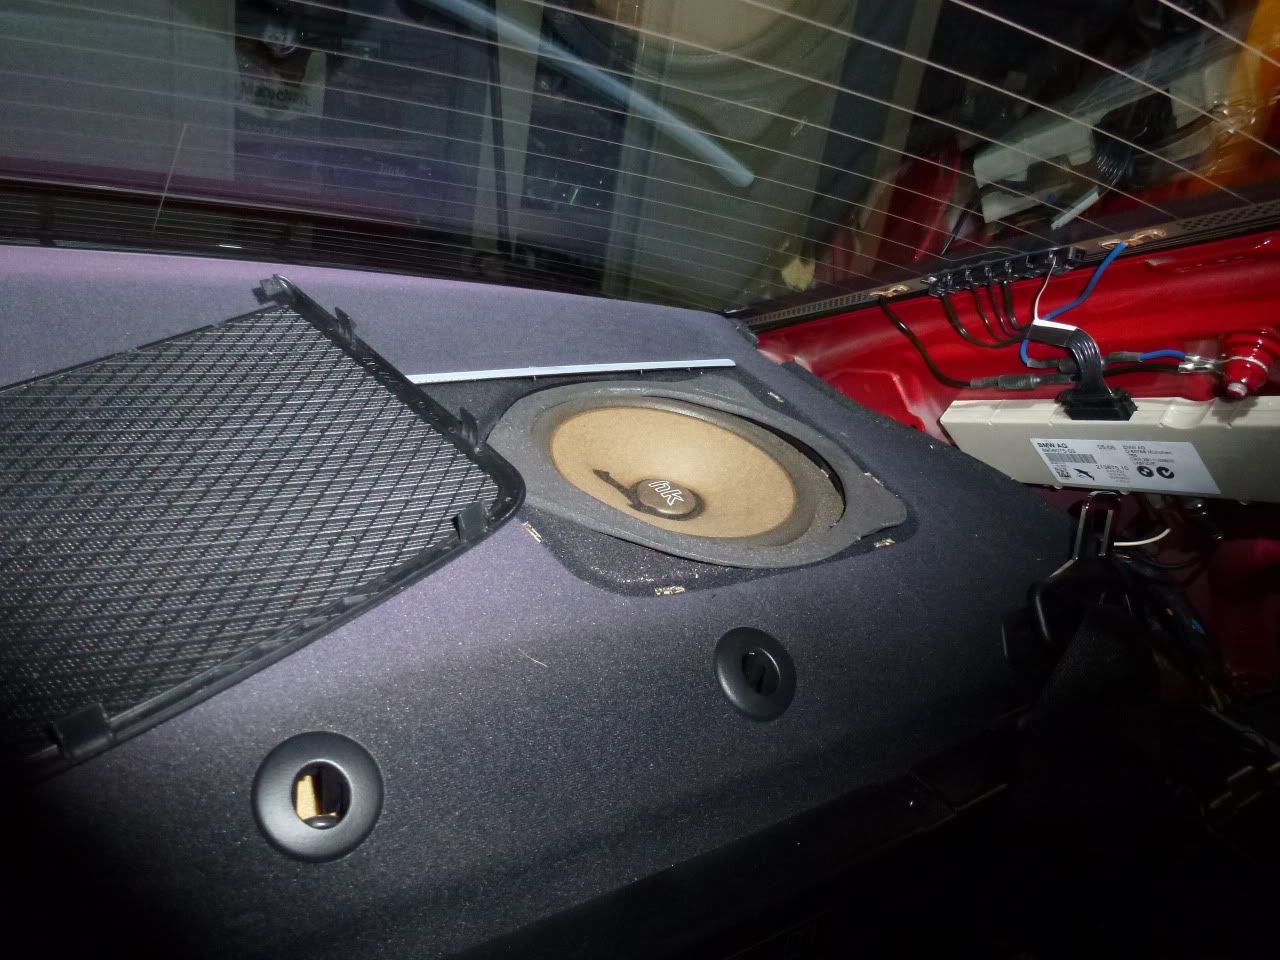
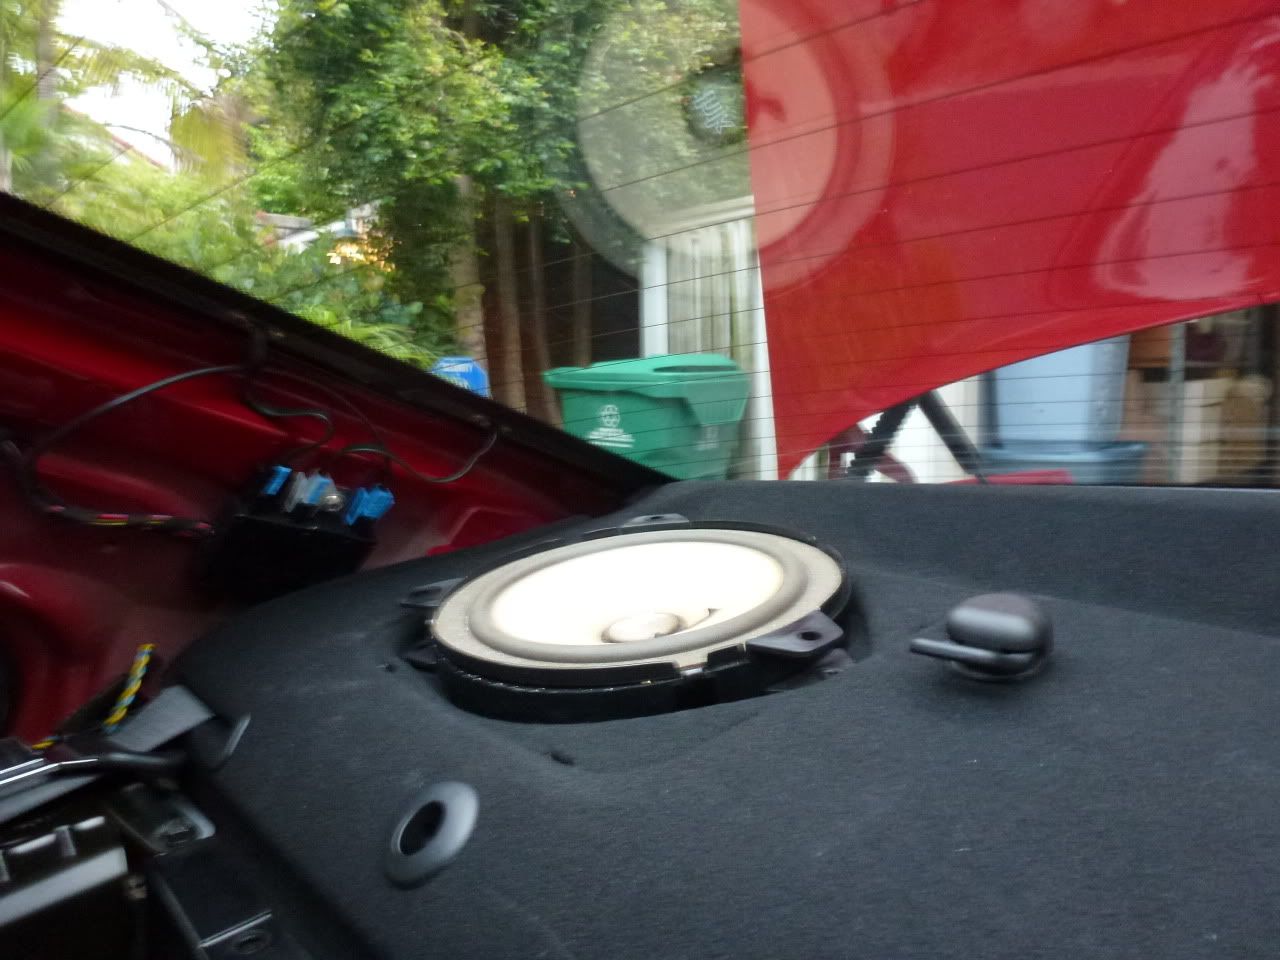
Take out the foam ring, put aside. Using a 8mm socket, undo the speaker itself.
The speaker sits in a basket, make sure you just take the speaker out and not the basket yet.
To take out the basket you have to undo 3 clips, then it just pops out.
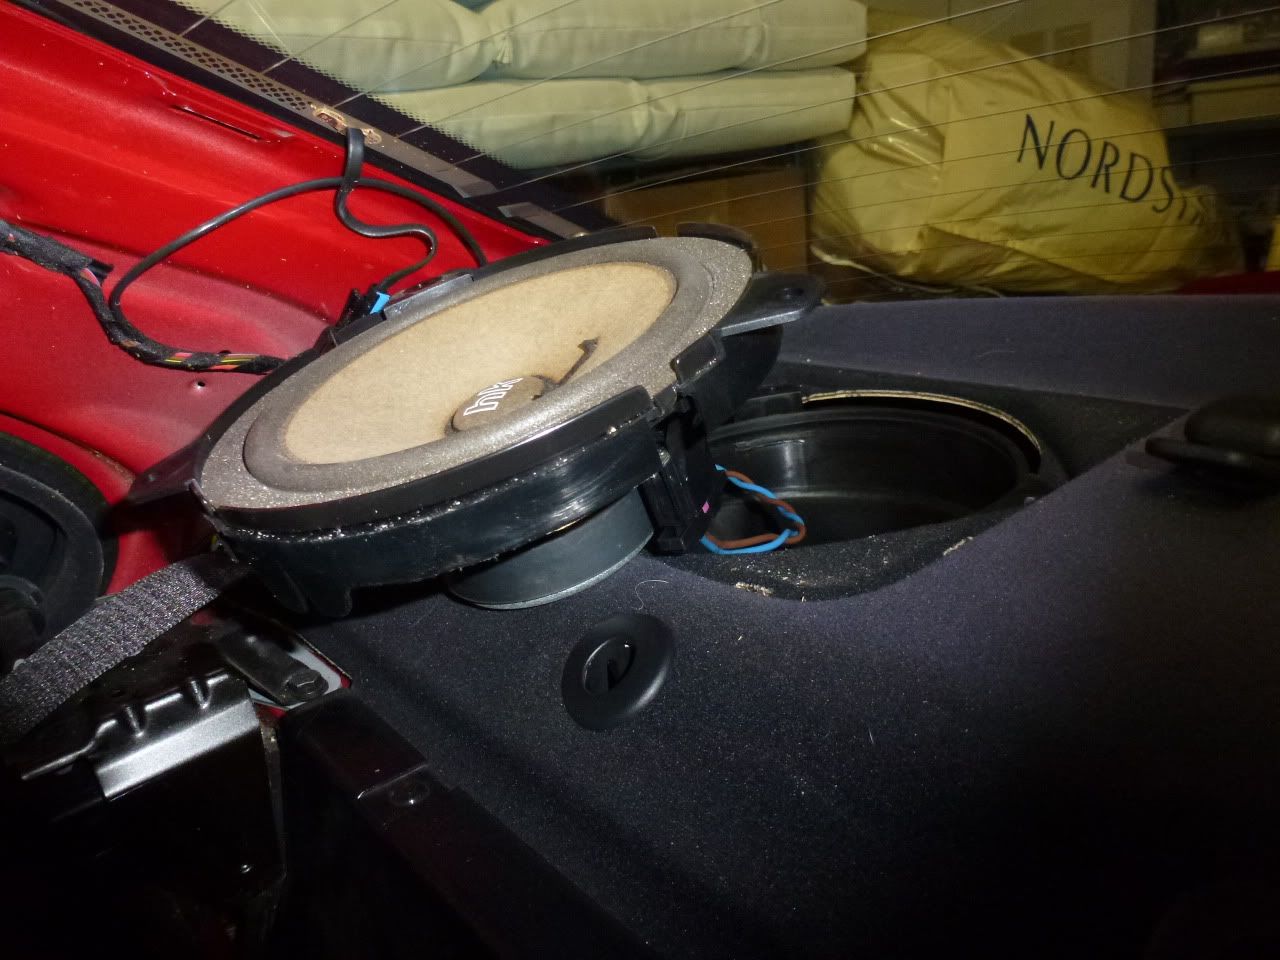
At this point I also took out the plastic trim piece around the seatbelt, just pry it up and off. There's a slot on the bottom so you can take it off the belt.
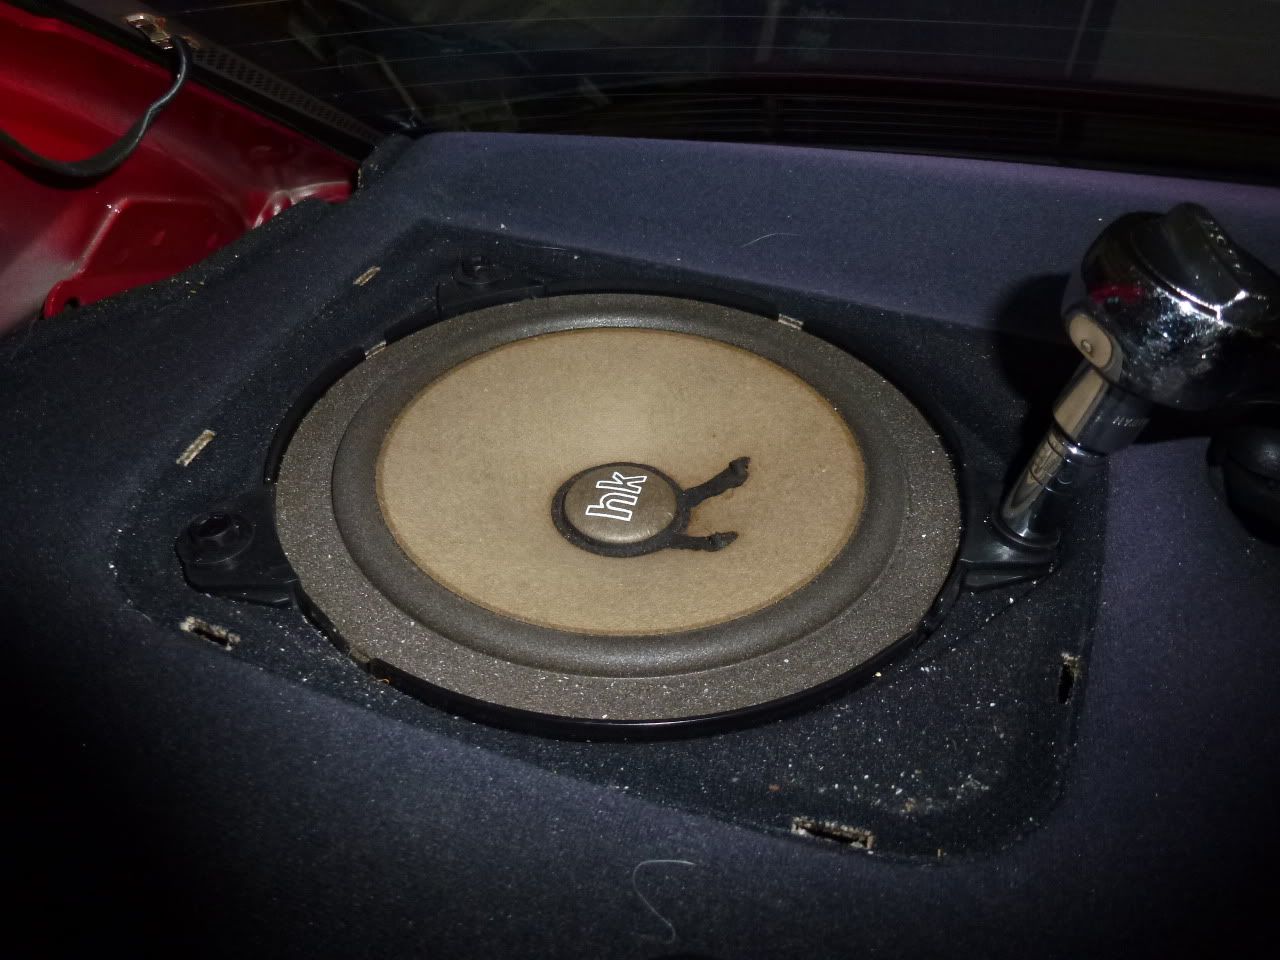
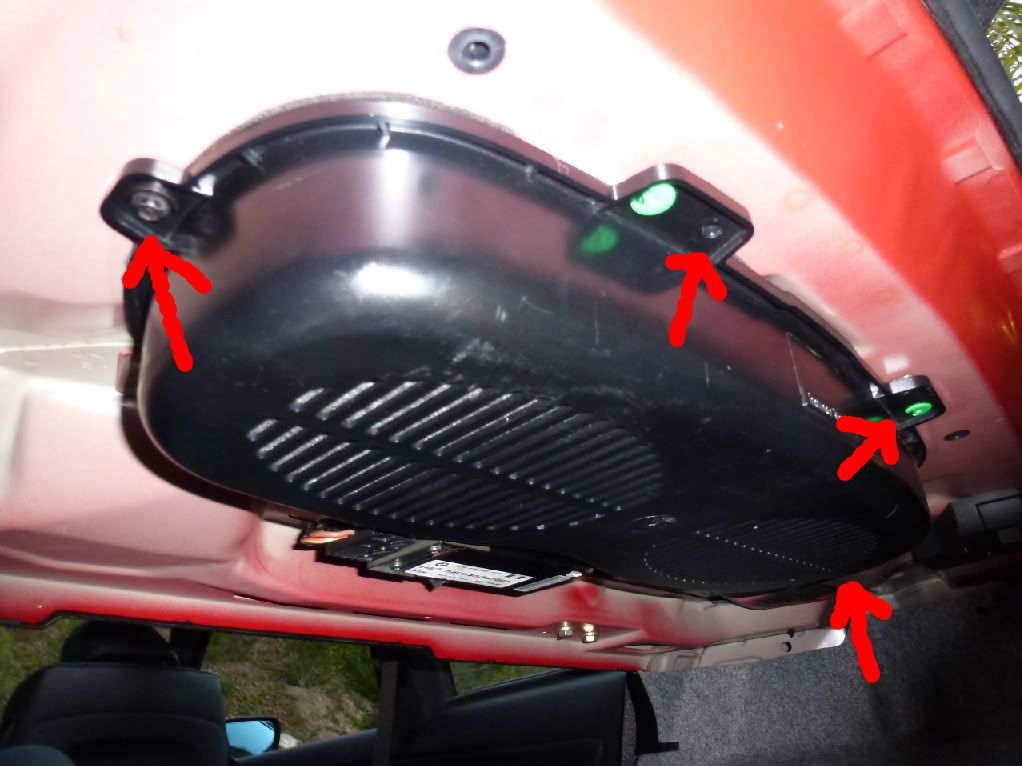
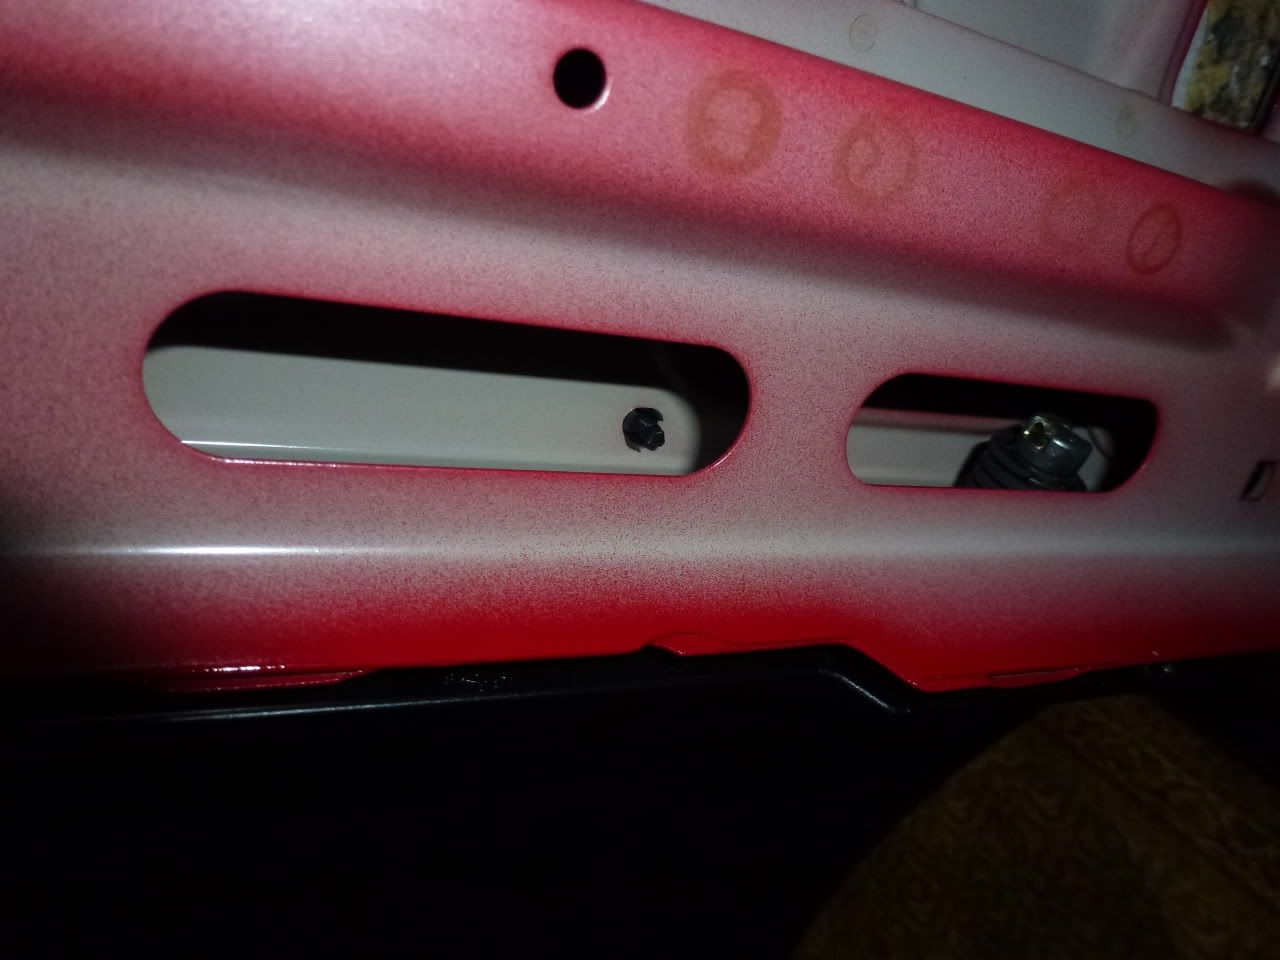
Now, onto the sub. It's held in by 4 screws, 2 clips and 2 hooks.
Take out 4 screws (mine only had 2 for some reason), 2 in 'front', 1 on each side.
I'm assuming you're laying on your back in the trunk, your feet in the car. Pull 'up' on the sub toward the trunk, the hooks in the back should fall out of their slots and the sub should only be held in by 2 clips, right next to where the screws in the front were (they look green in the pic). Just pull and it should come out. There should only be the cable left, unhook and put aside.
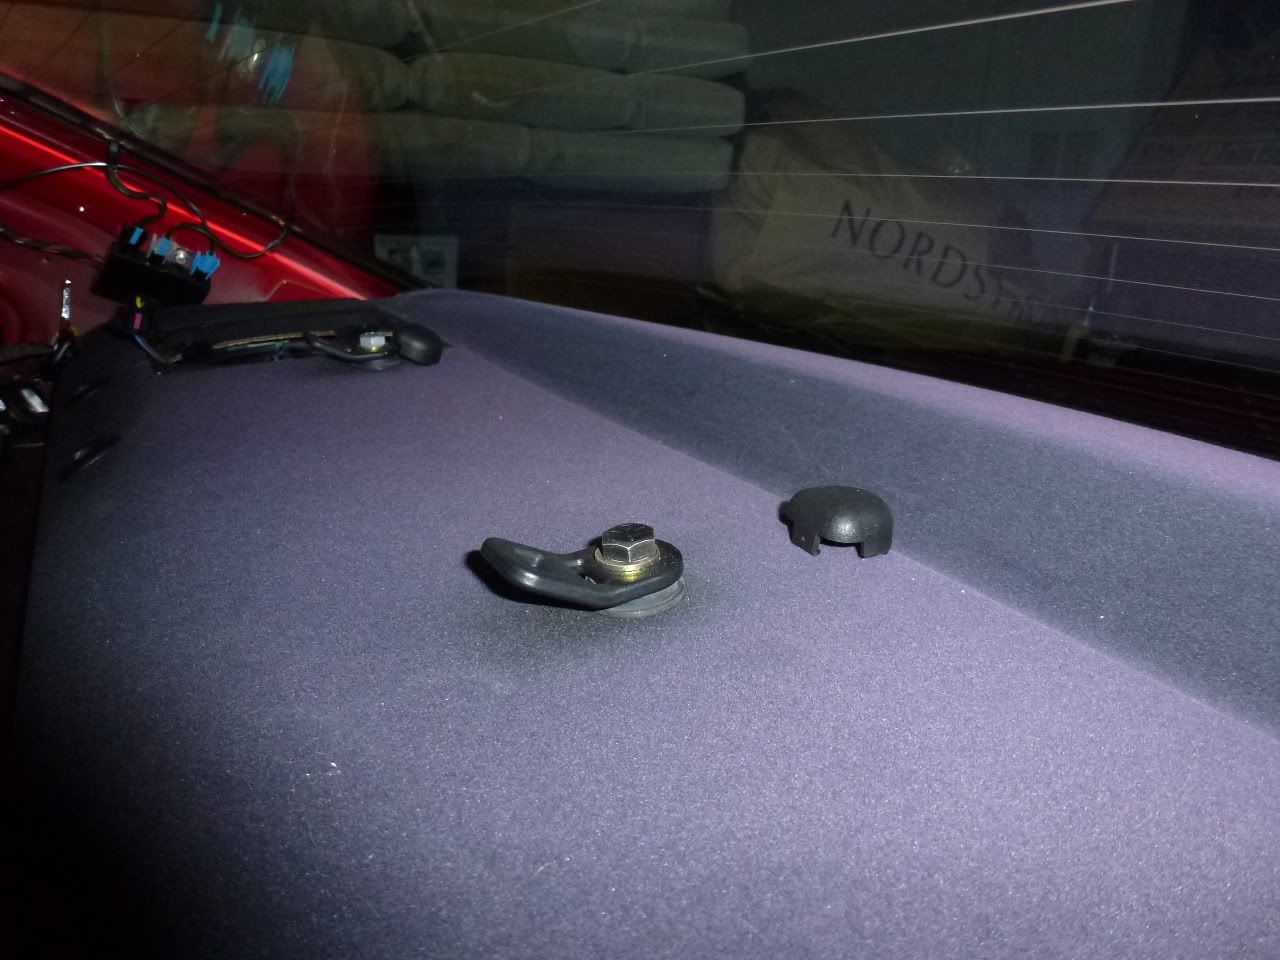
STEP 5: REMOVE TETHER POINTS FROM REAR SHELF
Using the 13mm socket, undo and remove the 3 tether points (pull everything out but don't lose anything). Put aside.
STEP 6: REMOVE THROUGH-LOADING CROSS MEMBER TRIM (that black plastic piece)
There are 4 expanding rivets you need to remove.
Using your narrow punch, push them all the way through. They should fall all the way and end up on the trunk floor. Just pull the other part up through the top
You can see the other side of the rivet through this gap. All 4 should be placed near a gap like this.
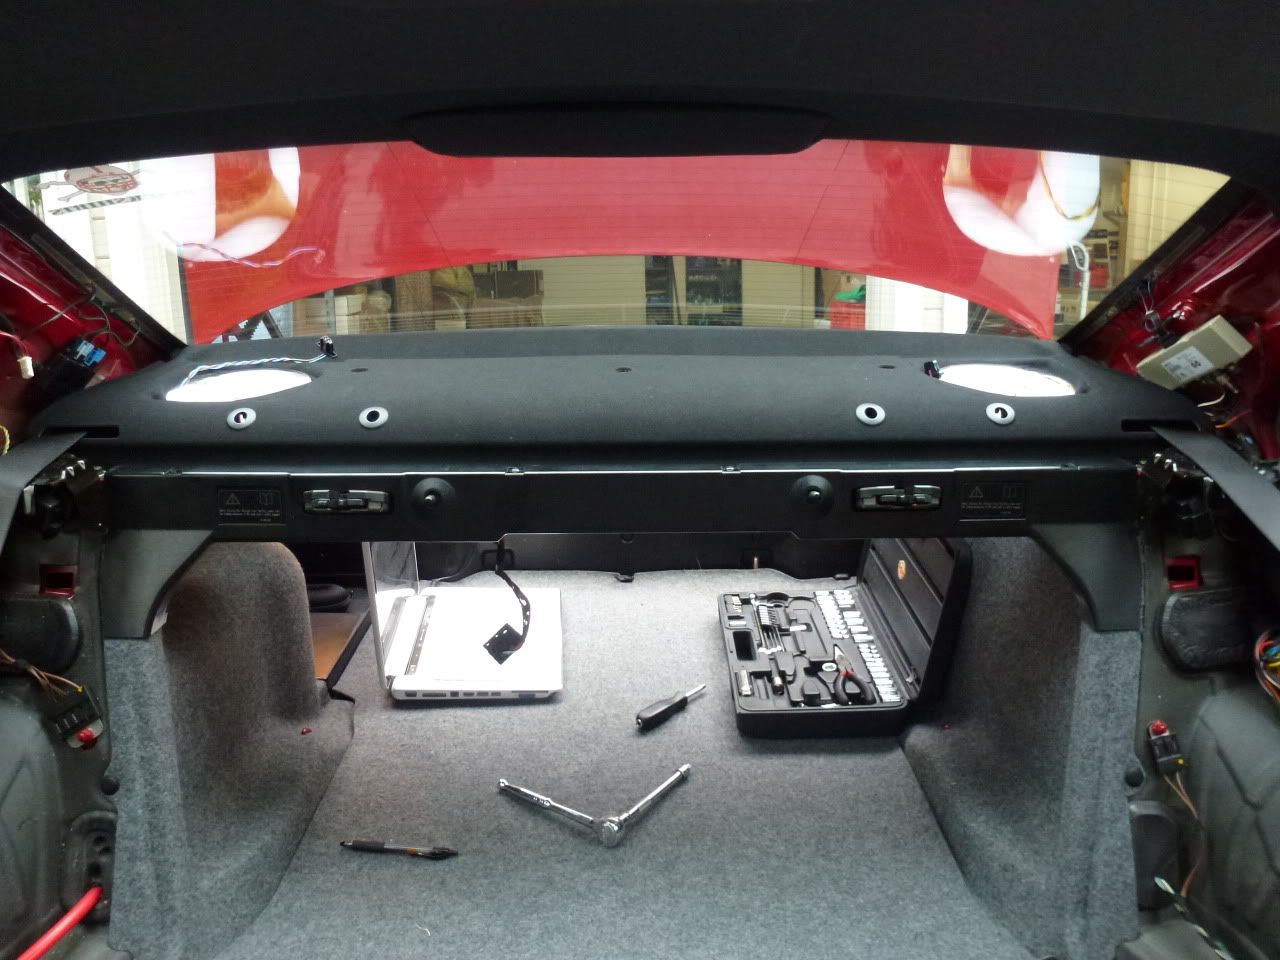
It's clipped in so just pry it off, your car should now look like this:
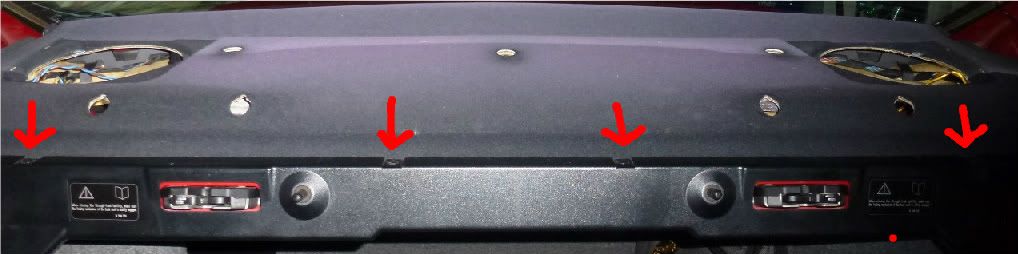
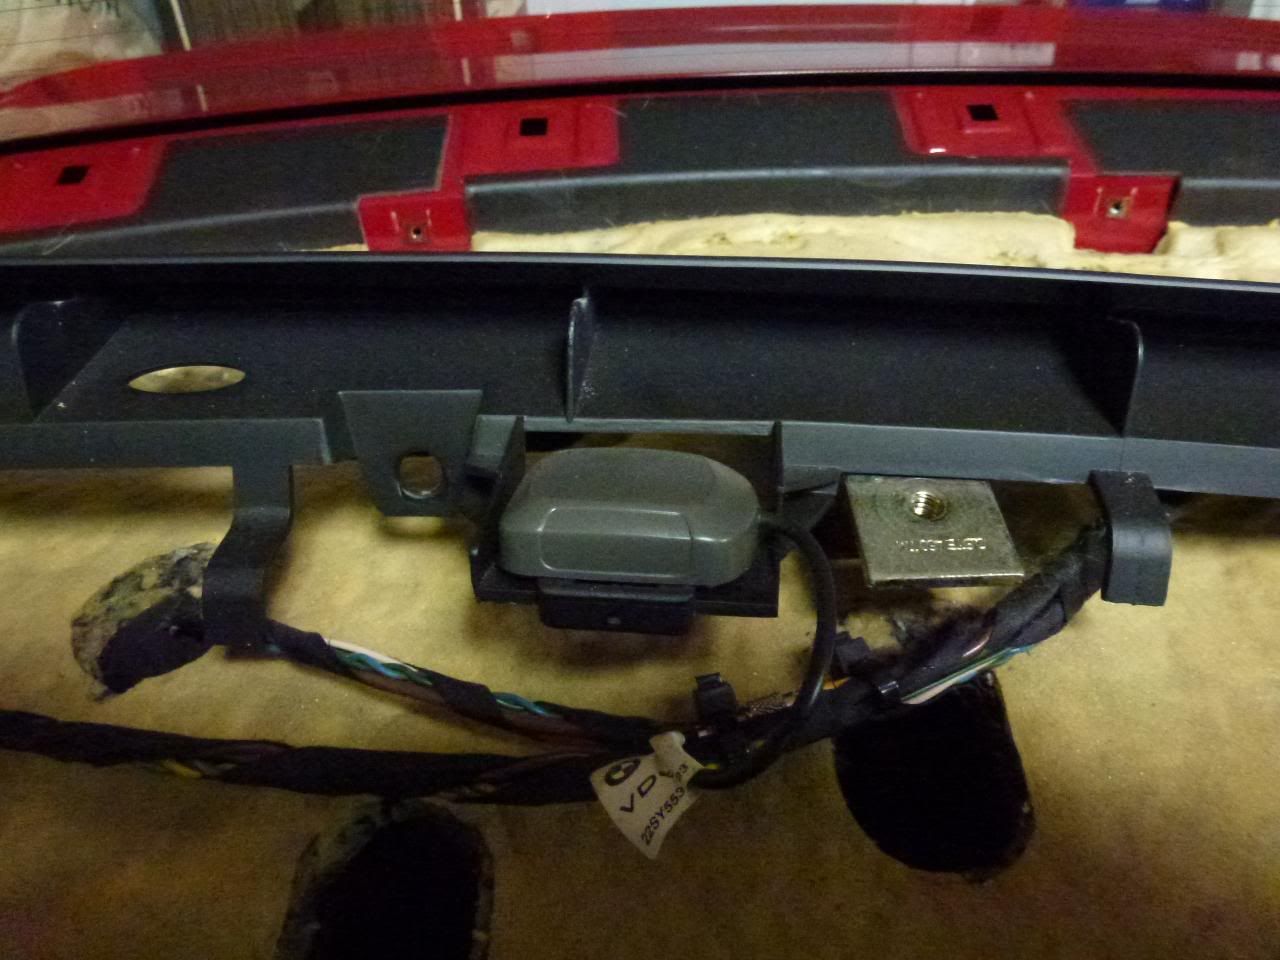
STEP 7: REMOVE REAR SHELF
ok, so I got to this point and hadn't removed the sub yet and was sitting there cursing my car cause I couldn't find what was hold it in still. Right in the middle of where the sub was is 1 screw that needs to be removed. I think it was 8mm but I don't remember.
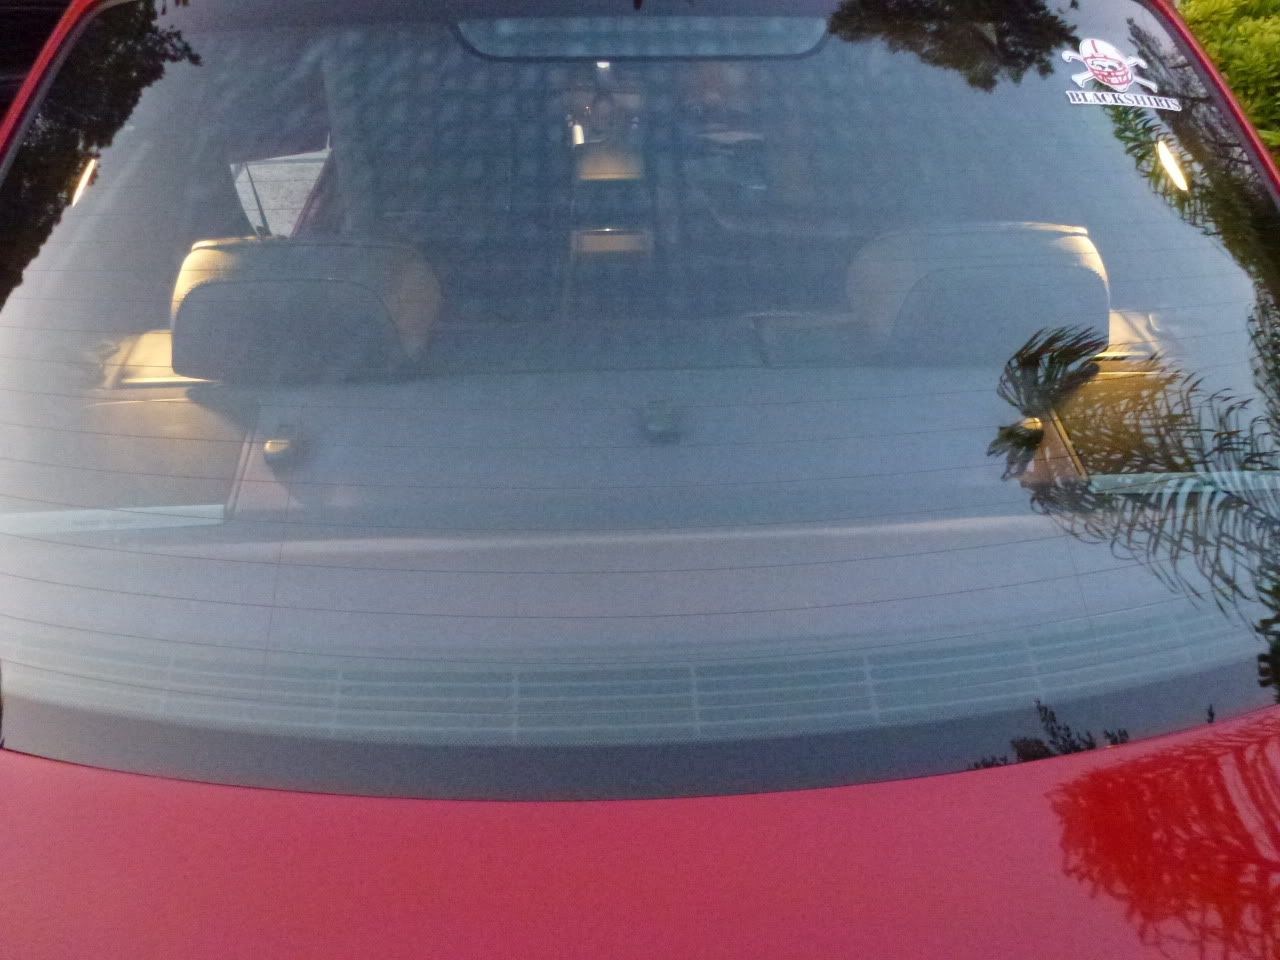
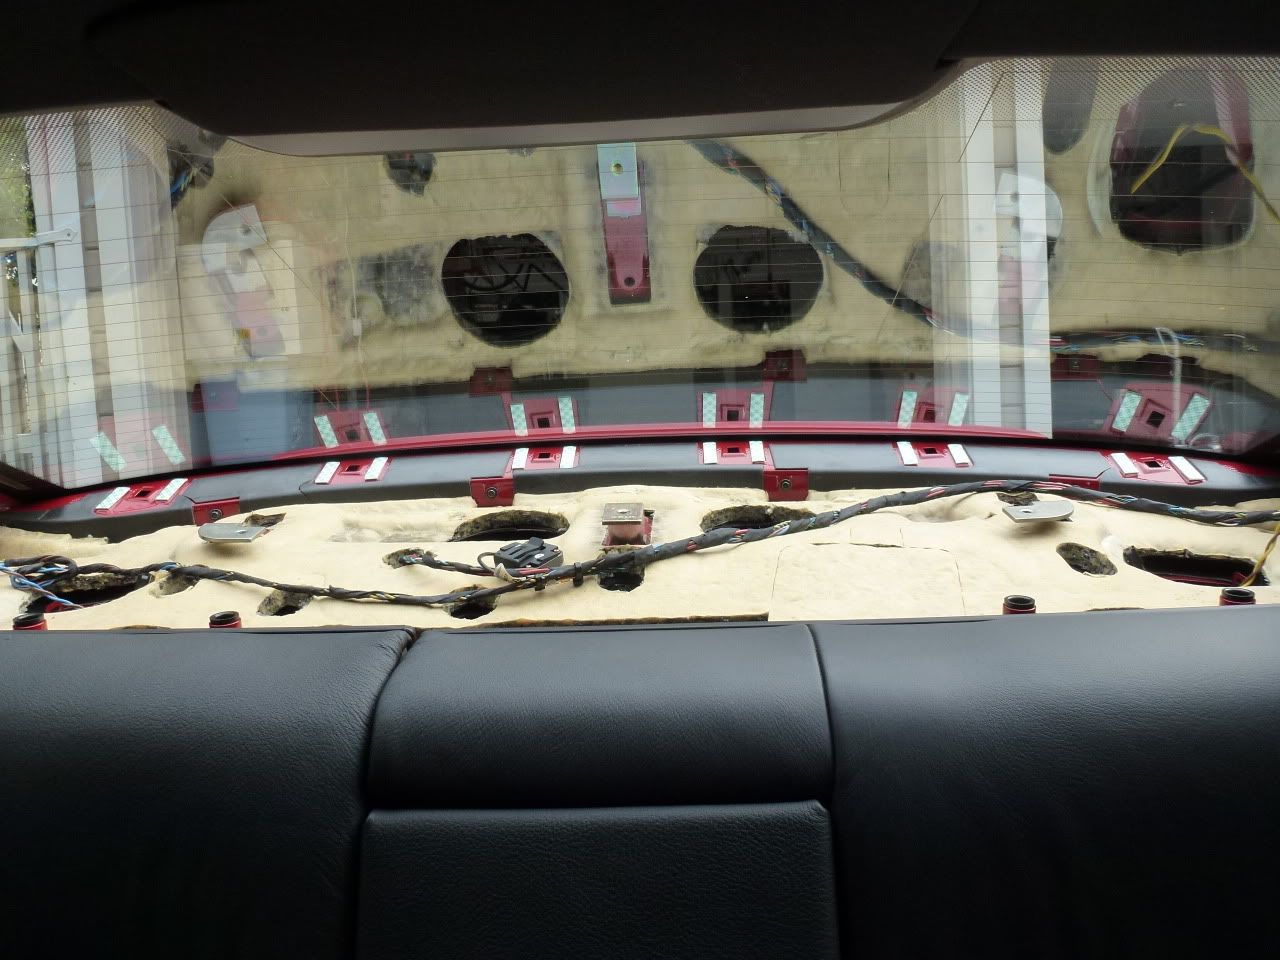
In this picture you can see how much space there is between the trunk roof and the shelf and the lack of good padding, part of the reason for the rattle.
Now it should come out easily. Lift up from the front and pull towards you. You might have to twist to get it around stuff but it comes out easy.
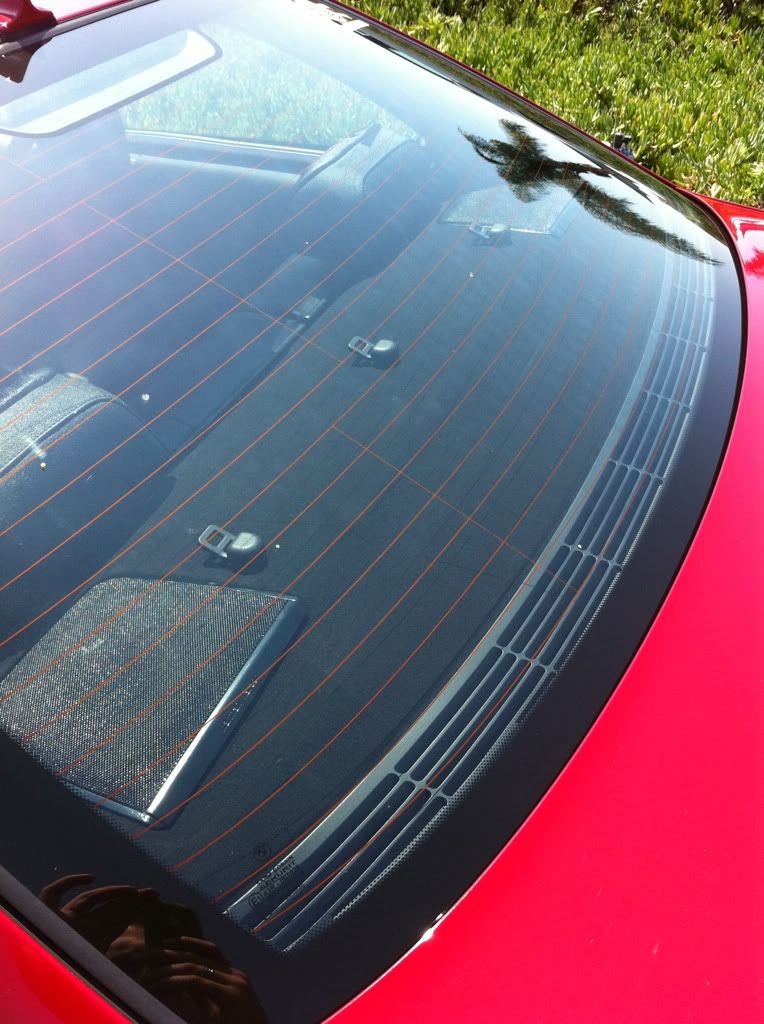
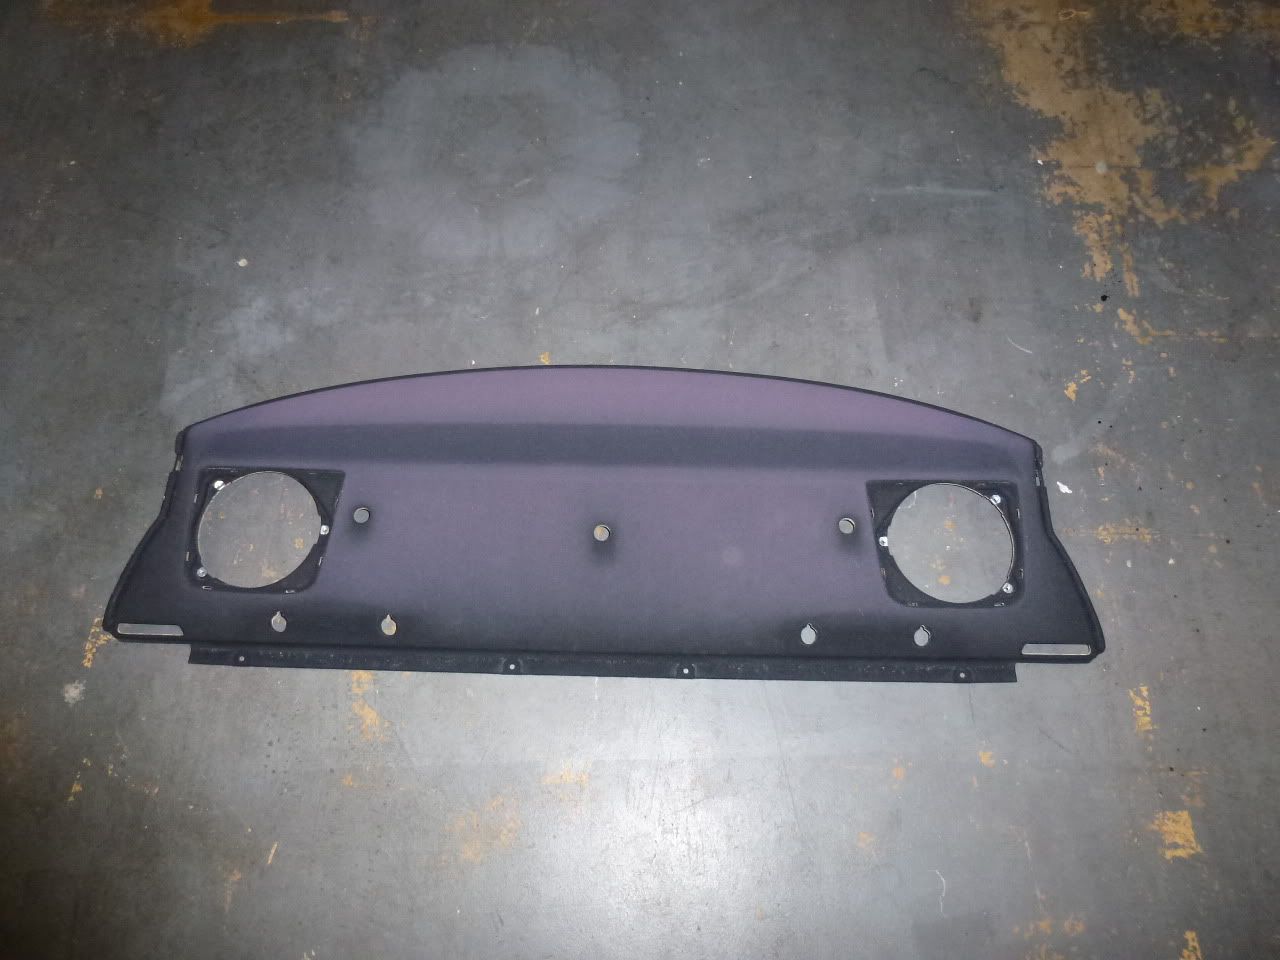
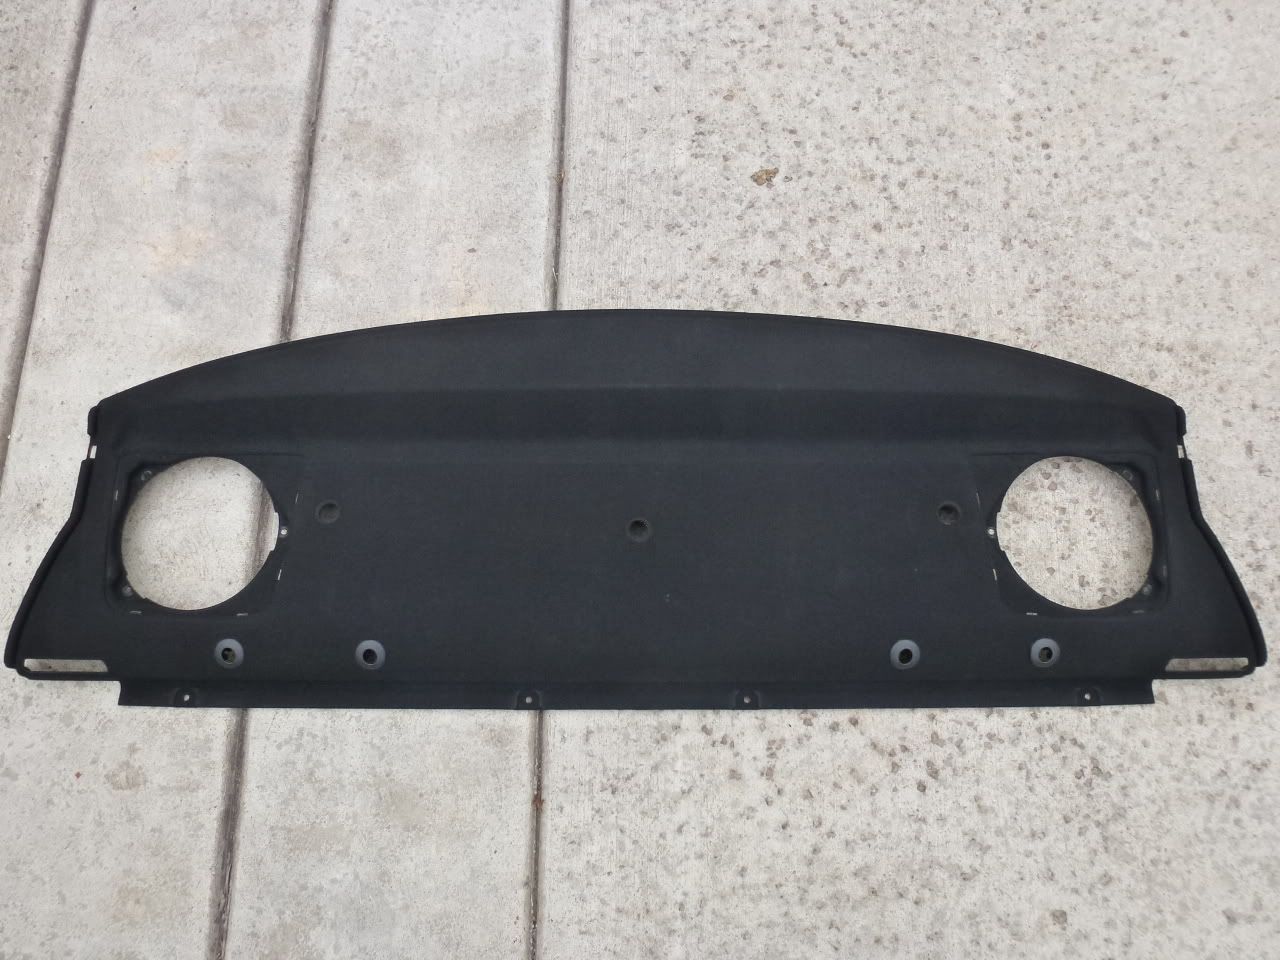
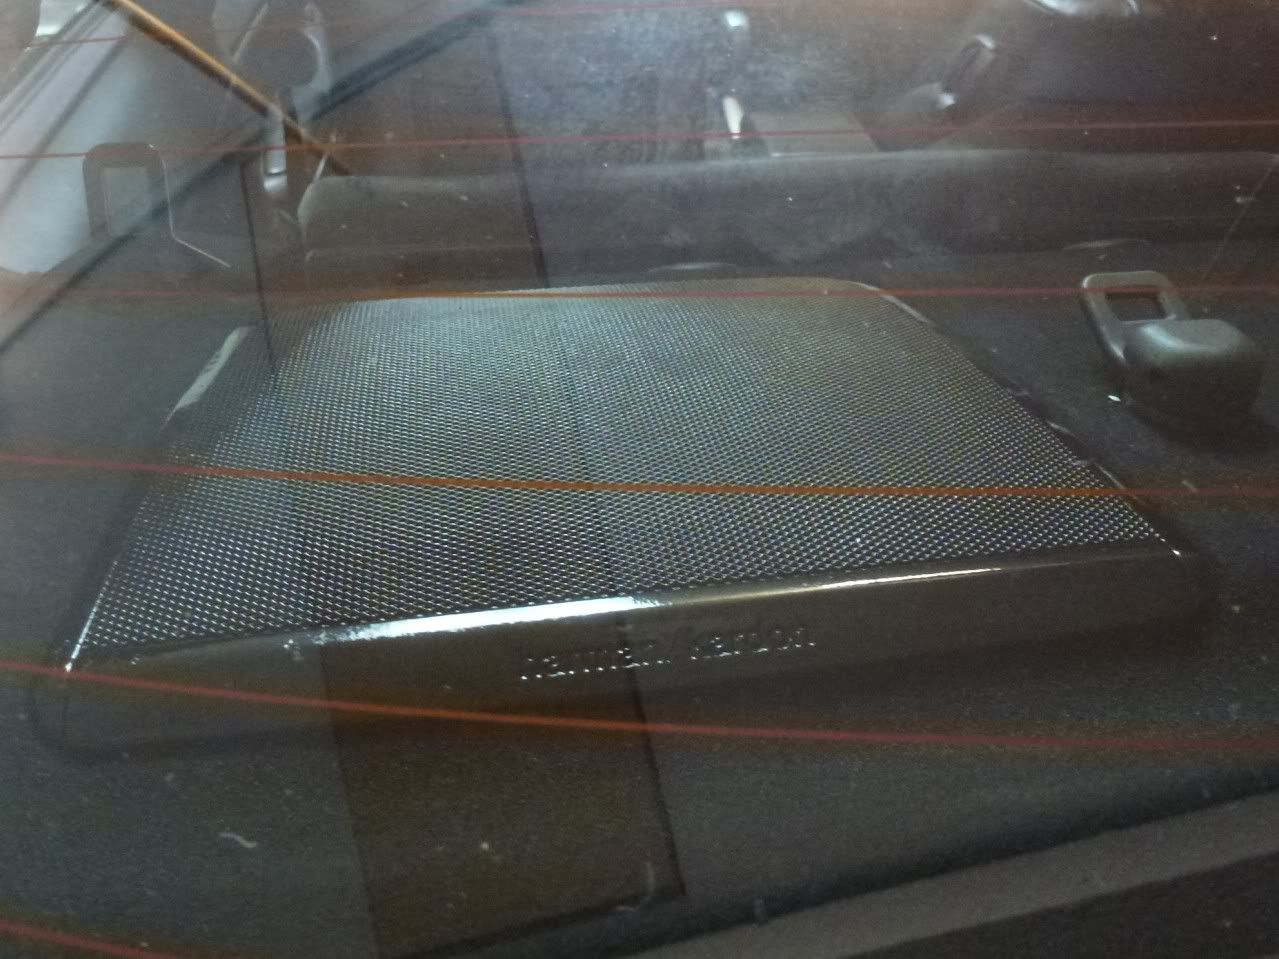
Now its time to really see how discolored it is. This is what mine looked like:
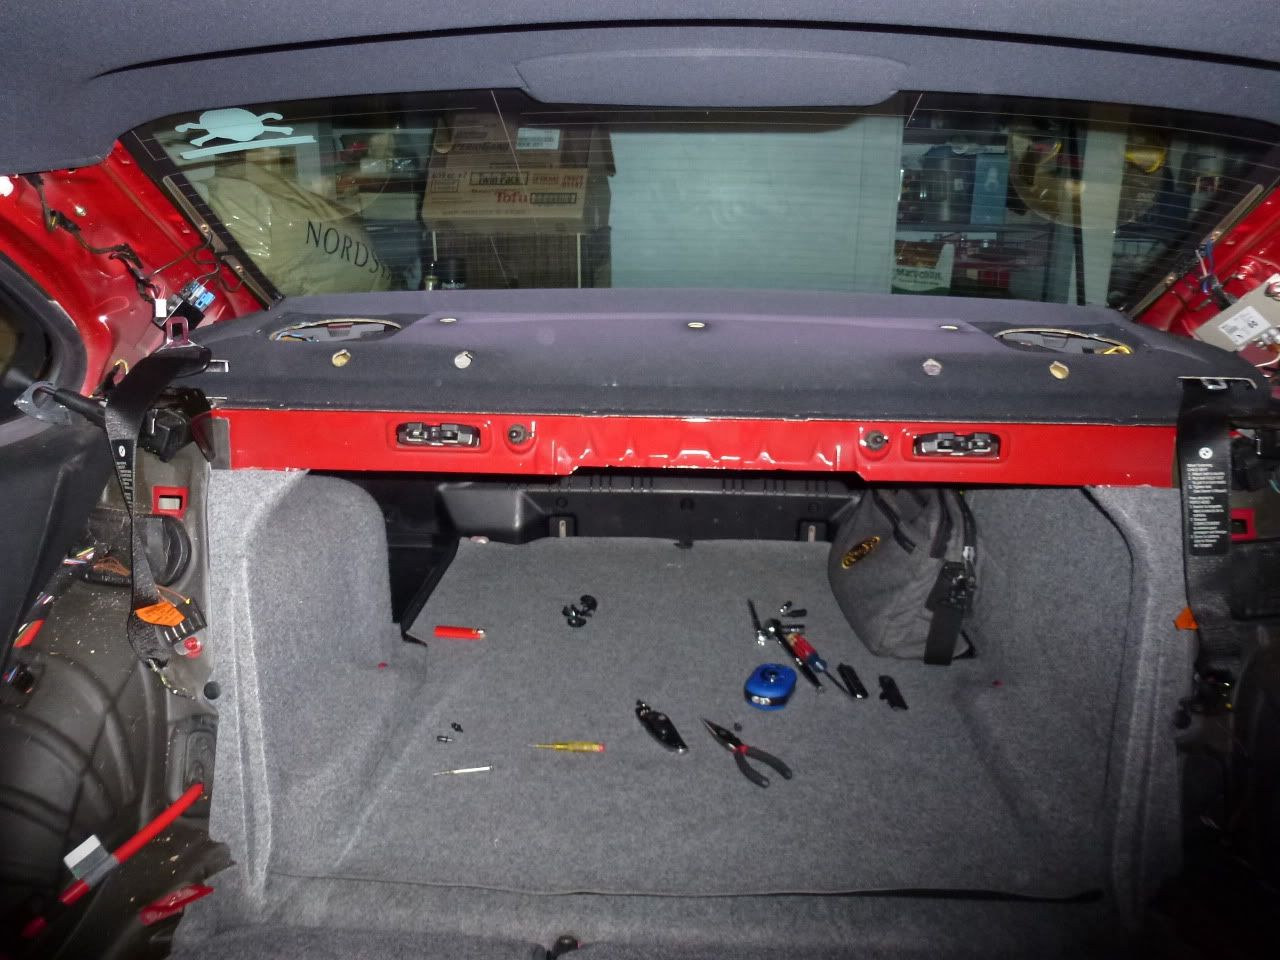
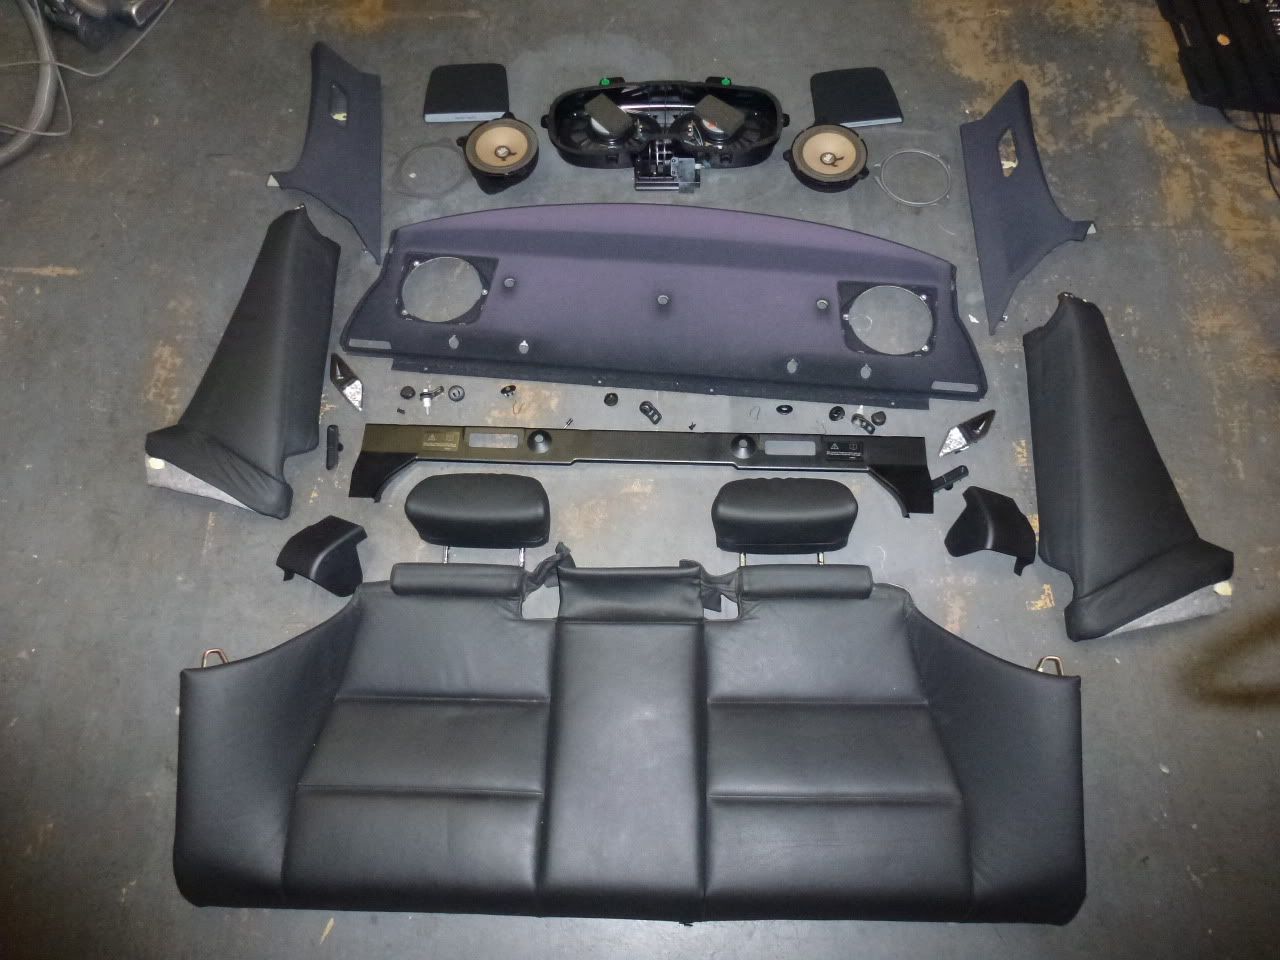
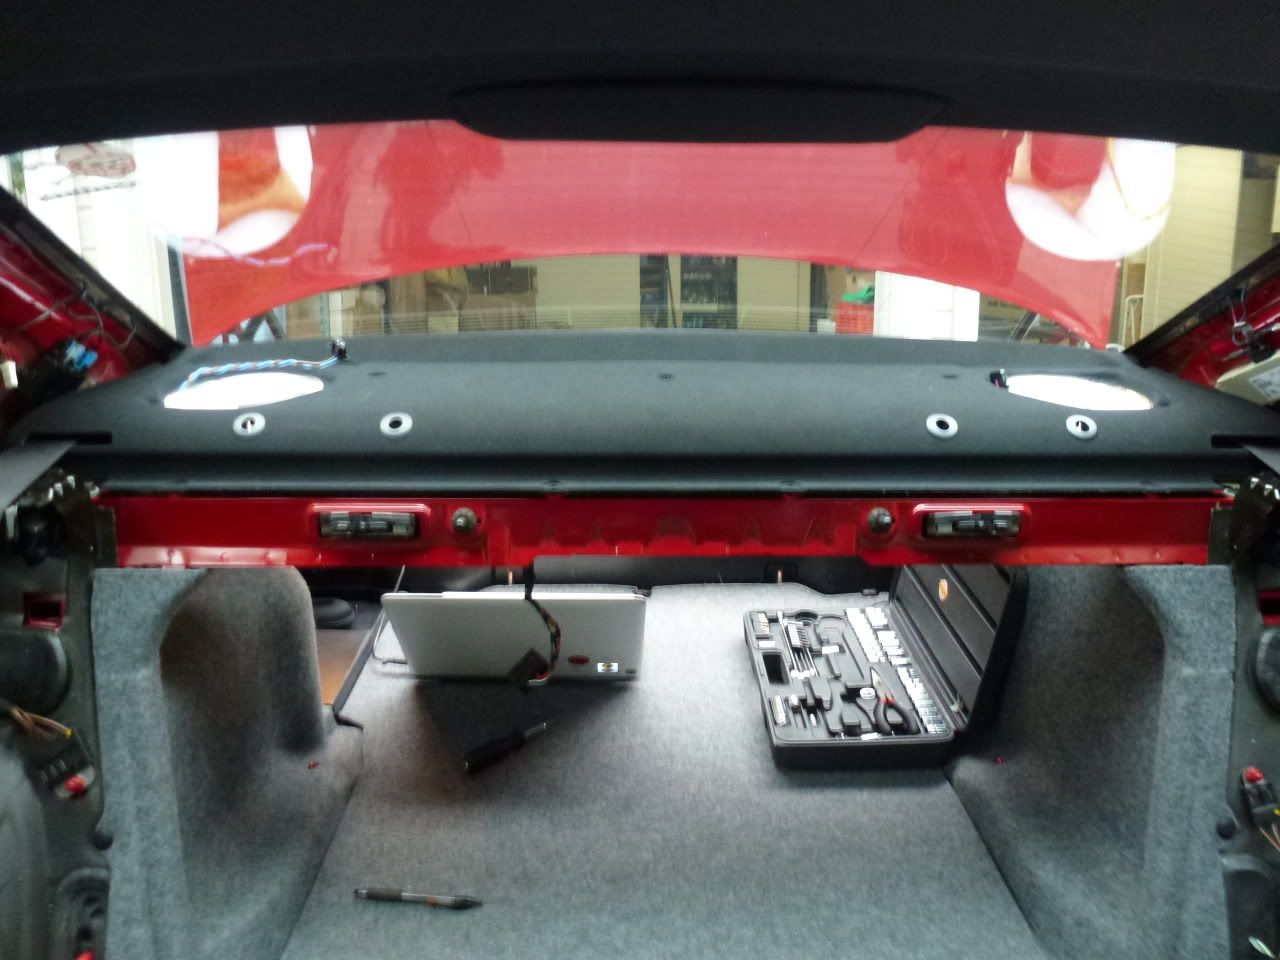
This is what you should have out of your car so far:
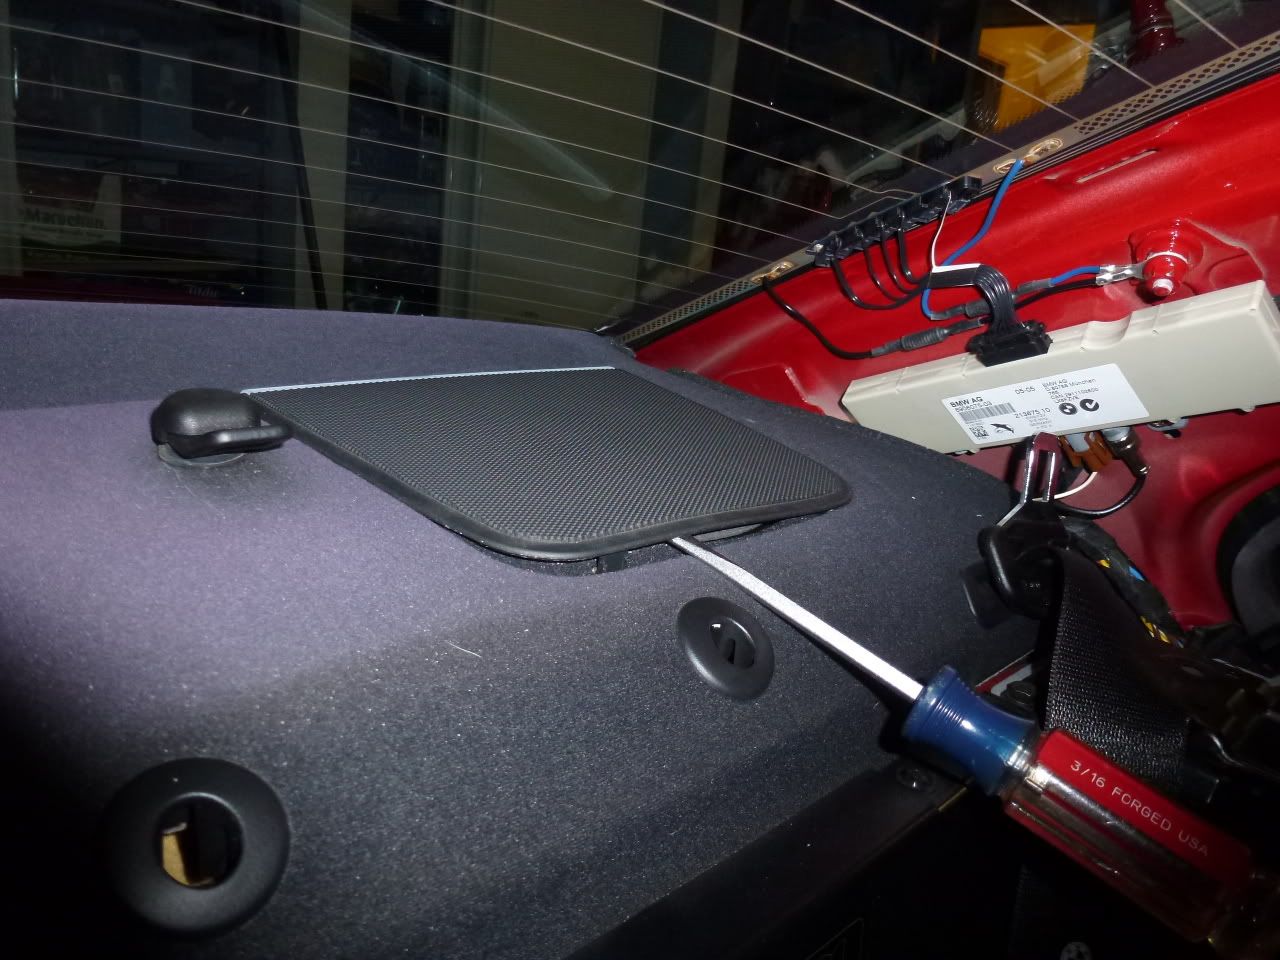
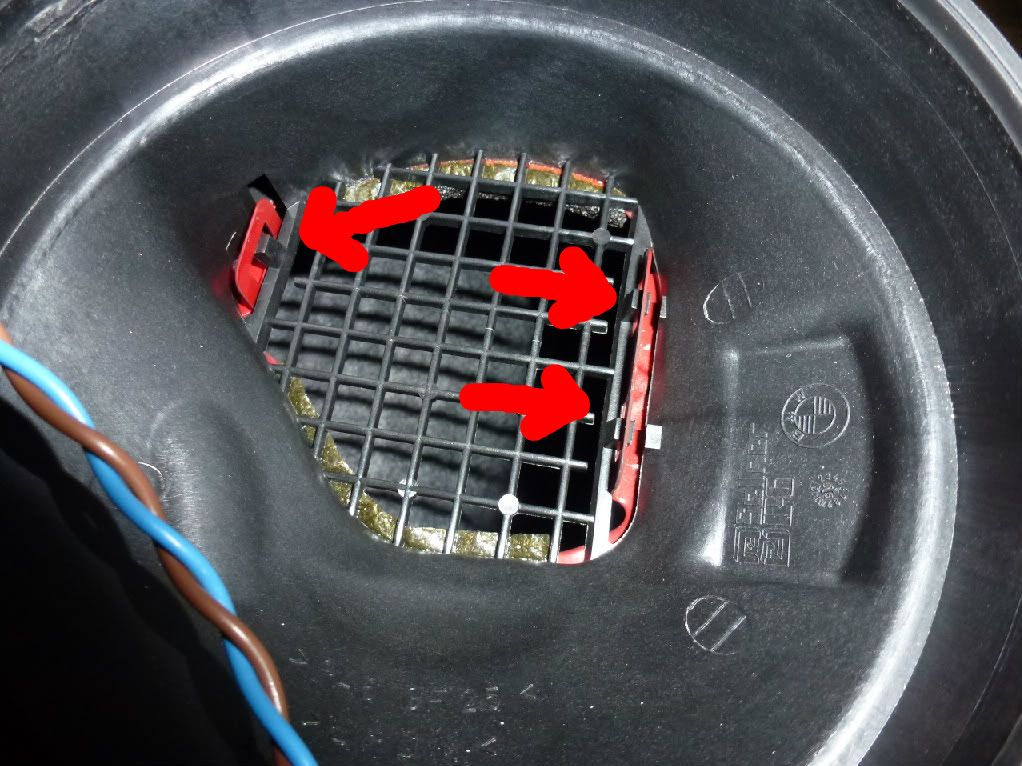
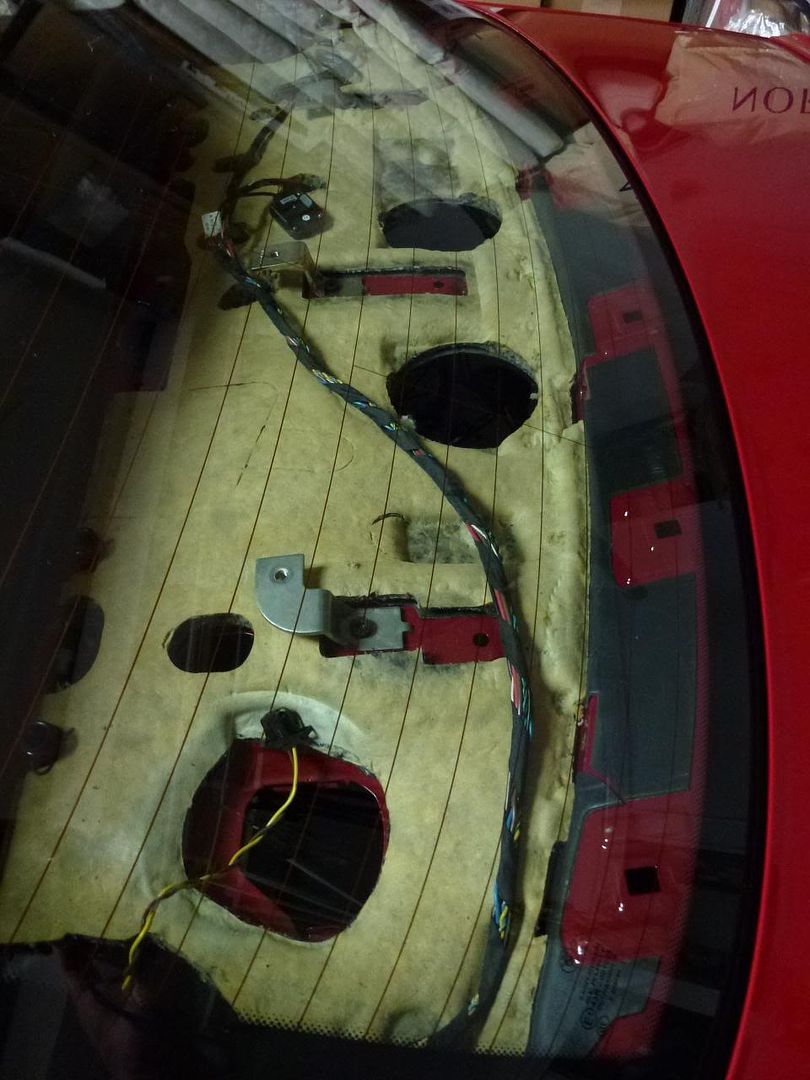
STEP 8: REMOVE GRID
This one is held in by 4 screws. Use 7mm socket to remove.
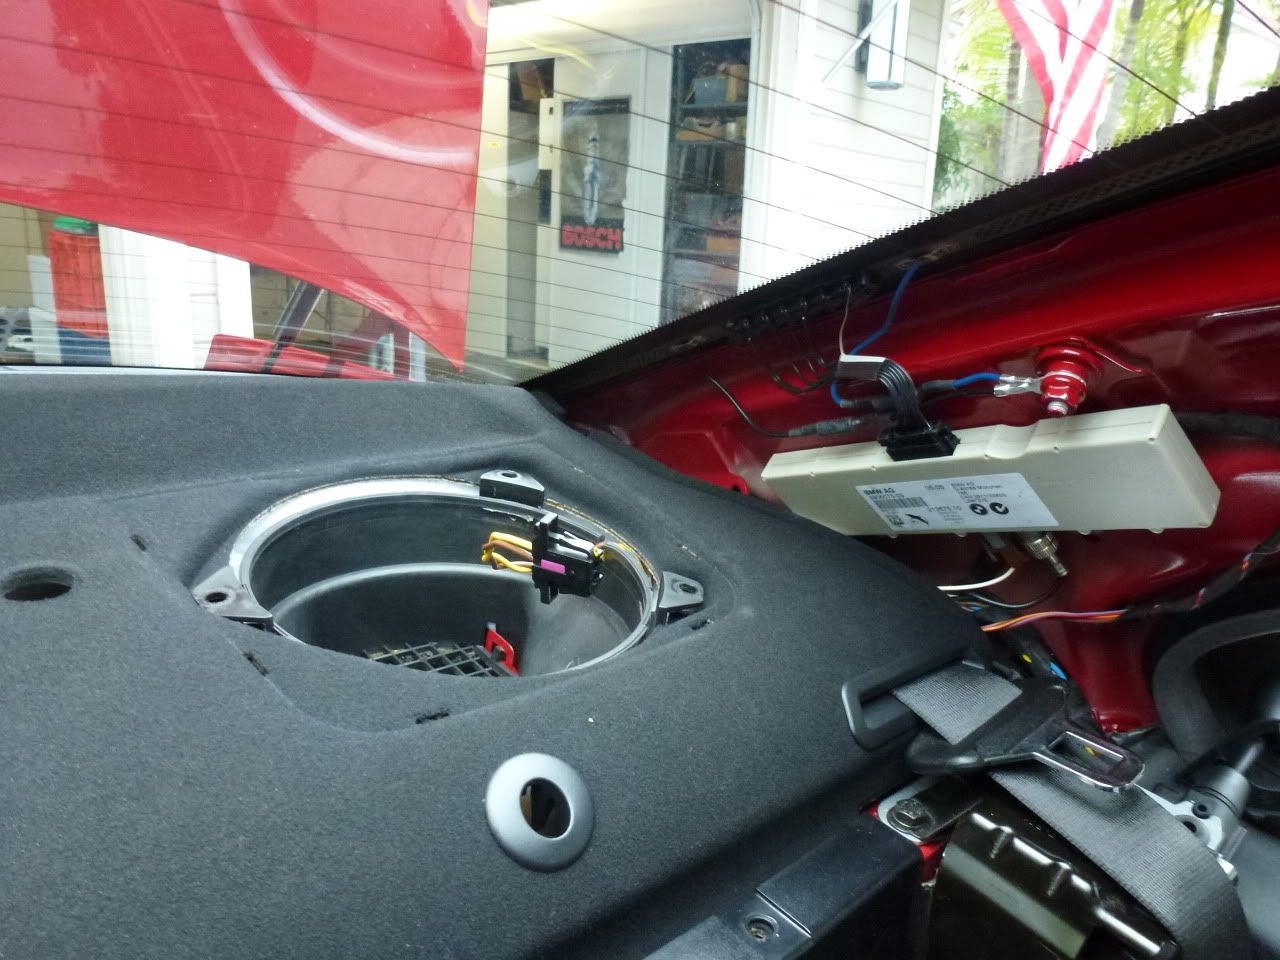
Before you can pull it out completely the nav antenna needs to be unclipped. Just leave it on the foam stuff since it's wired in.
OK - so now everything is out. At this point you may want to clean your car up a little as the back window is completely available. I cleaned it and put some rainx anti-fog while I was at this point.
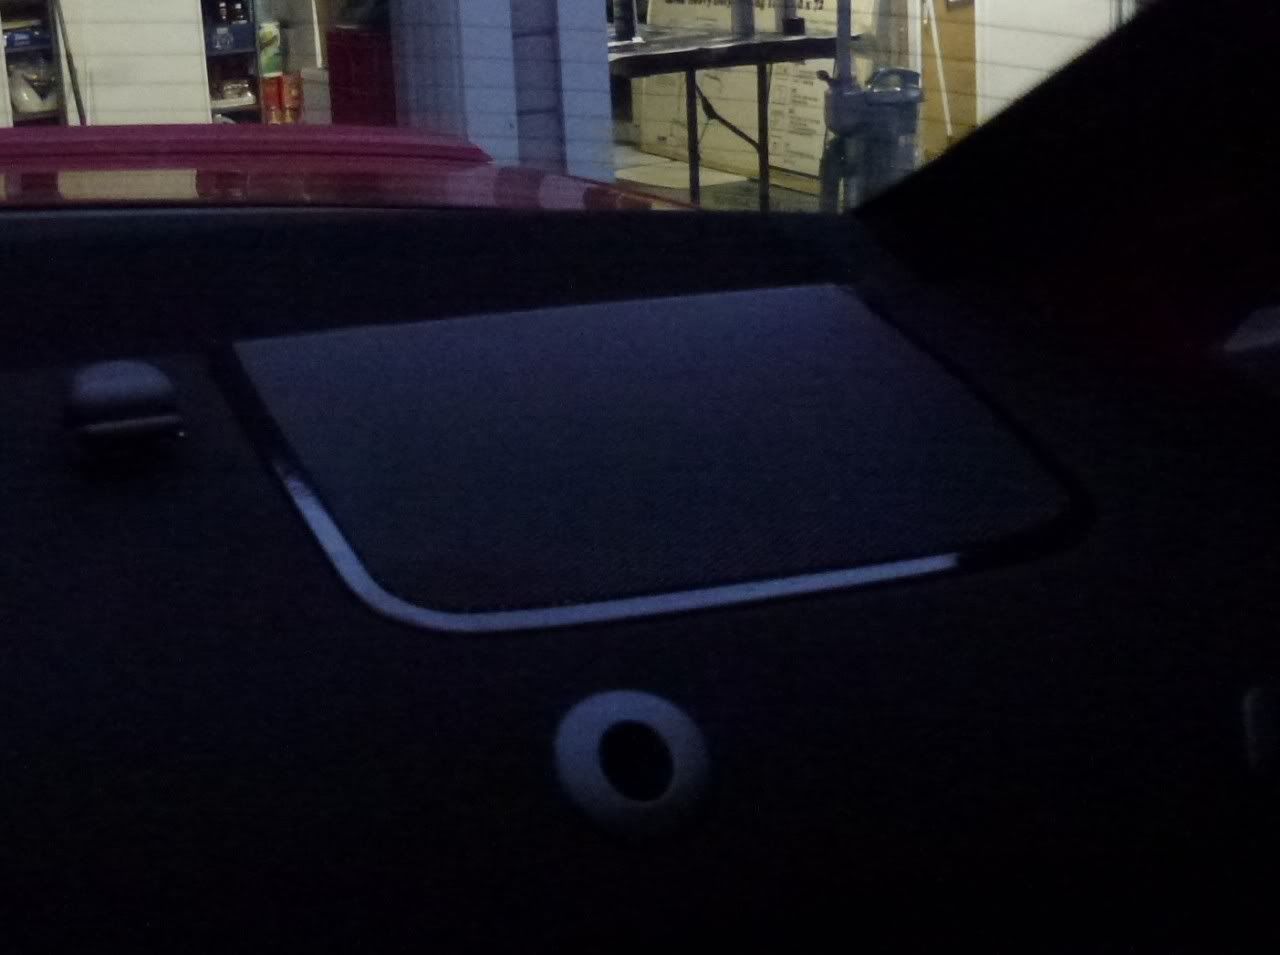
What your back shelf should now look like:
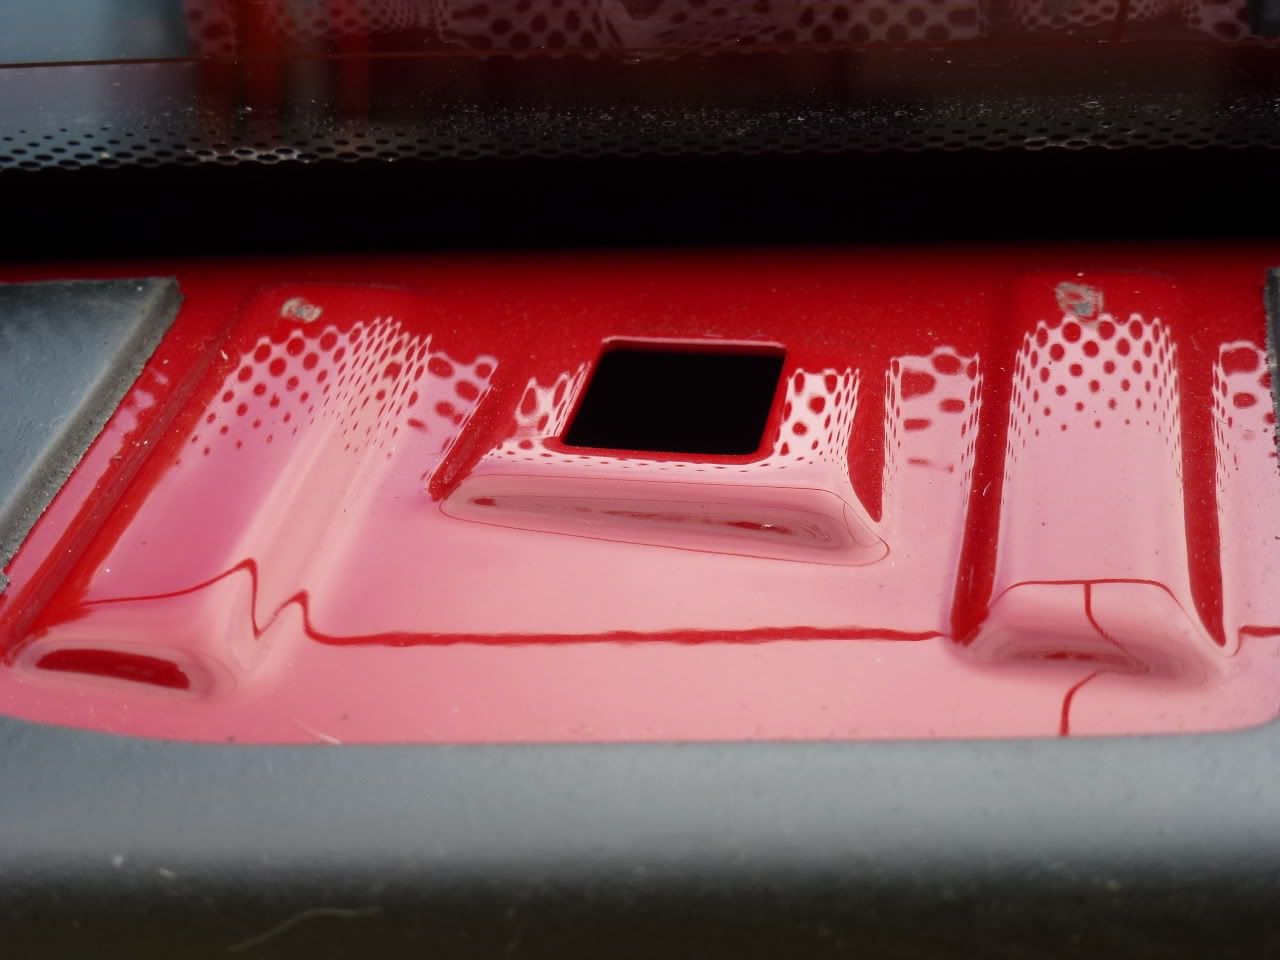
Ok, the thing with the tennis ball trick, stuffing t-shirts, etc., is they only try to solve one part of the rattle problem. Part of the problem is the grid that we just removed. If you see the point where it makes contact with my car, it has been there so long that it is actually rubbing the paint away, adding to the noise when I drive.
Now, for the repairs:
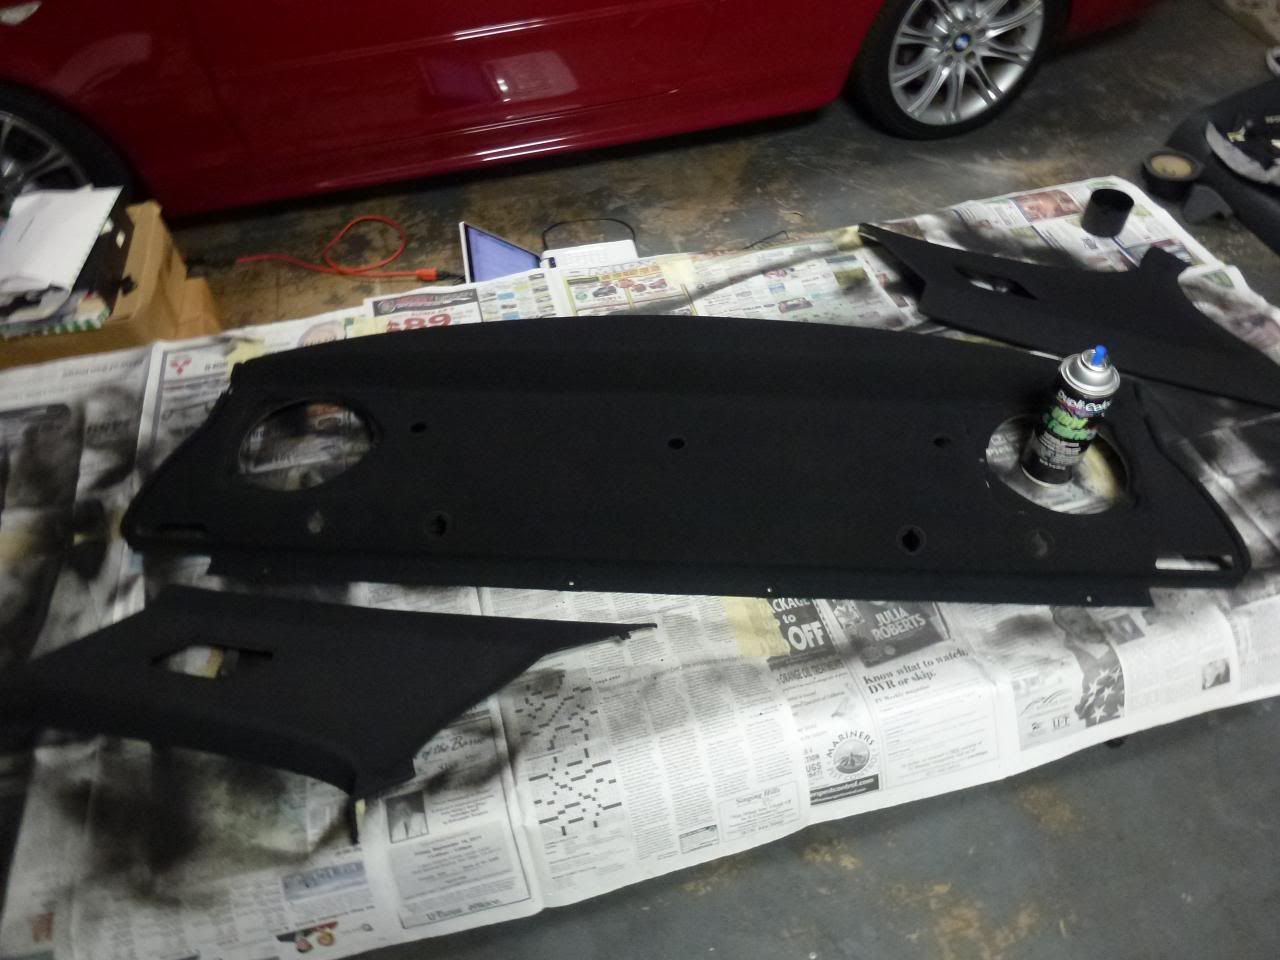
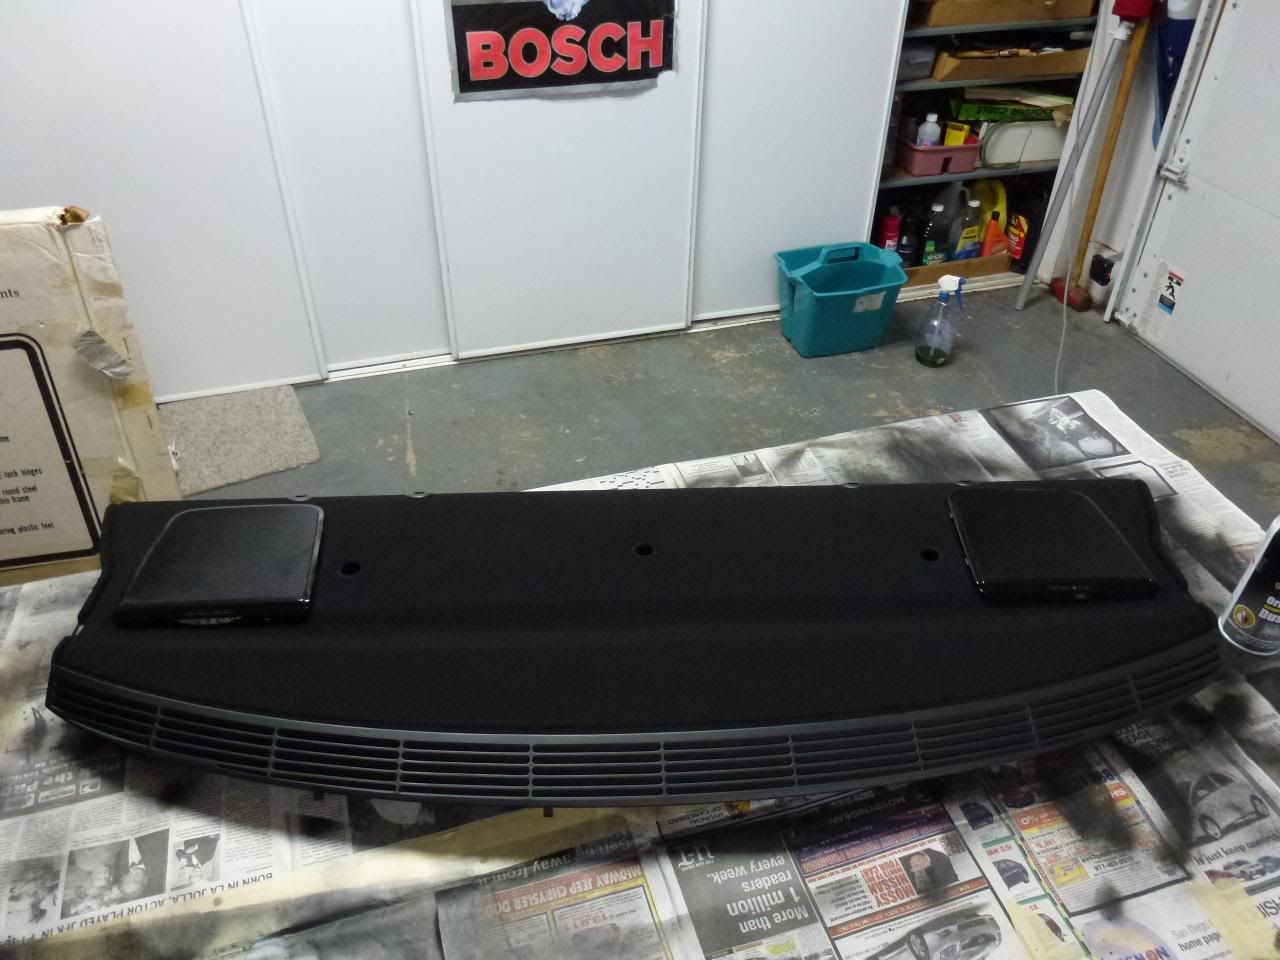
You might want to start with the painting of the shelf as that will take the longest time.
I used 1 can for the rear shelf and the 2 C-Pillars. I think that should be more than enough, just put a lot of thin coats and you should be good.
BEFORE:
AFTER:
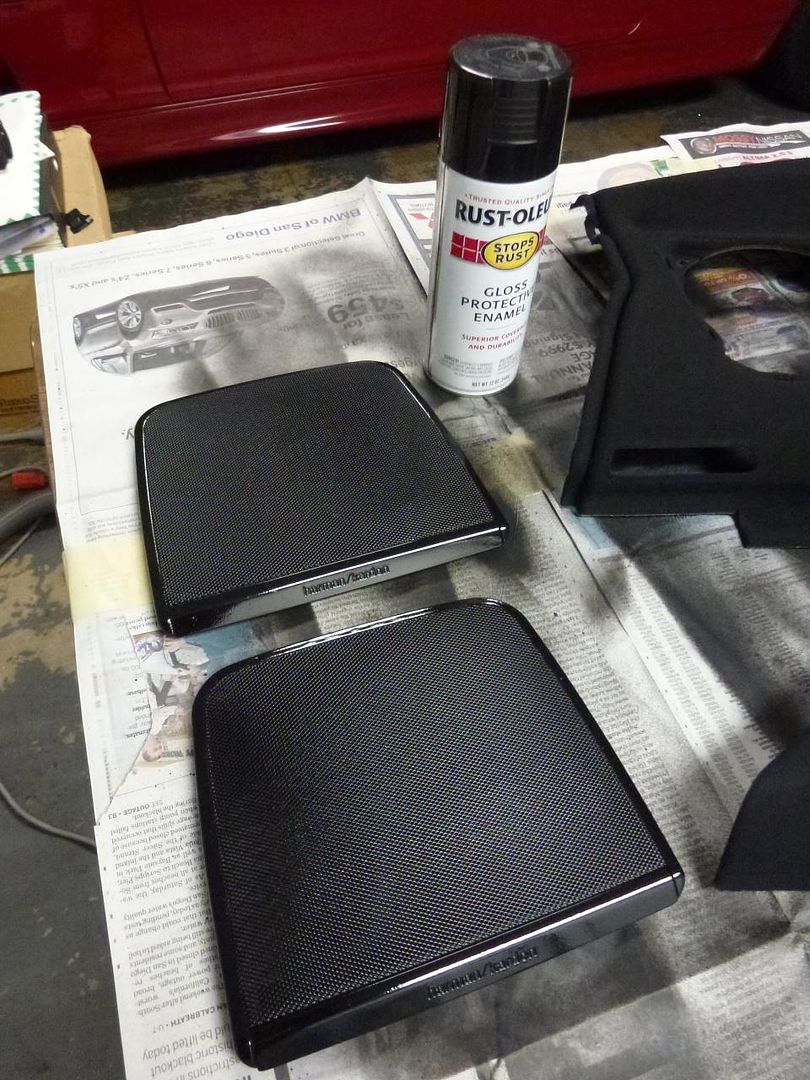
Earlier I mentioned the crappy state of my speaker covers, well I decided to use the leftover can of Rustoleum Black Enamel that I did my front bumper grid with to refinish them. I like how it turned out.
What it will look like in my car:
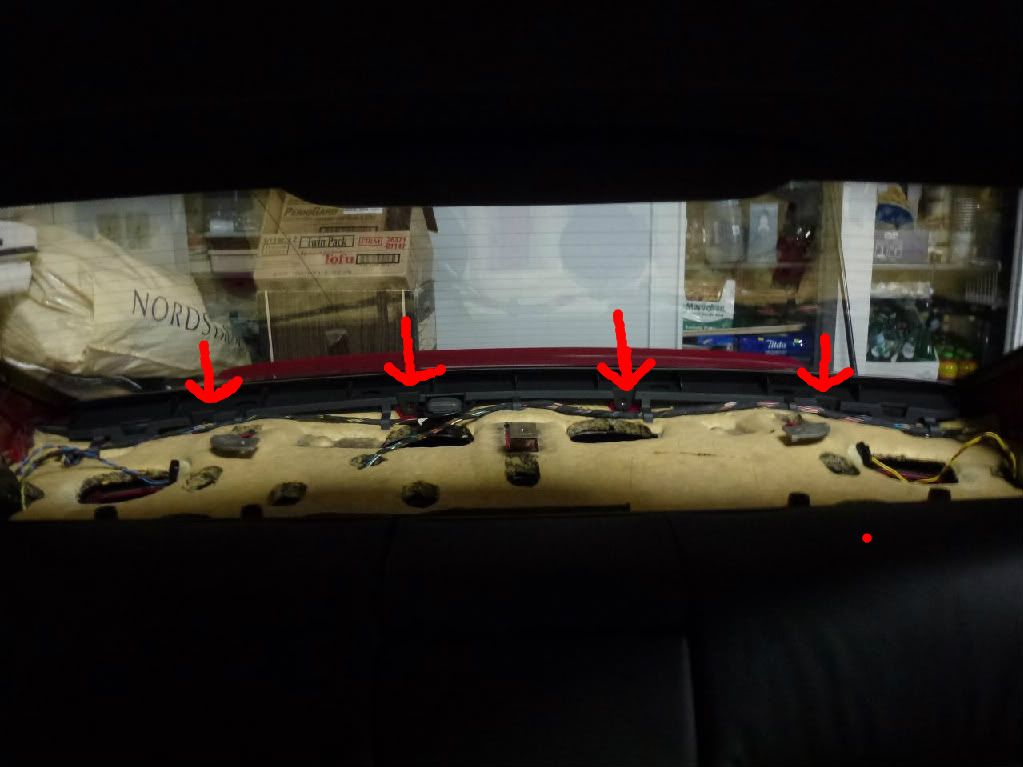
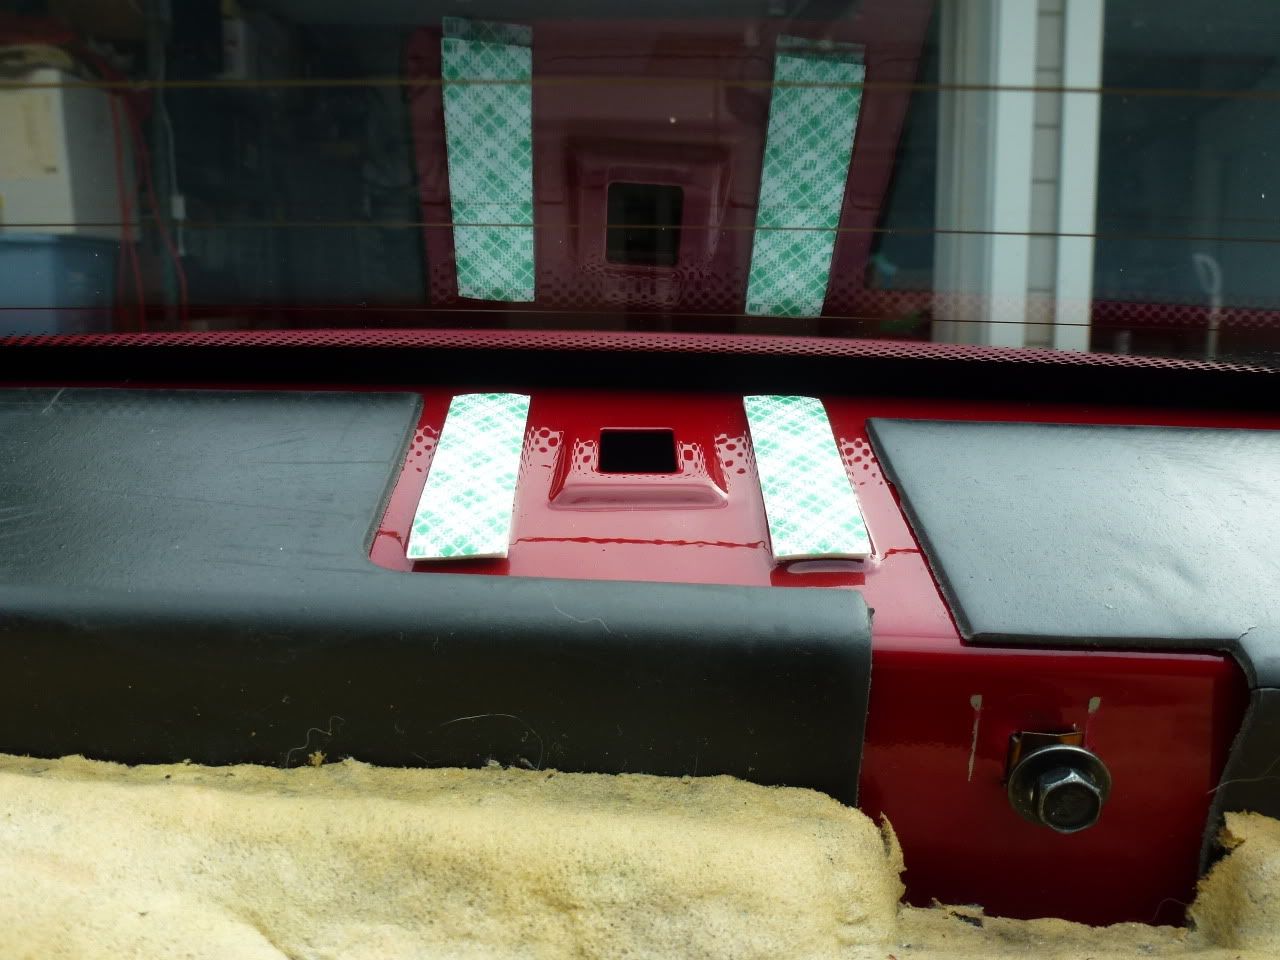
Now, back to the rattle... to fix the grid part of I used the double sided mounting tape but only used 1 sticky side. Cut small pieces and laid them out over the contact points for the grid.
there's 12 total strips you need to place
Now, reattach the grid (4 screws, 7mm socket). It's gonna be a little tough to wrestle in place now with the strips but you'll get it eventually.
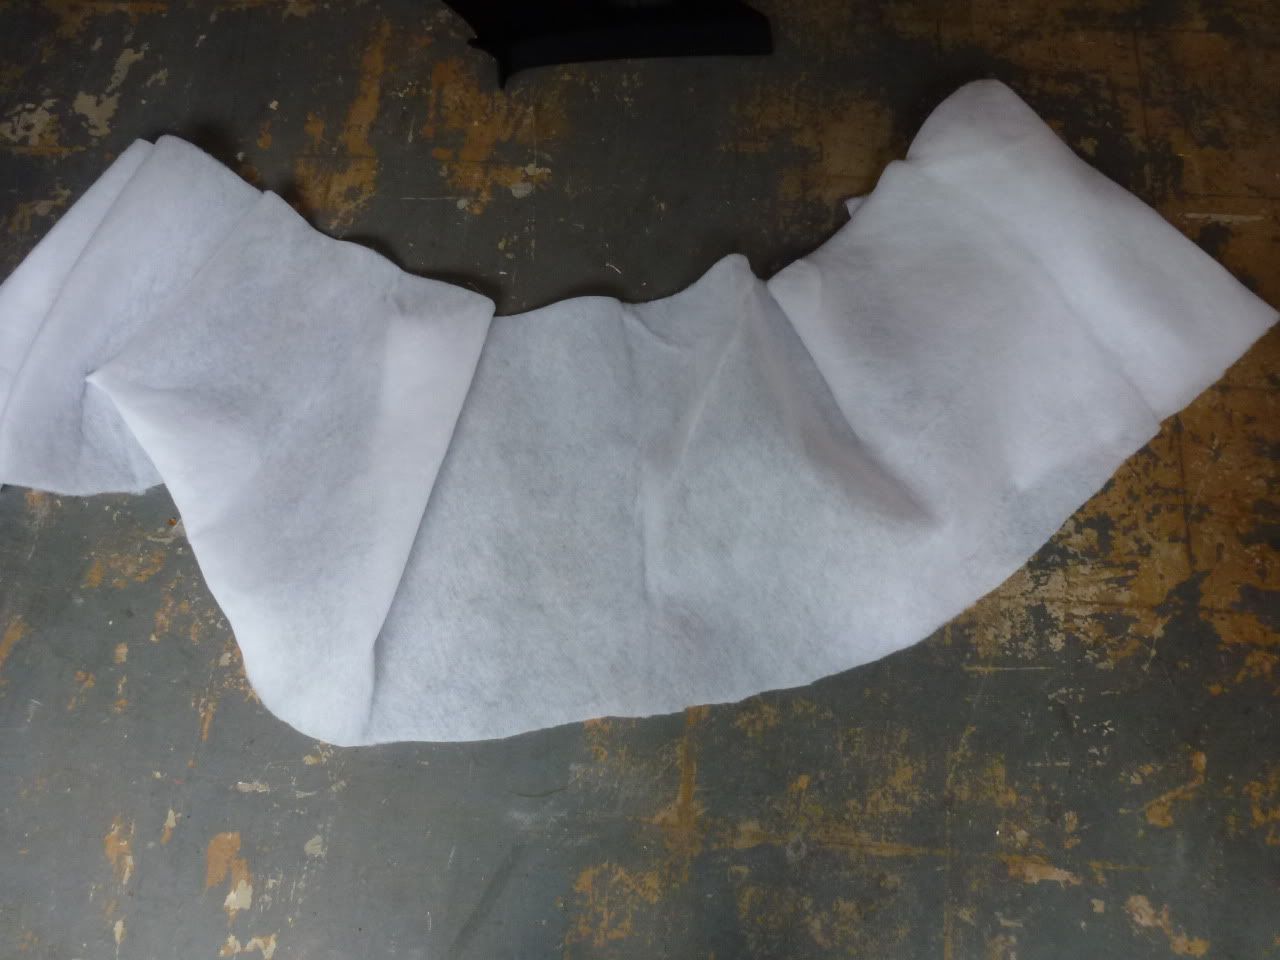
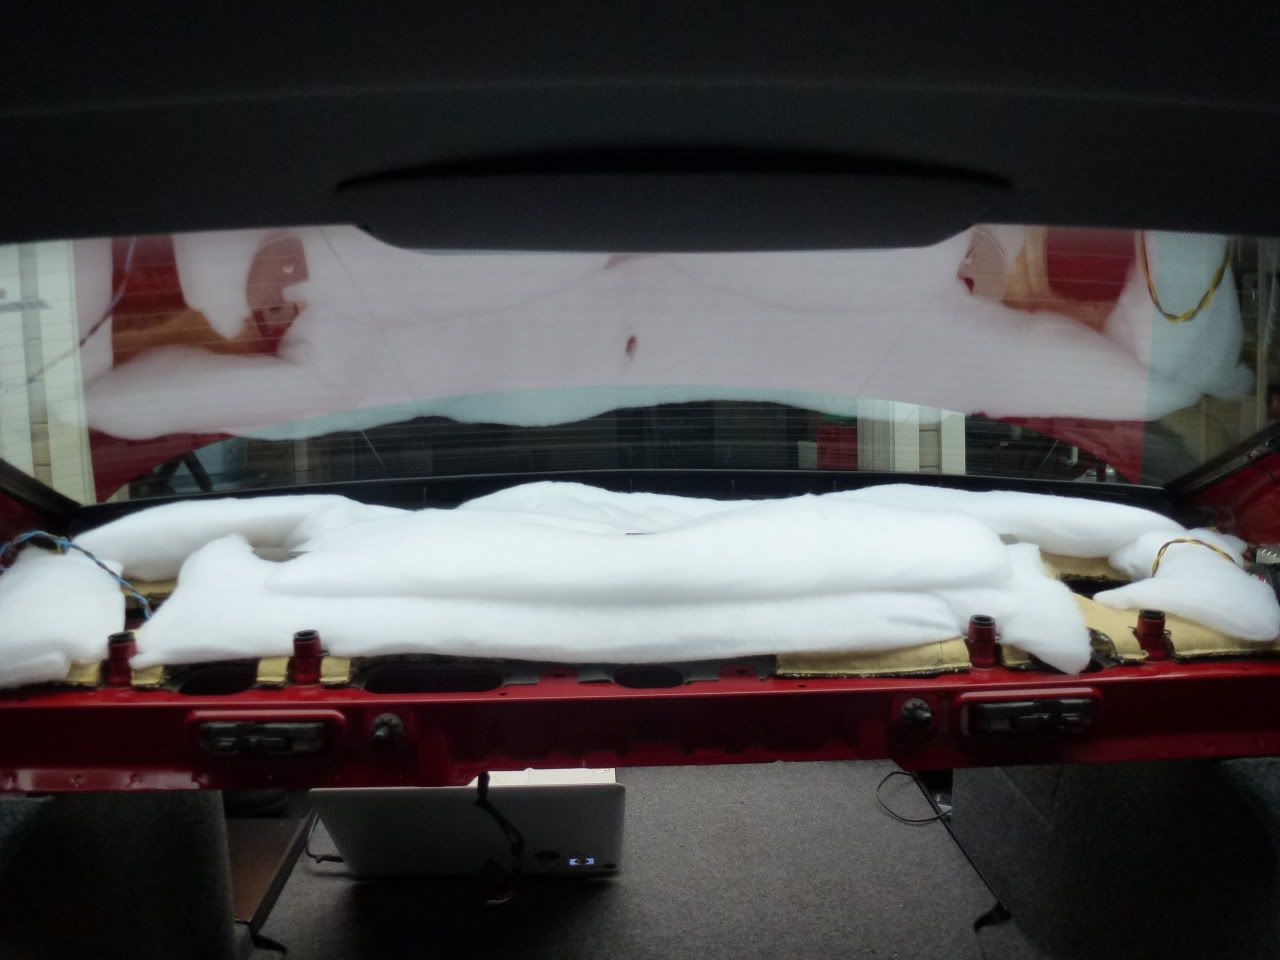
Next, we need to lay down something as padding to solve the major rattle. This is basically what you're doing with the tennis ball fix but we're going way more crazy with it. I used polyester batting from a quilt shop as my padding. (Like an idiot I bought a 120in x 120in piece so if anybody in the SD area wants to do this hit me up and I have some for you)
The solutions to the rattle:
Mine came in a huge yet thin sheet so I cut a stripe across the top and took it to the car so I could then cut what I needed for each spot.
Make sure you don't cover up the holes for the speakers and the spot where the screw attaches to the shelf (the one that was hidden by the sub). I folded and placed some until I got it filled up as much as I thought I needed. Mine looked like this after I thought it was ready:
Now it's time for the nice clean shelf to return.
Before:
After:
To put it back just do the opposite of how you took it out.
Now you put the black plastic piece back (Through-Loading Cross Member Trim from step 6)
Reinsert speaker basket and tether points
Reinsert speakers and speaker covers
It looks so much better in black...
Reattach Sub (I added a little padding inside the box. It might not make sense but this actually tricks the speakers into thinking they're in a bigger box)
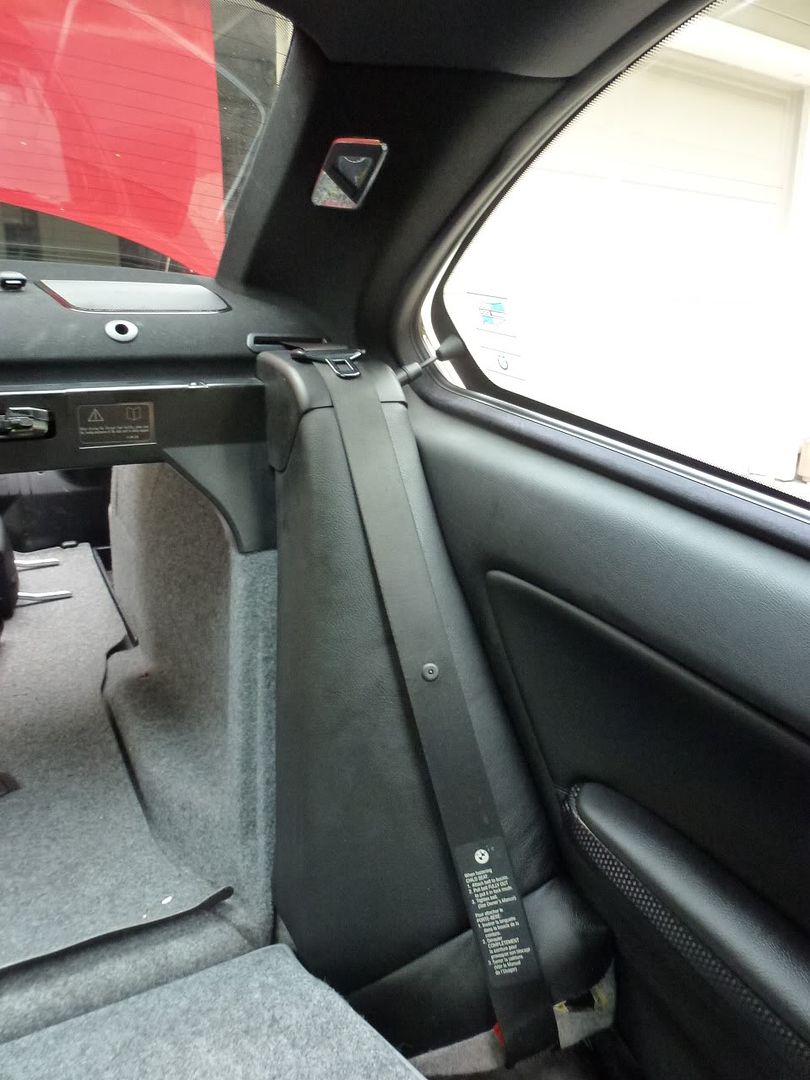
Replace C-Pillars & Lights, be careful how you put it in. It needs to slide in a certain way and also make sure you line up the clips at the top with the holes they go in before you push on them or you can crack them (even if you do they're only like $0.70 at the dealer but that means you need to go and get them).
I apparently didn't do it exactly correct at first as you can see in this pic, but you can just slide something in there to fix the other fabric. This pic also clearly shows the difference in color. I'm pretty sure the fabric is actually antracite but flat black works fine. Unless you're really looking you wouldn't even know.
Reattach seat belt
Reattach seat bolsters & plastic thing on top where motor for the window/seatbelt are.
**Two things with this last part, when you're taking out the bolsters you could crack the mounting point at the top and when you put it back you could crack the clip that holds it in at the bottom. Sorry I forgot to take a picture of the back of the bolster but you'll understand once you take yours out and look at it. As long as the top one wasn't broke you can probably just put the seat bottom in and that will hold it in place. I broke the bottom point on one of mine so I'm gonna have to make a trip to the salvage yard to see if I can find a donor car to get the plastic backing.
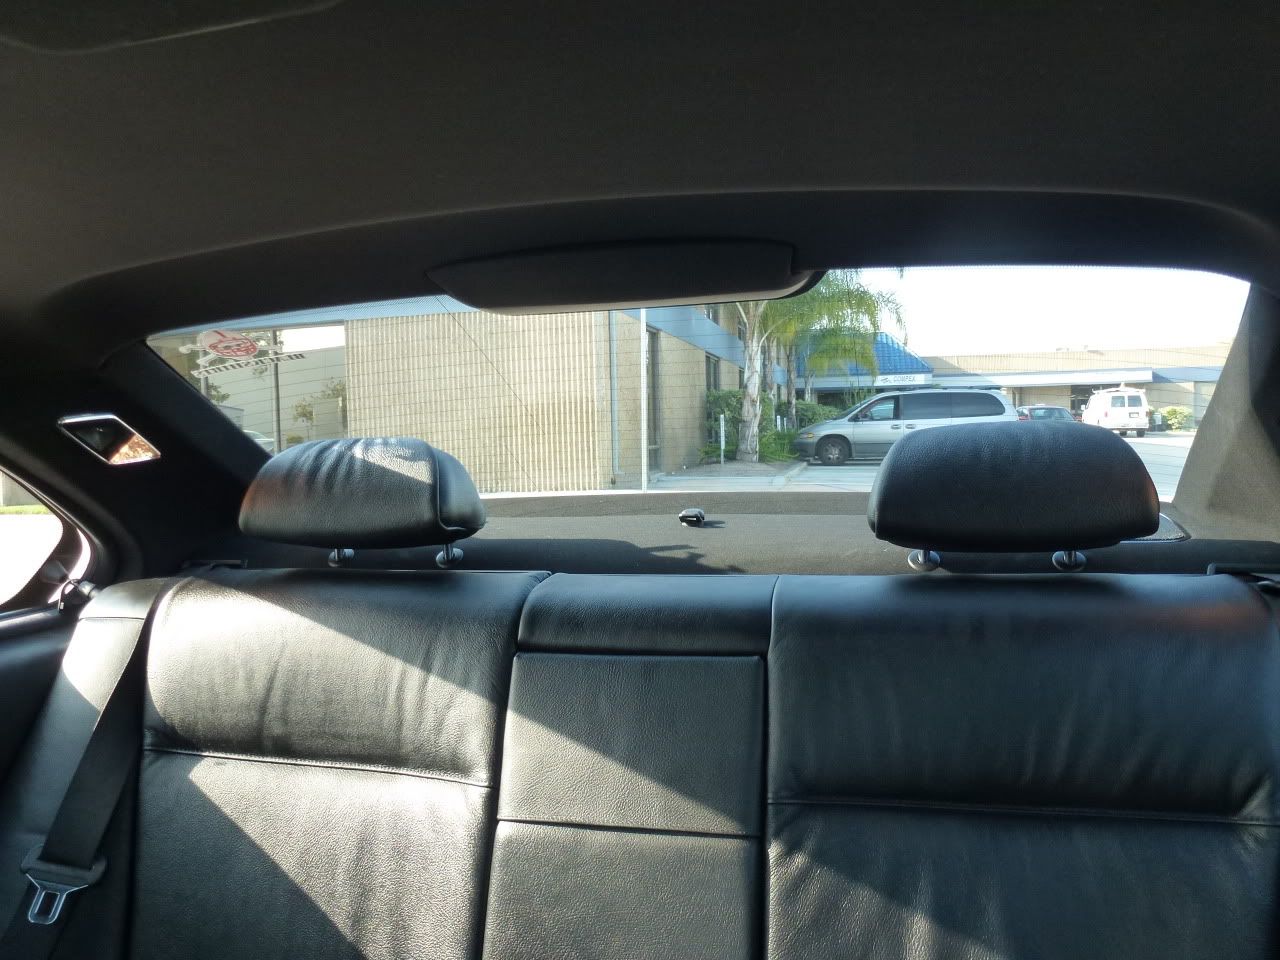
Put your seat bottom in the car and enjoy your rattle free stereo!
Final Results:


 Reply With Quote