Hello Group,
Thought I would share my experience using the Sylvania Headlamp Restoration Kit on a set of well worn headlamps, in this case from our 2004 Saab 9-3 with 120k. You do not need to remove the lamps from the car but I decided it would be easier to do on the bench (The kit includes tape to protect the paint).
The main benefit of this kit over the others lies in the final step of the process which is the application of a UV blocking clear coat paint. This is the same type of paint used on new lamps and does not require any reapplication on a regular basis - in other words it should (hopefully) keep the lenses looking like new for a long time.
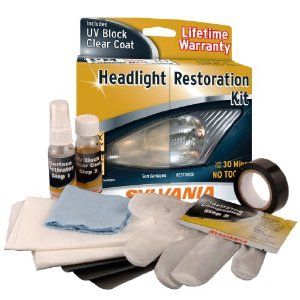
I sourced my kit from Amazon (*plug* click through the ZHP Mafia link on the home page to support the site!) for ~$23.
The kit includes everything you need except some water for the wet sanding and rinsing in between steps. Here are some details of the kit:
a) 400, 1000, 2000 Grit wet sanding paper - each sheet large enough to cut into 4 squares
b) Tape to protect paintwork - The tape in the kit is essentially 3M electrical tape so if you desire to tape a larger area you can easily source more tape from any big box or hardware store.
c) Surface Activator - essentially a deep cleaning solution to remove imbedded dirt
d) Clarifying Compound - a fine polish used after wet sanding to even out remaining minor scratches and provide an even finish
e) UV Block Coating - this is a thick-ish clear paint that keeps the plastic protected from UV, which keeps the lenses from yellowing again.
f) Applicator towels for the Clarifying compound and UV block coating (large enough to be cut down to more manageable size)
g) Latex gloves - to protect your hands during the application if the UV block paint
I would also recommend that you get a spray bottle for water to help keep the pieces wet during the wet sanding process. A garden hose would work equally well if you are working in the right environment.
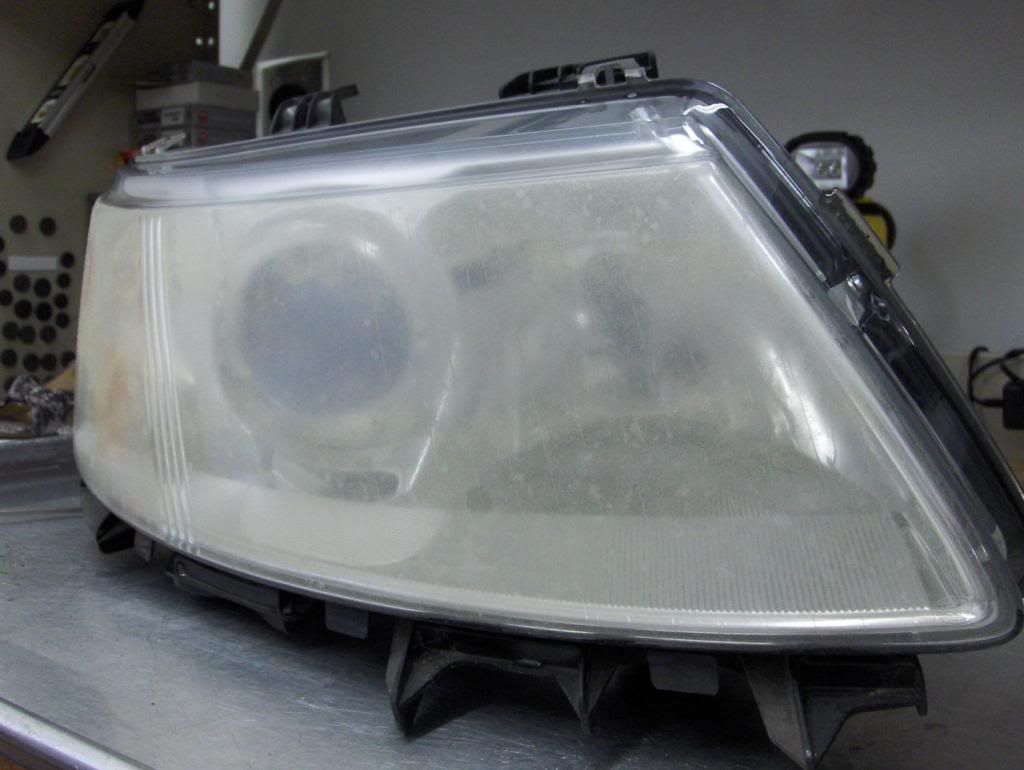
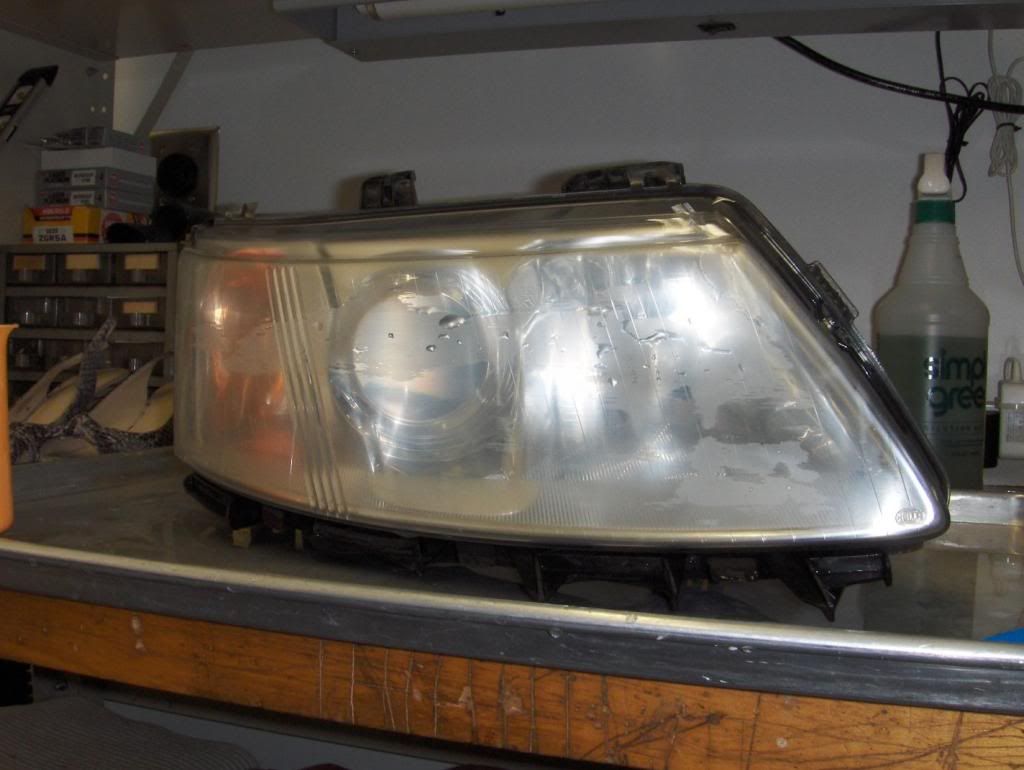
This is what the lamp looked like before the process - note how cloudy and yellow the lens was from UV degradation.
The first step is applying the surface activator to deep clean the plastic - if you look close, you can see the run-off is brown colored from all the dirt.
Here is where it starts to get serious - use the 400 grit sandpaper to remove any remaining old paint and begin to even out the surface. I soaked all of my sandpaper in water to soften it up before use and made sure to keep the surface very wet while sanding. I tried to keep my sanding motion in straight lines working from one side of the lamp to the other and top to bottom. This picture is after using the 400.
More sanding this time with 1000 Grit. Again, this picture is after using the 1000.
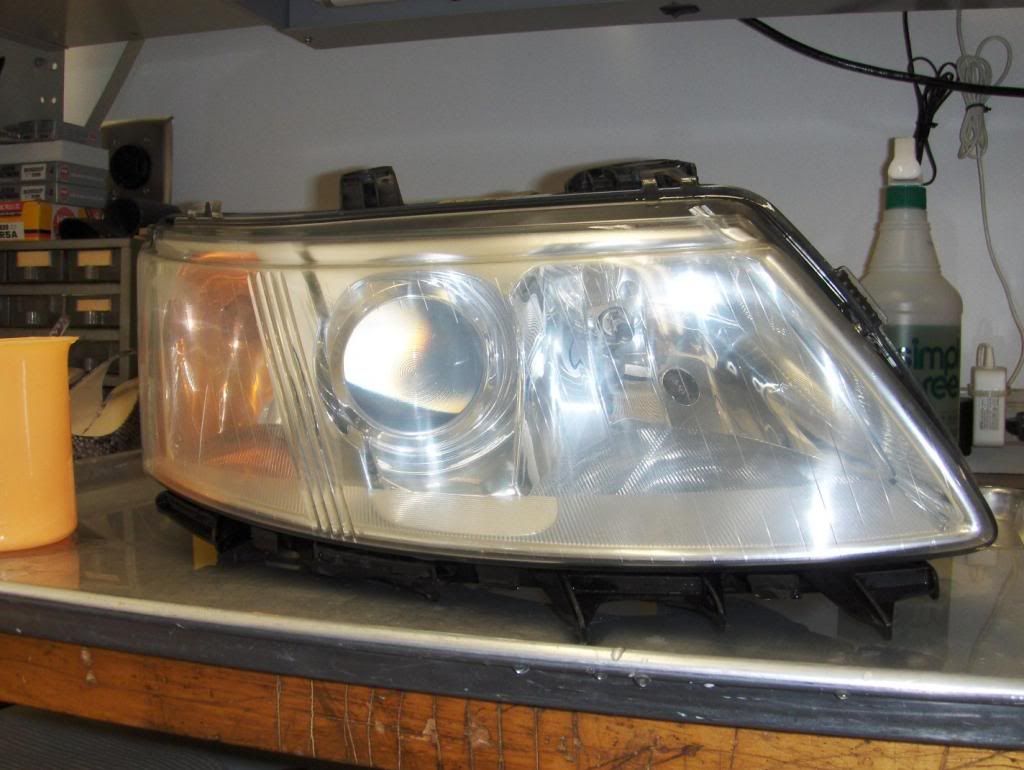
One more sanding step with 2000 grit. The lens really starts to look good after this step.
Once you are done with sanding, you need to apply the clarifying compound to the lens using a small overlapping circular motion. The lens will look a little more cloudy after this step but any sanding marks will be evened out and the lens will have a nice non-directional finish.
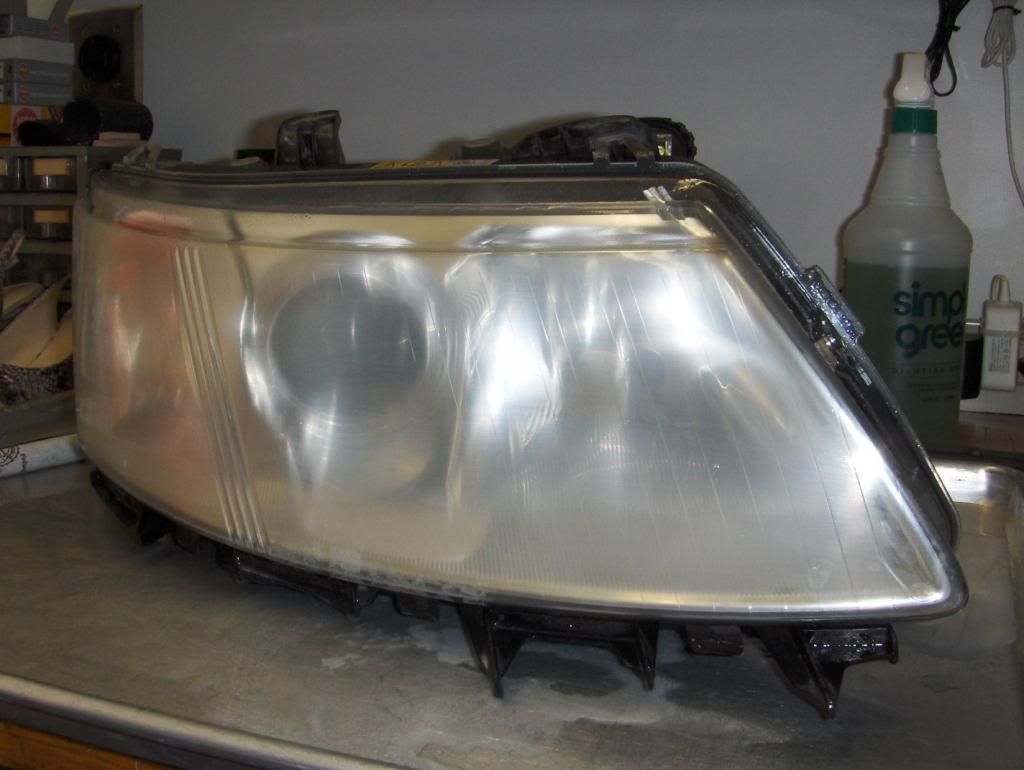
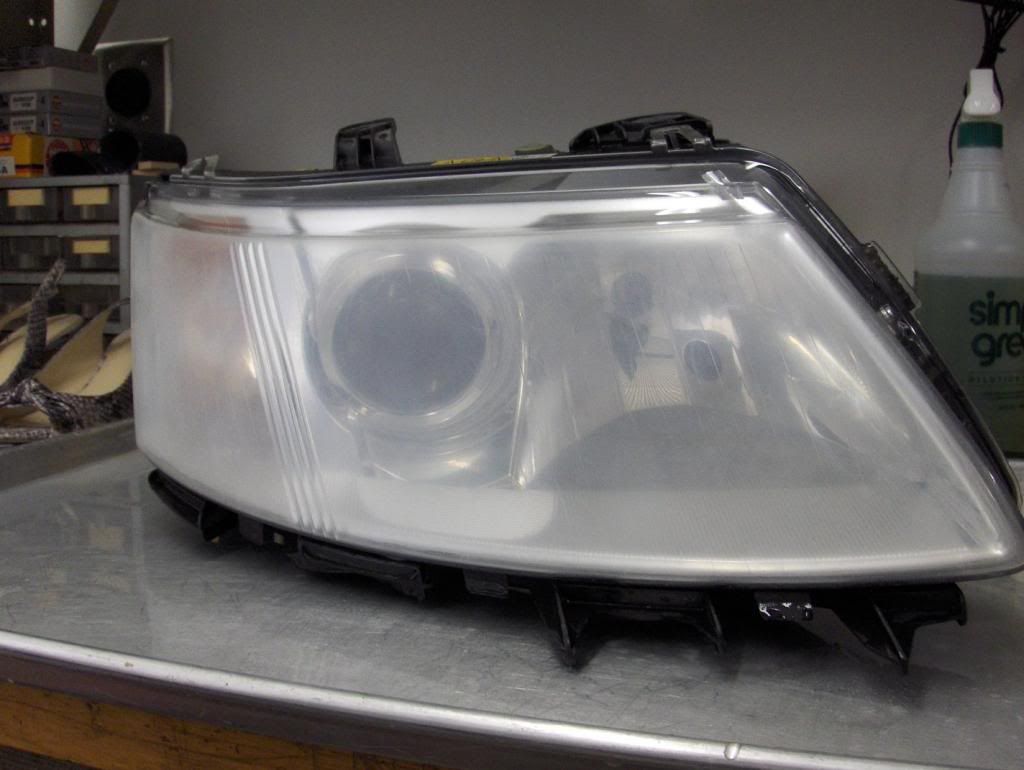
This picture was taken after the application of the UV Block clear coat. As you can see the lamp looks almost as good as new. This step is a little nerve wracking because you need to apply the coating from one end of the lens to the other in about 1 inch increments. Each pass must *just* overlap the last to prevent lines in the paint. Once you do a few passes it gets easier and if you goof up, just quickly go back over the entire area until it looks right.
This is the other lamp after it was done.
So this is not as easy to use as some of the other kits on the market but I think it provides better results - I have tried the Turtle wax kit and the Mothers kit on friends cars and the clouding comes back after a couple of months even with the application of their special waxes
BTW - the lamps have been on the car now for several months and several thousand miles and so far they still look as good as the pictures. Hopefully they will stay this way for a long time!
Hope this was not too long winded and helps someone get their lights looking and performing better. I would be happy to help add more detail, etc. if needed.


 Reply With Quote