This DIY is for people that want an Oil Pressure, Oil Temperature, and Voltmeter (or gauge of your choice) installed in their car that looks factory, works properly, has an extra pressure warning light (optional), and have the time to do it. Can only be done on cars without Navigation (unless you find somewhere else to mount).
If you want an easy way to do this I would recommend LeatherZ's Complete Gauge Kit. The main downside's to the LeatherZ kit are: Oil Temperature reads low and the Insert (IMO) looks cheesy.
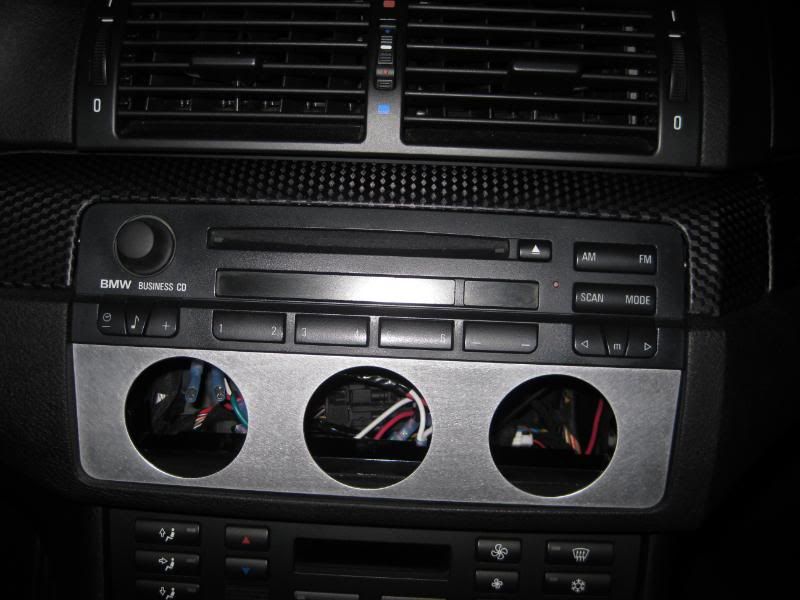
To start, there are TWO mounting locations to choose from - Option one is where the HVAC Controls are located (What I did, requires an extra piece & modification to an existing piece) or Option two which is where the Sunglasses Storage is. If you decide to mount where the HVAC controls are you will need BMW Part Number: 51167001408 (Single Row of Buttons $92) OR 51168202186 (Individual Buttons $49). By selling your old carrier & associated pieces you can get out of this costing only a small amount. Please note the Above P/N's are without Smokers Package. You simply replace the Carrier piece with the new Piece and move the HVAC down. If you mount where the Sunglasses Storage is you don't need to change anything.
The next step would be the gauges and everything associated with them. "The" place to order is from www.egauges.com. You will need the following Part Numbers: 310-106 (Oil Temp Gauge), 323-092 (Oil Temp Sender), 350-104 (Oil Pressure Gauge), 360-007 (Oil Pressure Sender), 332-103 (Voltmeter Gauge), & 600-402 (Mounting Kit x3). Total Cost is about $180-$185 shipped.
Wiring & Connectors can be bought from your local hardware store. I bought 4 different colors of 25-Foot 16 Gauge Wire (~$12) and 24 Female & 24 Male 16-Gauge Insulated Connectors (~$8).
Last you will need a piece of aluminum at least 10"x2.5" (~$5).
This leaves us at about $205. The final cost is machining, painting, and mounting the aluminum piece. A local shop charged me $50 to machine my aluminum piece and they did an excellent job. I have a printable template you can request that will fit perfectly in either location. A can of Plasti-Dip will cost you about $7, Super-Glue about $3?, and small plastic slab about $5?. So, final cost is about $270 - saves you $35 over the LeatherZ kit if that matters, I spent quite a bit more trying to work this all out.
Alright, so let's say you've ordered/bought everything and replaced the carrier - or not. The first step would be to wire from the intake area to the center console. I can't remember how long it is but I think around 15 feet. I would recommend wrapping the entire wire in electrical tape to keep them together and looking factory. I used a red wire (temp), green wire (pressure) and white wire (warning light) wrapped in electrical tape. Take note the red (temperature) wire will be longer because it will be going down to the drain plug. The wire starts at the intake area:
Goes around the strut tower and through factory plug (drill it out):
Through the clip thing above the engine.
Then over the passenger strut tower and through another factory plug:
Through the firewall plug:
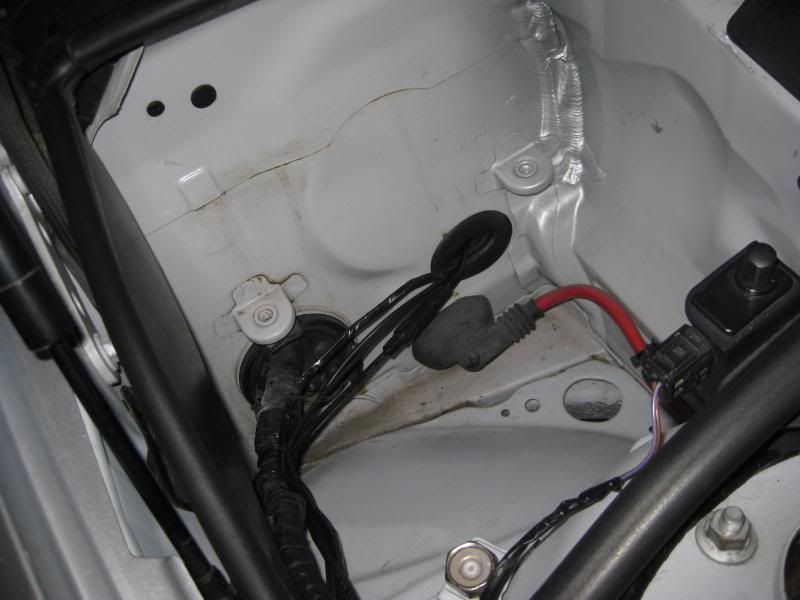
Into the fuse box area (must take out glove box to do this):
And routed out the center console:
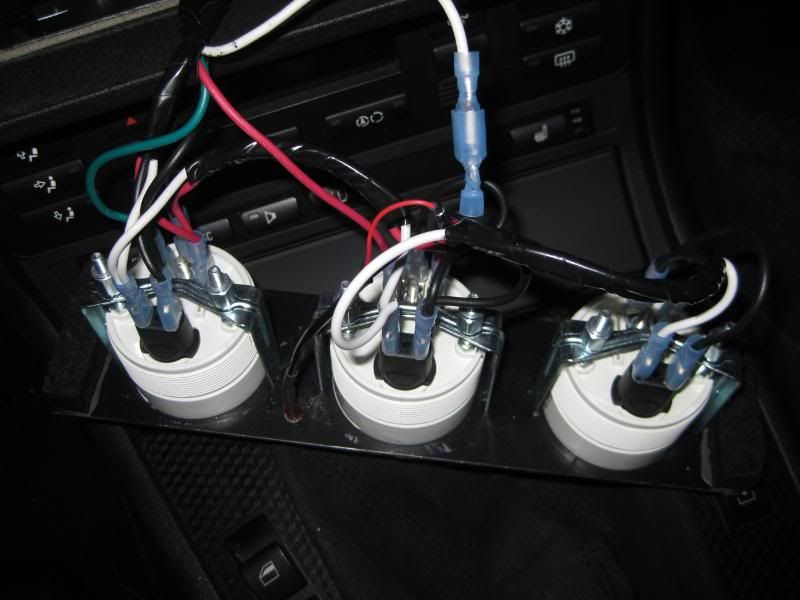
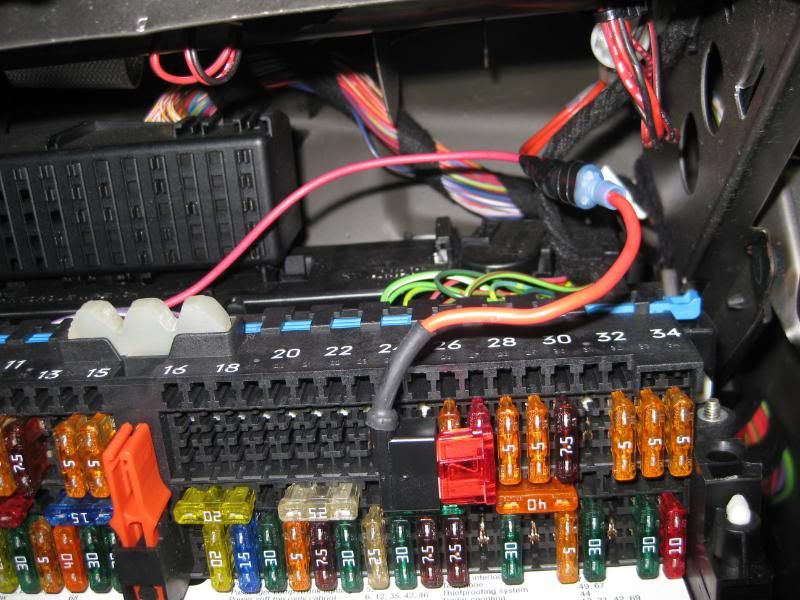
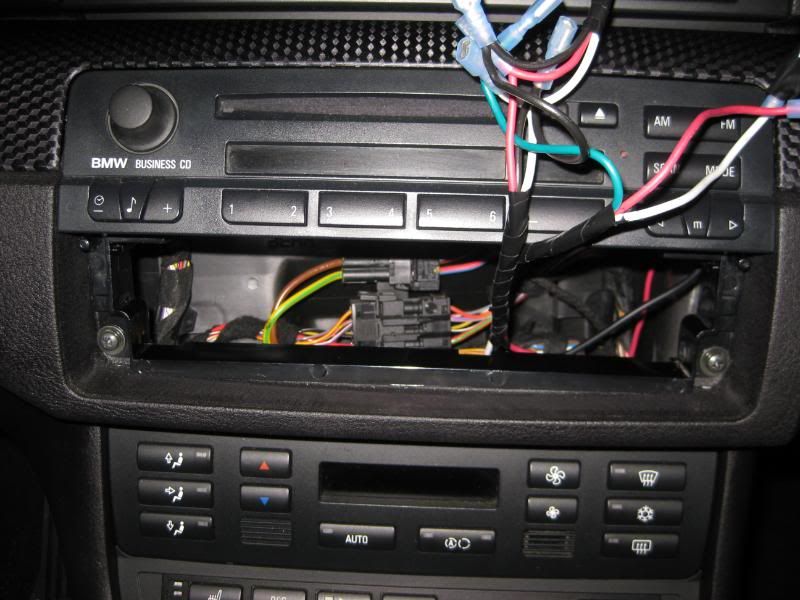
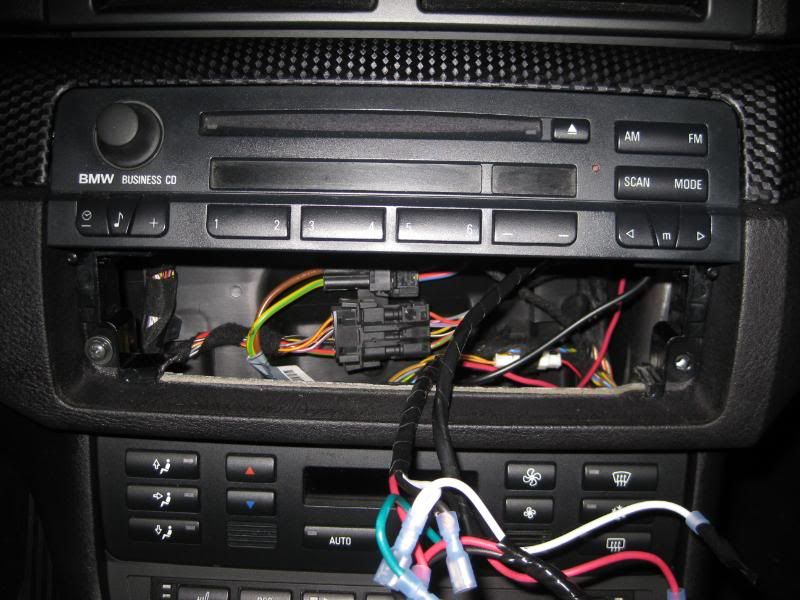
Now we can start the wiring in the car. This will require many connectors, lots of piggybacking, etc. The "S" on the gauges is where you plug in the sender, the "+" is where the positive goes, and the third plug is where the ground goes. The light's can go either way and take a ground and a positive. Switched lighting is tapped off from the ashtray lighting in the carrier, ground I tapped off of the cigarette lighter ground, though it's not the best place, and the 12V comes straight from the fuse box. The LED requires a resistor and goes to the (in my case white) wire coming from the pressure sender. Here's a picture of the final wiring and the fuse box wiring, sorry no pic for the cig lighter or switched light source (easy to find though).
Don't mind the wires going to the right, that's for my radar detector.
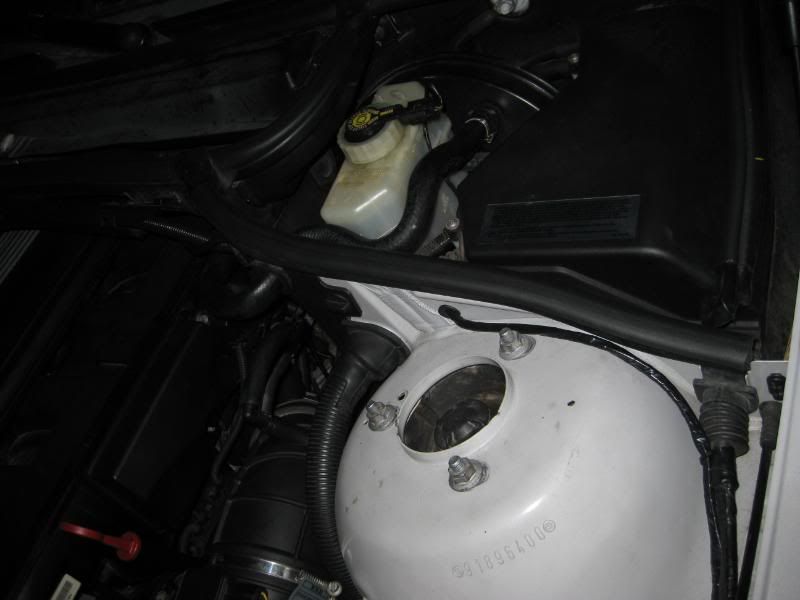
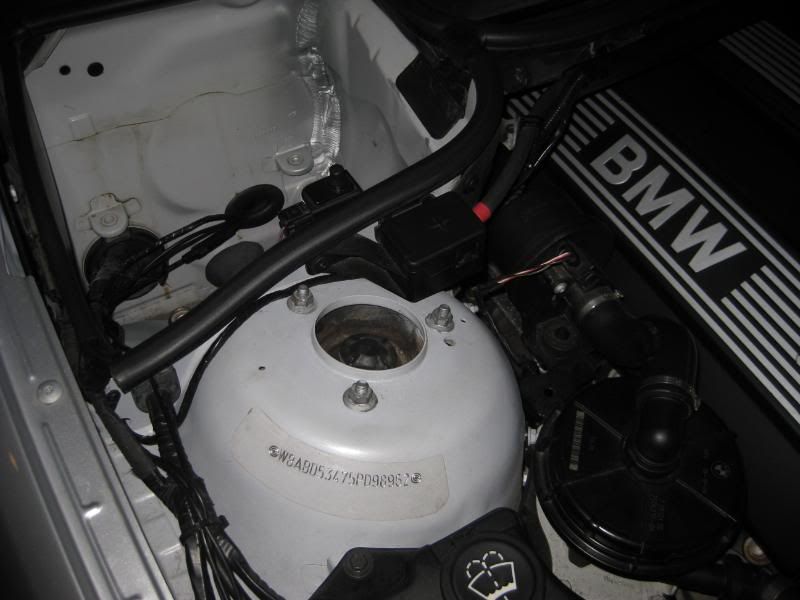
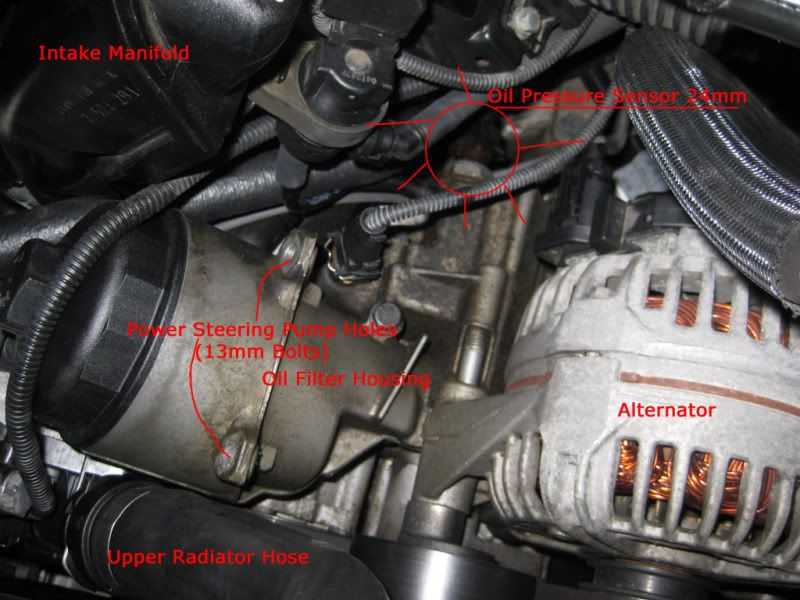
Alright, so let's say you figured out and finished all the wiring for the console, next step is to wire in the engine. First, you need to remove your intake and intake snorkel. You will probably also want to move the power steering pump out of your way and disconnect a couple wires (DONT FORGET TO PLUG THEM BACK IN) to get more room in there.
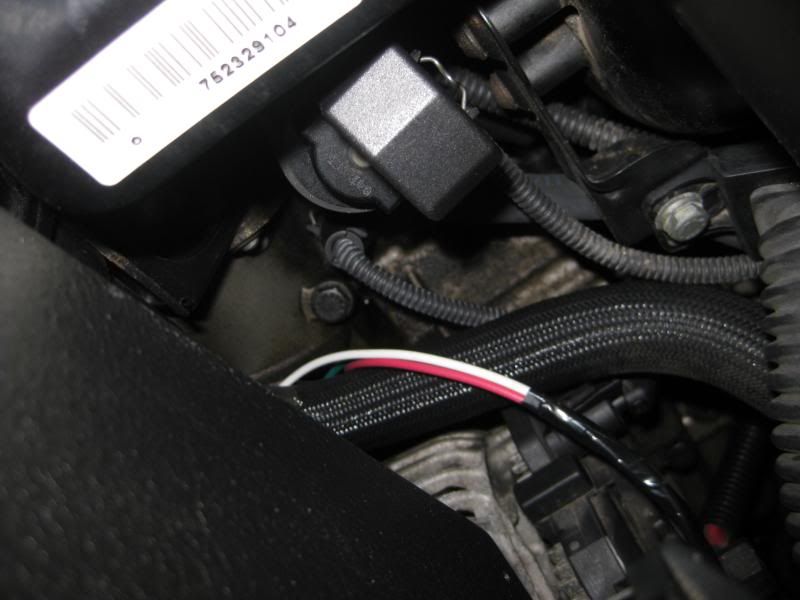
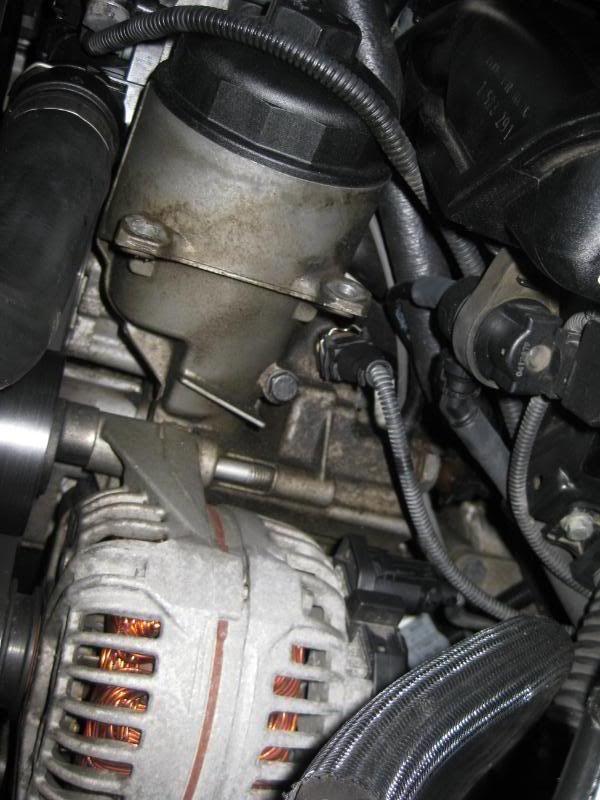
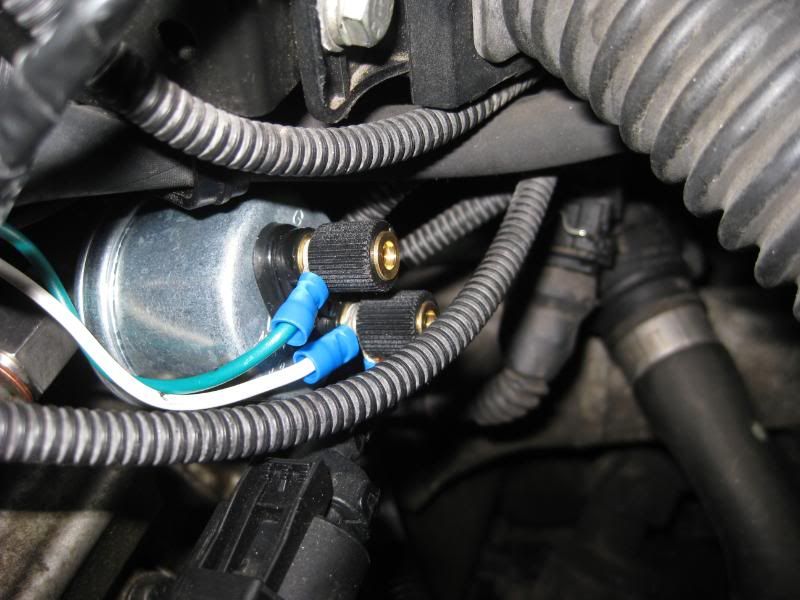
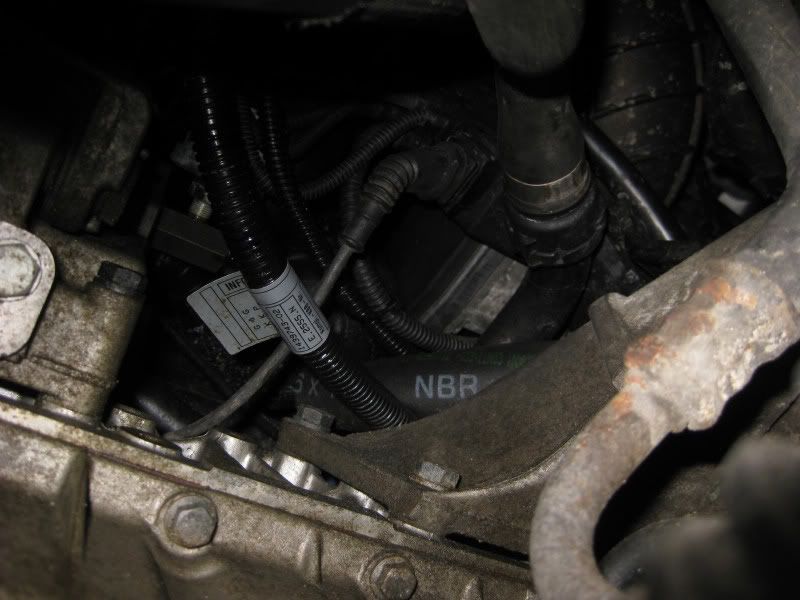
Power Steering Out of the Way, take note the connector seen in the picture near the oil filter housing is NOT the factory pressure sender, do NOT mess around with it, the pressure sender is located behind that one facing the back of the car.
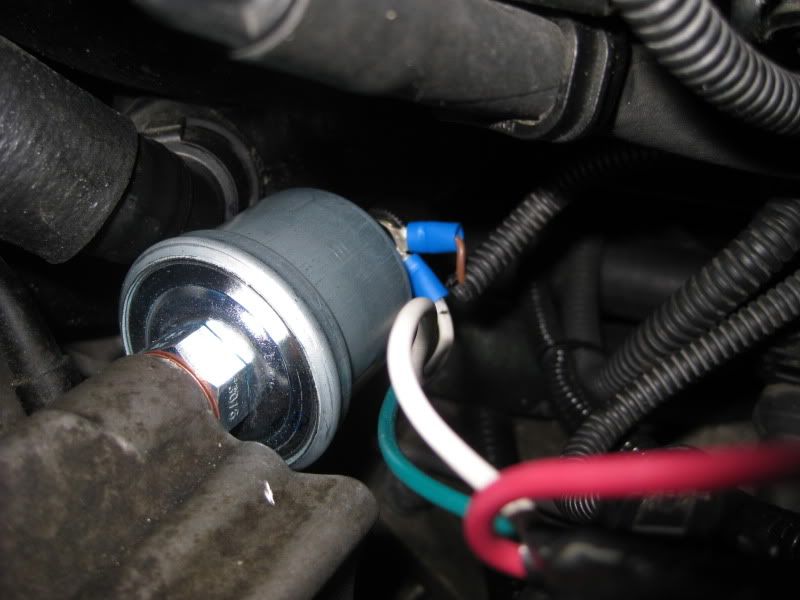
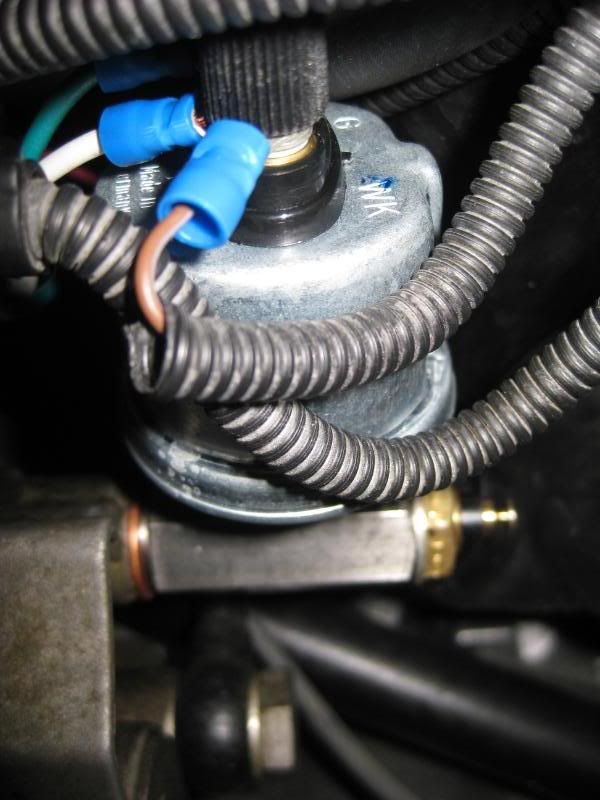
Here you simply screw the M12x1.5 Pressure Sender into the hole (replacing the factory one). You will need a SHORT 17mm wrench for this. For the wiring, the Green wire goes to the "G" (Gauge), the white wire goes to "WK" (Warning Light if using one), and the factory sensor which you unplugged gets cut (there should only be ONE wire) and goes to the "WK" as well (retains factory warning light in dashboard). Here's some pics to show the wiring.
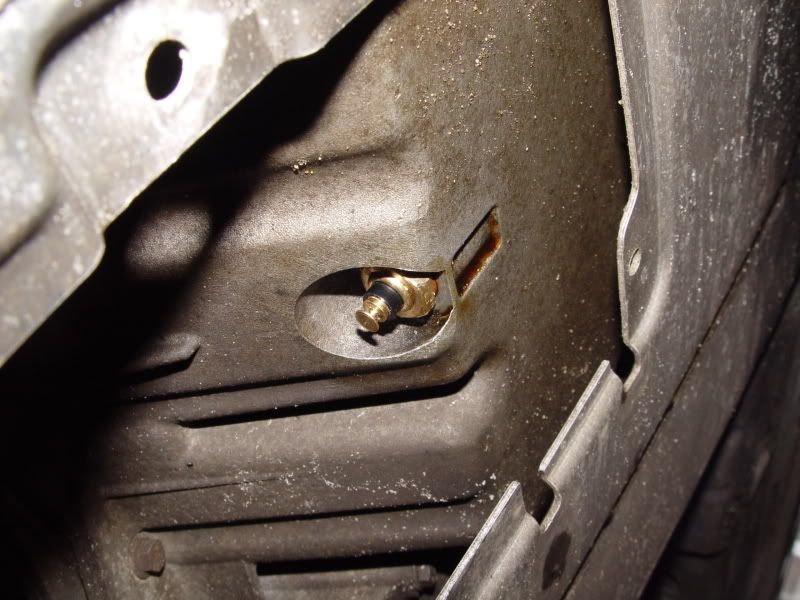
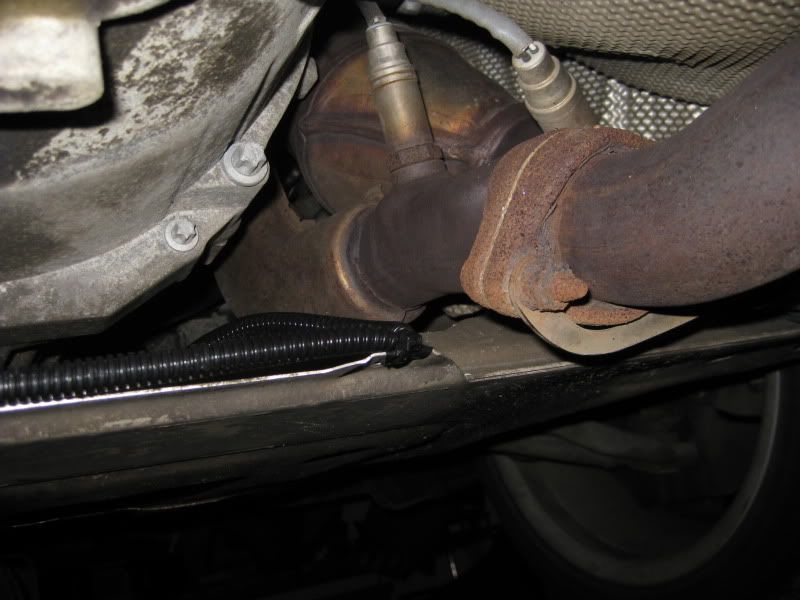
This leaves you with only one wire and one sender, Red (temp) wire and temp sender. The temp sender is going to be installed where the oil drain plug goes. You will have to do an oil change when doing this (unless you just drain oil and put it back in). Your red wire is currently sitting with the other wires. You will then splice or add connectors (or just one long wire) that runs down to the drain plug. You will piggyback the wire down the oil level sensor wiring and across to the drain plug. The M12x1.5 Oil Temp Sensor you bought will screw in there with a crush washer just like a drain plug would (torque to 25nm). Now, you may be saying well why would I want to have it down there rather than where the LeatherZ one goes? Because of where the pressure sender is located, the oil does not circulate in that location, therefore it does not get as hot, as well as being exposed to outside temperature, and does not read correct so even with a distribution block it doesn't work. Your oil temp readings would be low by about 30 degrees with the LeatherZ block and about 40 using the distribution block I did. Either way, it's not very helpful if it isn't accurate.
First, you will drain the oil and install the sender:
Wiring starts at the oil drain plug (wrapped it with electrical tape to protect it):
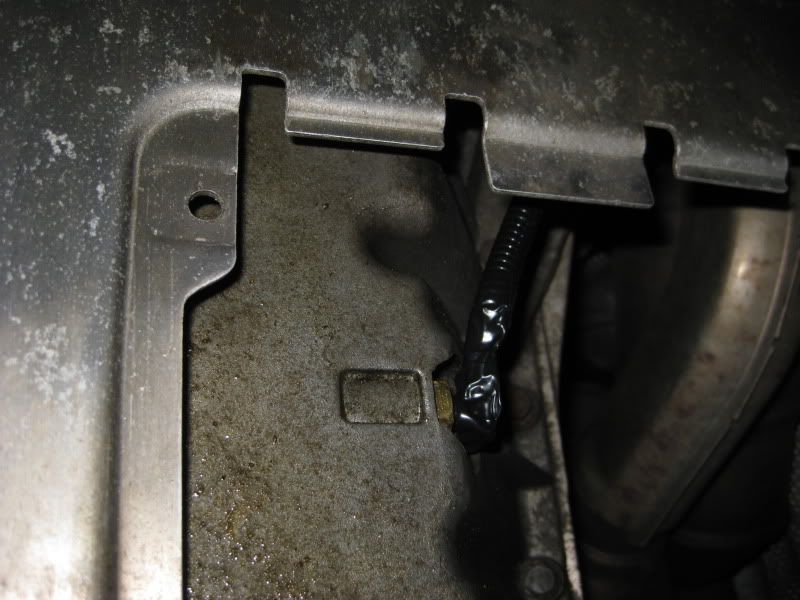
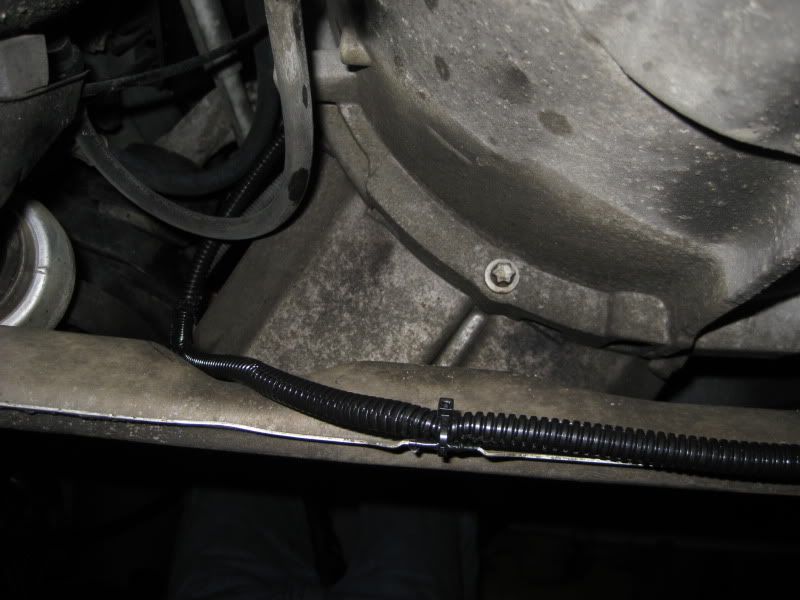
Moves back to metal reinforcement plate:
Goes to oil level sensor wiring:
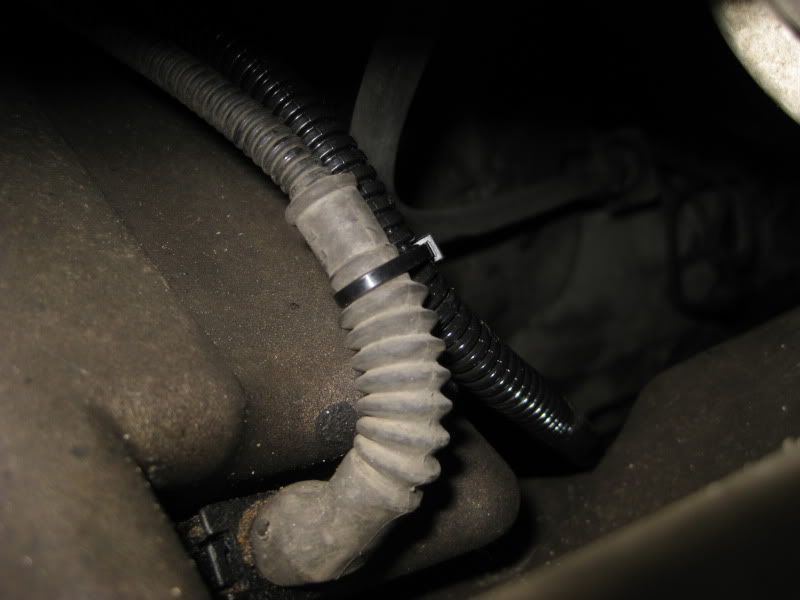
Follows oil level sensor wiring:
Follows it more:
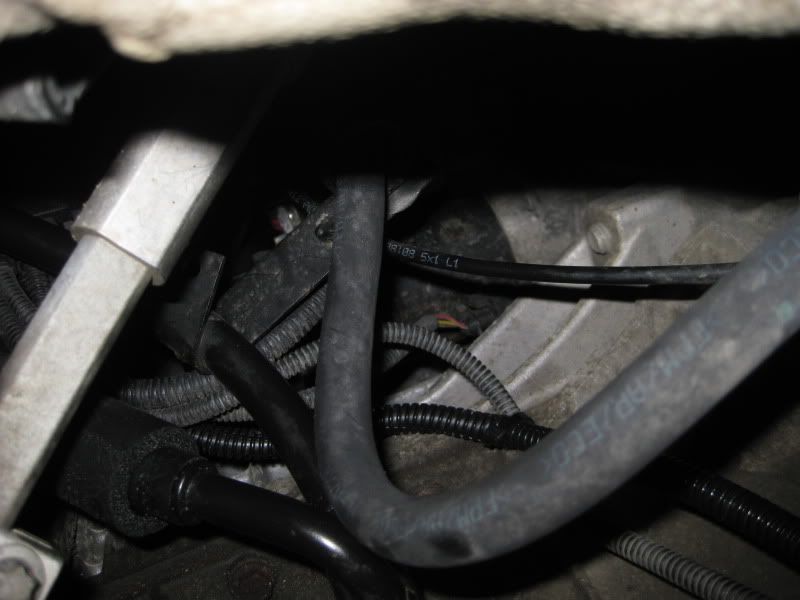
Goes through a little hole and follows some other wiring and in the background you can see the oil distribution block where it splices to the other wiring:
And that is all.
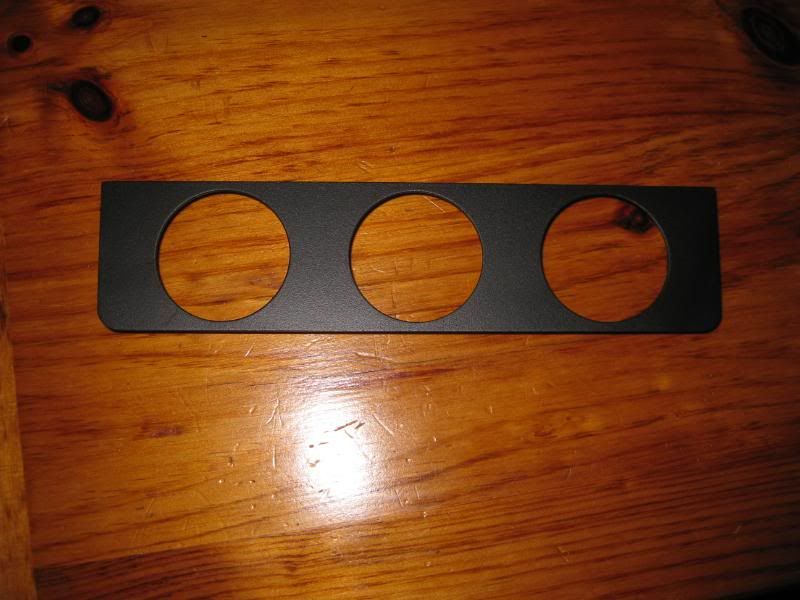
Your next step is to have the aluminum piece machined (again, feel free to request my template, much easier than making a new one, make sure to specify with or without LED). The end result should be this:
Perfect fit!
Now for the gauges to fit in the old HVAC location (not needed if in Sunglasses location) you will need to do some modifying.
Before:
After:
Not ideal, but it does work.
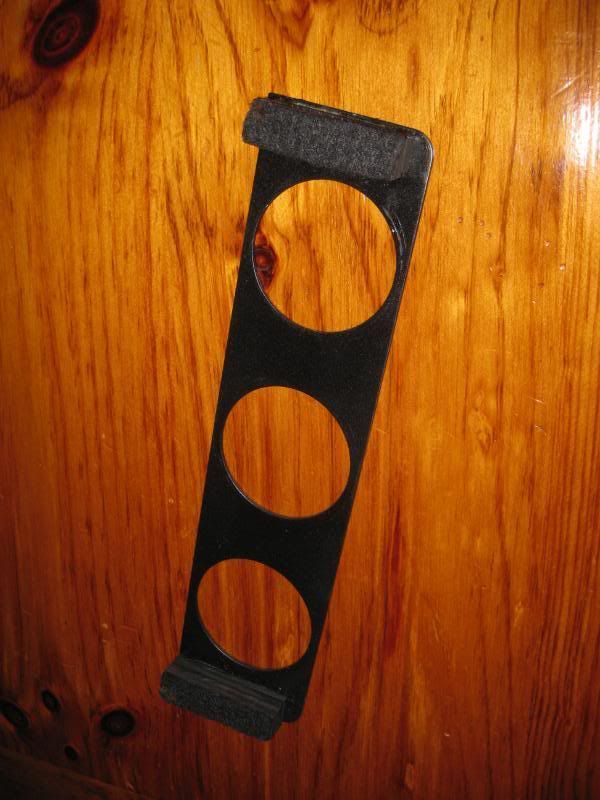
Next, you want to spray between 3 & 5 coats of Plasti-Dip on the aluminum after wiping it down. End Result:
Looks good, and factory like.
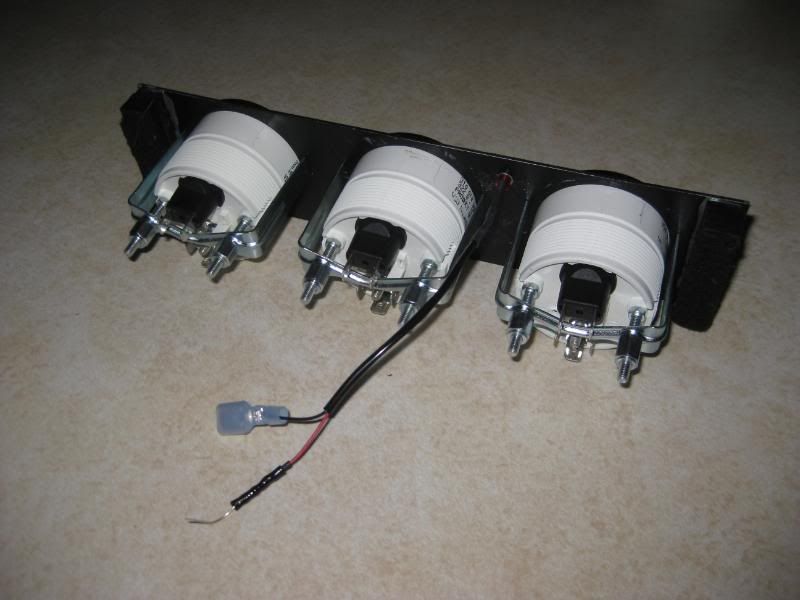
Now we need to add some plastic to the back to mount it in. The plastic pieces were around 3/4" heigh, with a little bit of room around the edges, width and height I can't remember, but make sure you get the measurements correct. After getting the dimensions correct, superglue them on, feel free to add felt to the ends, and put a dab of paint on the little "prongs" sticking out of the HVAC piece we just modified in the top corners. Push it on to get the paint on the plastic pieces, and then drill into them (make sure the holes aren't too big). End result should be the following, allowing you to push the aluminum piece into place and having it sit in there nice and tight.
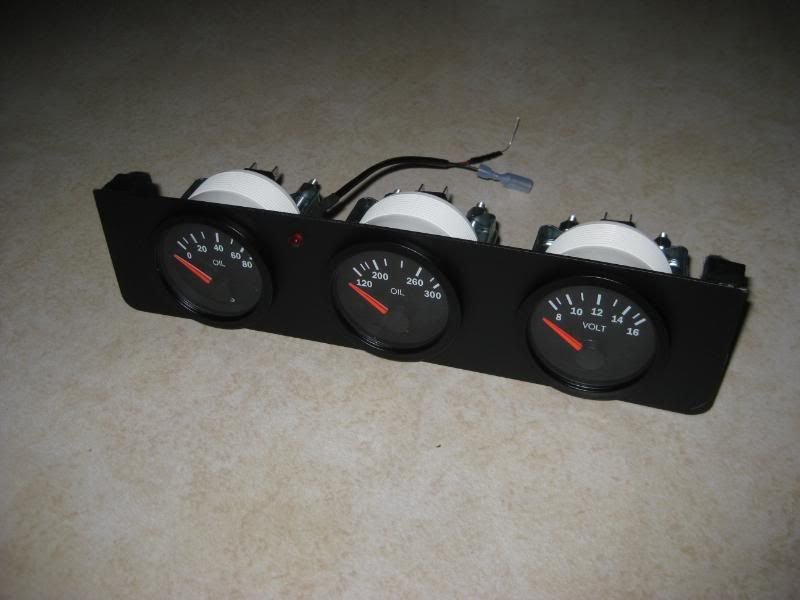
Now it's just a matter of mounting the Gauges to the aluminum piece and then wiring them into the car.
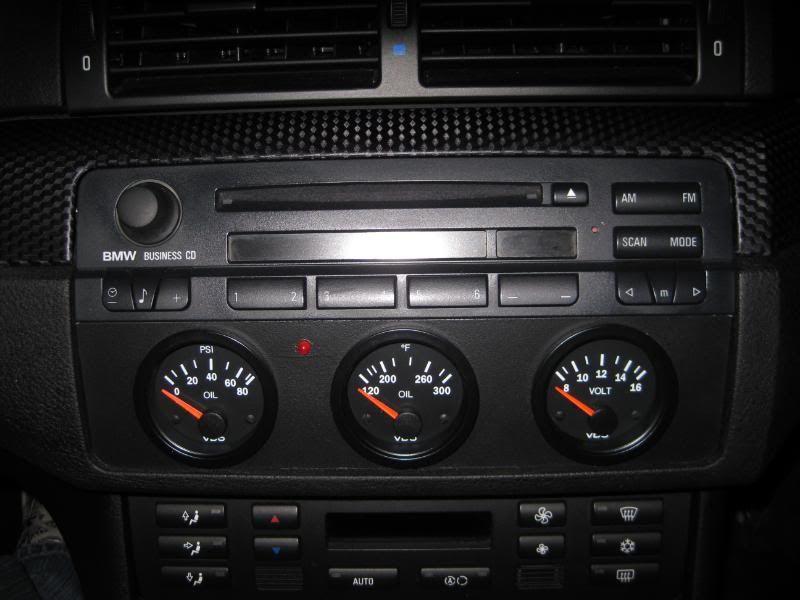
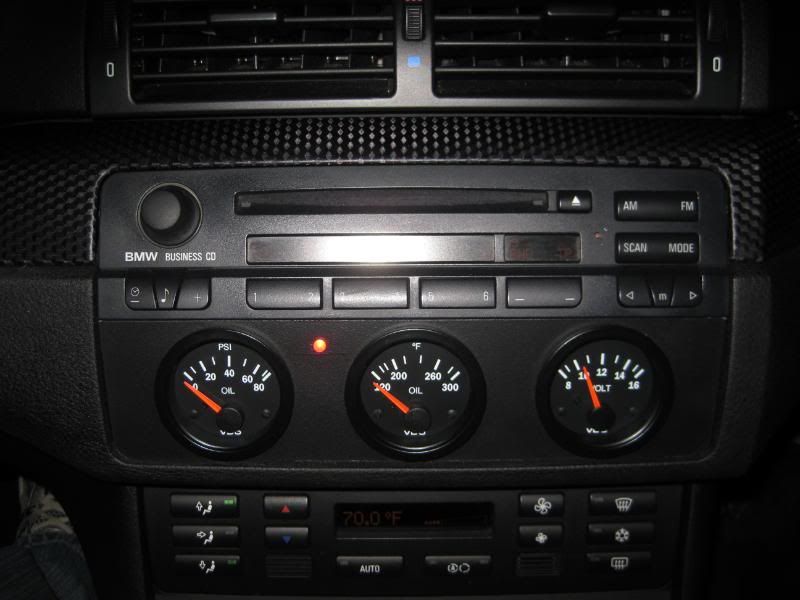
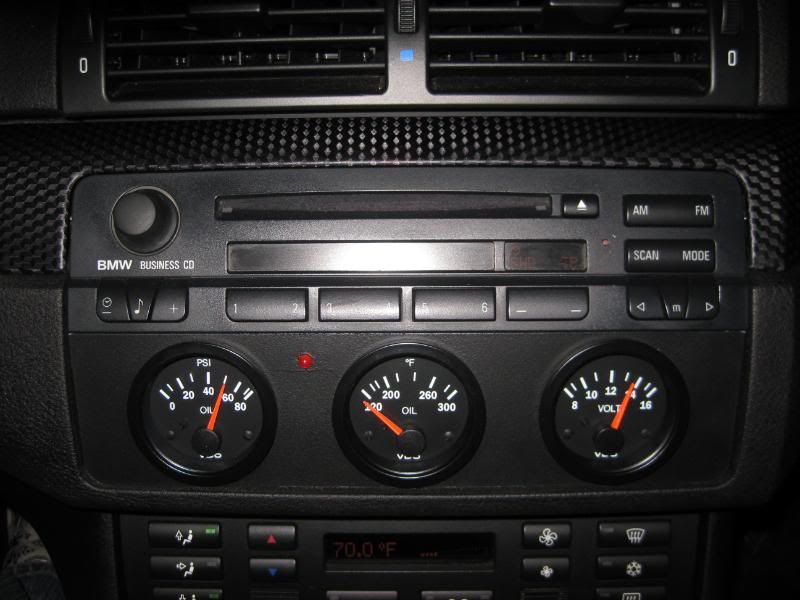
The Final Result:
Car Off:
Key Position Two (LED Lit):
Car Running:
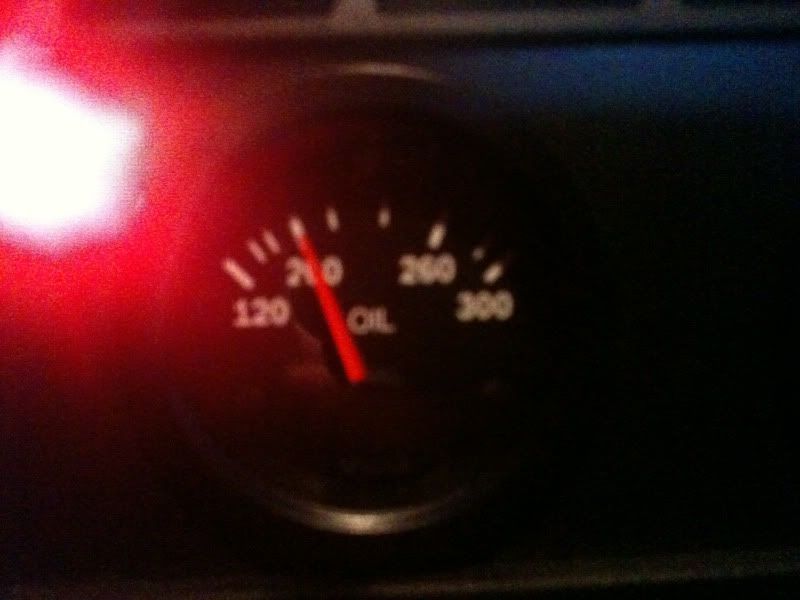
Bad (sorry) picture of oil temperature working:
So, you get nice, factory looking gauges in a good location with properly working Oil Pressure, Oil Temperature, and a Voltmeter. You also have a backup LED that is impossible not to notice and will come on if oil pressure drops below 8psi (your oil pump nut probably fell off and you should shut the car down immediately). When the car first starts oil pressure is around 50psi. Operating Temp ~12-16psi when idling, up to 60psi full throttle, about 40psi just driving around. Oil Temp should be between 200-230 degrees operating temp. Voltage should be I think 12.5 off and 14 running. The lighting for the gauges isn't a perfect match but pretty close to the amber in the car if you put on the red coverings that come with the gauges.
This takes some mechanical and a good deal of electrical skill. It isn't exactly easy. I took a long time trying to figure out the best way to do these gauges and I'm happy with the end result. Again if you want an already put together kit with instructions get the LeatherZ kit. If you want better functionality do this. Questions, comments, etc. welcome.


 Reply With Quote