Materials to Maintain Your ZHP IIIII Hand Protection IIIII Tools to Maintain Your ZHP
Page 1 of 4 123 ... LastLast
Results 1 to 10 of 31
  1. #1
    Join Date
    Oct 2011
    Location
    Silicon Valley
    Posts
    1,630

    DIY: replacing guibo (flexdisc) and/or driveshaft center support bearing (CSB) doityourself

    I recently replaced both guibo and CSB and didn't see a DIY so will be assembling this one in stages as I track down the photos and other DIYs. First key part numbers. It appears all E46 cars use the same CSB bearing, but there are three different CSB assemblies. You can buy just the bearing, but I recommend replacing the whole thing unless you somehow know the the bearing is bad but the carrier is okay.

    Part I -- Parts
    • Guibo 323/325 auto, 330 auto/MT (non-Xi) including ZHP: 26-11-7-511-454
    • Guibo 323 or 325 (non-Xi) manual: 26-11-1-227-410
    • Guibo 325Xi or 330Xi, manual or auto: 26-11-1-229-360
    • Guibo E46 M3: 26-11-2-226-527
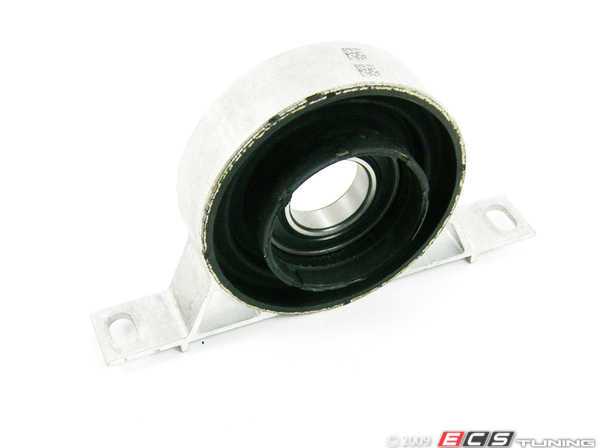
    • CSB assembly all E46 except Xi/M3: 26-12-7-501-257
    • CSB assembly E46 M3: 26-12-2-282-495
    • CSB assembly E46 Xi: 26-12-1-229-317
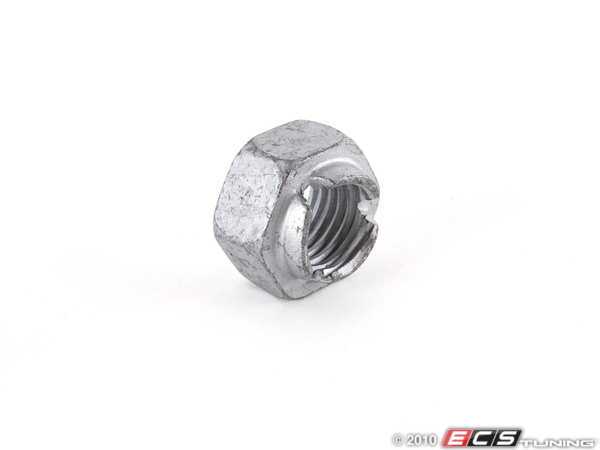
    • M12 lock nut for guibo (need 6, single use): 07-12-9-900-047


    Optional parts. Replacing the circlip, butyl tape, guibo bolts, intermediate ring, and driveshaft centering sleeve are optional. Some cars don't have the circlip, or intermediate ring. Officially you're supposed to replace all 6 guibo nuts but can re-use the guibo bolts if they're in good shape.
    • M12 bolt for guibo, all E46 except M3 6x 26-11-7-523-709
    • M12 bolt, M3 3x 26112283795/26117635643 and 3x 26112283795/26117635643
    • CSB bearing without support: 26-12-1-225-071
    • Circlip, only for 323, 325, 328, and 330xi: 26-12-3-648-156
    • Butyl tape for all E46 26-12-7-511-140
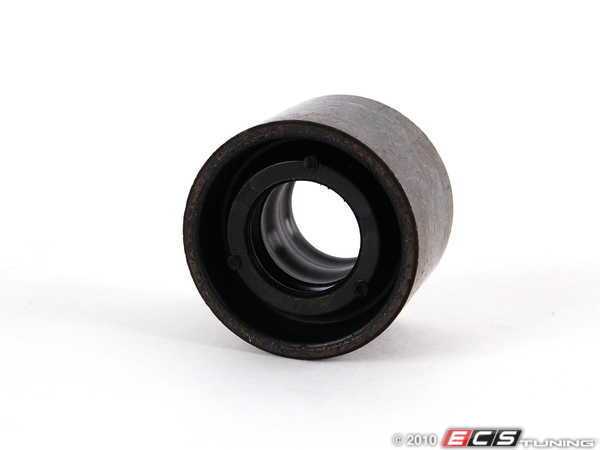
    • Centering sleeve, driveshaft to transmission: 26117526611
    • Intermediate ring (only some models, including ZHP): 26117514120
    • Exhaust to manifold flat gasket (x2) part 18107502346 and copper M10 (15mm outside) nuts (x4) part 18301737774


    Disclaimer: I only did this on an E46 330i 6-speed. Your E46 may have a different driveshaft setup or require different parts! Double check RealOEM and/or your parts vendor to make sure you gets the right parts.

    My starting point was Pelican Parts DIY on replacing the E36 guibo. Also used the Pelican Parts DIY on replacing the CSB. These are pretty good but the ZHP (and probably most or all E46 330s with 6-speed) have a different driveshaft setup.

    To start, here's what a typical E46 325i driveshaft looks like, from RealOEM. The U-joint is after (behind) the CSB; there is a snap-ring (part #7) keeping the CSB on the rear driveshaft, and locking collar (parts 5 & 6) that holds the two halves together.


    But the ZHP driveshaft is set up more like this, from RealOEM. AFAIK the guibo, CSB, and bolts/nuts for guibo) are the same as the 5-speed, but there is no locking collar or snap-ring. Plus the U-joint is before (in front) of the CSB on my car, even though the diagram shows the U-joint behind the CSB here. A bolt and washer (parts 12 & 13) inside the U-joint holds the two halves together. In this drawing they face forward because U-joint is behind CSB, but in my car they faced backwards because U-joint was in front of CSB--either way the bolt is inside the U-joint and faces toward the CSB.


    I was going to post a RealOEM photo of the E46 M3 driveshaft, but it's the same diagram as the ZHP only with some of the part numbers being different.
    Last edited by LivesNearCostco; 03-31-2013 at 08:07 PM.

  2. #2
    Join Date
    Oct 2011
    Location
    Silicon Valley
    Posts
    1,630
    Part I.V (1.5): The very short DIY
    • Raise car, drop exhaust, remove 2 pieces of heat shielding
    • Loosen driveshaft bolt or collar, support tranny, remove transmission brace
    • Disconnect driveshaft from guibo, separate driveshaft, remove and replace old CSB
    • Reconnect driveshaft halves, replace guibo and butyl tape if needed, bolt up CSB (pre-load towards front)
    • Torque guibo bolts, reinstall transmission brace, heat shielding, and exhaust -- Enjoy!


    Part II: Tools
    • 3/8" and 1/2" ratchet
    • 10mm, 13mm, 15mm & 18mm sockets (+17mm if removing wheels)
    • May need 13mm and 15mm deep sockets for transmission mounts, exhaust nuts
    • Two 3/8" extensions (or 1 longer than 9") for rear muffler supports; short 1/2" extension for exhaust-to-manifold nuts
    • 13mm combo wrench to detach transmission exhaust bracket and/or for top nuts on transmission mounts
    • 18mm box or combo wrench--helpful to have 2 of them
    • Helpful for 6-speed--18mm ratcheting box wrench with low-profile head to use on guibo bolts and to separate driveshaft halves
    • Pipe wrench (probably 16") if your driveshaft has external locking collar
    • 10mm nut driver and 10mm box wrench for heat shielding
    • WD-40, or preferably PB blaster; optional anti-seize for re-assembly
    • Breaker bar or air tools to loosen exhaust-to-manifold nuts
    • Jack and 4 jackstands, or lift; helpful to have 2nd jack
    • Bearing/seal drifts or large socket (somewhere between 38 and 44mm) may be needed to install CSB into carrier or push CSB onto driveshaft; may need piece of pipe to push bearing onto 5-speed driveshaft
    • 3-jaw puller or bearing separator/puller to remove old CSB
    • Headlamp or work light; eye protection
    • If have 5-speed driveshaft, might need lock-ring (circlip) pliers
    • Optional--extra jack stand or wire to support rear driveshaft
    • Optional--stiff putty knife or 5:1 paint tool, if re-using old butyl tape
    • Optional: friend, Bentley or Haynes, beer, extra work light, radio/iPod, etc.


    Part III, Likely questions:
    What else should I replace while in there? It's a good time to replace transmission mounts, shifter bushings or your entire shifter, since the exhaust and driveshaft will be out of the way. Also good time to get to the post-cat O2 sensors or install a new exhaust.

    Do I need to drop the transmission support bracket? I had to remove it and support the transmission with my jack. It's probably possible to loosen the guibo nuts without removing the bracket, but not sure you can actually remove the driveshaft and guibo with it in place, especially on 6-speed. For 5-speed and auto, may be possible to leave brace in place--YMMV.

    Do I need to replace the guibo nuts? Officially yes. I did not but I used blue LocTite when putting them back. If you want to be safe, replace them.

    How do I loosen the bolt holding the driveshaft halves together (for driveshafts that don't have external locking collar)? An 18mm box wrench fits inside the U-joint, but you are loosening and tightening it one 12th of a turn at a time--very frustrating. A ratching 18mm box wrench would be perfect, but it will need to be a slim or low-profile to fit in there. Some fat 18mm box wrenches might need grinding to fit inside.

    Do I need to lock the driveshaft to loosen guibo and driveshaft nuts? Depends. To loosen driveshaft bolt (or locking collar), I recommend breaking them loose while driveshaft is in the car, using e-brake to lock rear wheels. With two 18mm wrenches, you don't have to lock the rear wheels to loosen the guibo bolts (one 18mm wrench + one 18mm socket might work too). If you have only one 18mm wrench or socket, lock driveshaft with e-brake and loosen 2-3 nuts. Release e-brake, rotate driveshaft and lock again, then loosen other guibo nuts. There are 6 nuts and you can reach 2-3 at a time after rotating the driveshaft.

    Do I need to replace both guibo and CSB? Depends on their condition. One has failed and both are old, I would replace both. My guibo was failing at 135,000 miles (might have been 2nd guibo) and my CSB failed at 169,000 miles. If I had known better, would have replaced the CSB when replaced the guibo. They say a failing guibo (or broken differential bushings) can kill your CSB quickly. But short answer, just replace both at the same time if you can.

    Do I need to buy new butyl tape? No, you can re-use the existing tape but may need to transfer some from old CSB carrier bracket to new one.

    Do I need to disconnect driveshaft from differential? No, unless you cannot separate the driveshaft halves under the car or want to rebalance or replace the driveshaft, or replace the diff.

    Do I have to separate the driveshaft halves? Yes if replacing CSB, no if only replacing guibo.
    Last edited by LivesNearCostco; 04-02-2013 at 11:17 AM.

  3. #3
    Join Date
    Jan 1970
    Location
    Liberty Township, OH
    Posts
    37,935
    Awesome brutha. Thanks!

    Sent from the HTC DNA, Williamsburg, VA and USA
    Call Me Dane l 2/2004 330i ZHP l 18x8 ET45 BBS CK's wrapped with Michelin Pilot Sport AS3+ @ 245-40-18 l KW V1 Coilovers in front l KW V1 springs w/ Bilstein B8 dampeners in rear l BMW Performance Rotors l UUC StrutBarbarian l Racing Dynamics Rear Strut Bar l Jim Conforti Shark Injector l Light Birch Interior Trim l Bimmian Celly Mount l M3 Trunk Mat l l e90 Performance E-Brake & Shift Knob l M3 Tri-Stitched Boots l AL Headlight Retrofit with ZKW Lenses l CobyWheel Wrap w/M3 Stitching l LCM sw 4.5 triple blink and rear fogs l Maple Interior Trim

  4. #4
    Join Date
    Oct 2011
    Location
    Silicon Valley
    Posts
    1,630
    Part III -- Other DIYs


    CoolCarNick YouTube video looking at failed CSB (5-speed style driveshaft)


    JayMay YouTube Video on E36 CSB replacement


    Frikke Hanekom video of failing CSB (spinning by hand)


    HefftoneGA video of E36 new guibo vs. trashed guibo
    Last edited by LivesNearCostco; 03-31-2013 at 07:34 PM.

  5. #5
    Awesome DIY guide here! I will find this very useful when it comes time for me to replace my GUIBO and centerline bearing. Thanks for getting this all put together!

  6. #6
    Join Date
    Oct 2011
    Location
    Silicon Valley
    Posts
    1,630
    Part IV -- Basic DIY Steps to take it apart

    1. Safely raise car and support on 4 jackstands or lift; optional to remove rear wheels to make it easier to spin driveshaft. Must be high enough for you to use 1/2" ratchet or two 18mm combo wrenches on guibo.
    2. Put on safety glasses. Spray WD-40 or PB blaster on 4 exhaust-to-manifold nuts, let marinate.
    3. Remove center brace that doesn't support exhaust (2 x 13mm bolts)
    4. Loosen, but do not remove, 8 13mm bolts/nuts supporting exhaust: 4 muffler, 2 rear brace, 2 transmission brace. Transmission brace nuts also need 13mm wrench to hold bolts; Muffler bolts require long 3/8" extension. Grit will fall onto your face when loosening muffler nuts.
    5. Use breaker bar or air tool, and 15mm socket to remove 4 nuts holding exhaust to manifold. May require deep 15mm socket and/or short 1/2" extension. May require cussing and busted knuckles. Try not to break manifold studs or else you'll have to drill them out.
    6. Use friend (with eye protection) or jack to support exhaust in middle. Remove all exhaust bolts/nuts. Slide exhaust back and front will fall off manifold studs onto friend. Slide exhaust and friend out from under car. Thank friend. If no friend/jack available or in a hurry, unbolt middle supports, unbolt muffler supports, drop muffler on ground then slide front pipes off of manifold studs.
    7. Remove front tunnel heat shield (3 10mm nuts) and rear tunnel heat shield (4 10mm bolts). Don't lose those 7 small nuts and bolts! 10mm box wrench may be needed for front. 10mm nut driver ideal for rear heat shield bolts.
    8. (If you want to inspect rear subframe mounting points, bushings, or front differential bushings, this is an excellent time! One forward subframe bushing is covered by a separate heat shield so you might have to remove that for a full inspection.)
    9. Mark forward/rearward position of CSB carrier bracket. If replacing CSB, mark driveshaft front and rear so you can align them when you put the halves back together. I used white-out, or you could use a silver/gold Sharpie. Don't use a black marker!
    10. If removing transmission brace, remove 13mm nuts from bottom of transmission mounts (may require 13mm deep socket)
    11. If removing transmission brace, support transmission with jack and remove 4 x 13mm bolts holding brace. Most tranny mounts let you remove the brace without removing the mounts by slightly bending the lower mount studs. If not, remove 13mm nuts from top of mounts with 13mm box wrench to remove brace and mounts.
    12. If replacing CSB, lock rear wheels with e-brake and slightly loosen driveshaft locking collar with pipe wrench (5-speed) or inner driveshaft bolt with 18mm box wrench (6-speed)
    13. Loosen all 6 bolts holding guibo to transmission output shaft. If using socket only, leave e-brake locked and loosen 3, then unlock e-brake, rotate driveshaft, and re-lock e-brake to loosen other 3. If using two 18mm wrenches, unlock e-brake first and rotate driveshaft as you loosen all 6.
    14. If replacing only guibo, remove all 6 guibo bolts and unbolt CSB to drop driveshaft. This lets you slide driveshaft back enough to remove old guibo.

    (Pause for air, beer, drink, bathroom visit, take photos of your transmission or subframe, etc. You are halfway done.)

    Exhaust note 1. I removed parts 4/5/6 from transmission. You could instead remove parts exhaust pipe clamp (either parts 9/10/11 or 12/13/14) but I think it's easier to leave the clamp on the exahust.


    Exhaust note 2. There are two rear hangers part #6 held up by 4 13mm nuts part #7. There are two braces part #9 held up by 4 13mm bolts #8. Only one is connected to exhaust (by 2 rubber supports part #10) but both have to come out. I could not find parts 3/4/5 or 11/12 on my exhaust.


    Exhaust note 3. You have option to replace 4 copper nuts (#3) and 2 diamond-shaped gaskets (#8) when re-assembling exhaust. I didn't, but I ordered new nuts and gaskets for next time. Be sure to observe orientation of flange part #9 so you can replace it properly later. Could also use anti-seize for re-assembly of the nuts. I didn't this time but probably should have.


    Here's how I supported my transmission with a jack. Right behind the wood block is where the exhaust support bracket bolts to the transmission.
    Name:  SupportingTransmission_small.JPG
Views: 38979
Size:  89.7 KB

    How I marked my driveshaft but forgot to mark position of CSB carrier bracket.
    Name:  OldCSB_small.JPG
Views: 45905
Size:  88.5 KB

    Hidden bolt inside driveshaft U-joint, already loosened. You can see the inner part of the CSB bearing support has completely separated from the CSB support bracket.
    Name:  U-jointBolt_small.JPG
Views: 54119
Size:  85.4 KB
    Last edited by LivesNearCostco; 03-31-2013 at 09:56 PM.

  7. #7
    Join Date
    Oct 2011
    Location
    Silicon Valley
    Posts
    1,630
    Part V -- replacing CSB. If not doing this, skip forward to guibo replacement.

    1. Driveshafts differ but in all cases you must separate the halves. Remember to mark driveshaft first! You can disconnect driveshaft from CV joint or from differential to work it on the bench, but I left rear driveshaft in the car. Good to support it with padded jackstand or piece of 2x4.
    2. If you have locking collar, finish loosening it and pull front half off the back half. If you have internal bolt, use 18mm box wrench (hopefully ratcheting) inside U-joint. As it loosens, you must pull the front half forward or else the wrench gets captured inside the U-joint. Separate driveshafts.
    3. If 5-speed driveshaft, remove circlip with snap-ring pliers. You can re-use or replace this later. The 6-speed style has no circlip but an intermediate ring. RealOEM shows it behind the CSB but in my car it was in front of the CSB. (RealOEM also shows U-joint behind CSB while mine was in front of CSB.) I re-used old intermediate ring. 5-speed might also have protective shield or cup in front of bearing.
    4. Best to use bearing separator/puller, but I didn't have one and inner rubber bearing support had separated from CSB carrier, so I used 3-jaw puller. One DIY video above HF bearing separator tool in use. In retrospect, I think I could have gotten old bearing off by wiggling it, without a puller. If using puller on 6-speed, do NOT damage threaded hole on rear of driveshaft--protect it with a washer or something.
    5. My new bearing came loose from the carrier so I tapped it in with a 3/8" extension because my biggest socket (36mm) would have hit the inner race. Use larger socket or proper bearing drift. I lubricated rubber carrier with dish soap.
    6. Now install bearing onto the rear half of the driveshaft. The cupped section of CSB carrier should face forward. For my 6-speed, it was easy to press on by hand. For 5-speed, might need drift, PVC pipe, etc.--just don't know. Then reinstall circlip and inner cup (which might be only for E36) for the 5-speed, or intermediate ring (6-speed).
    7. Reconnect front half of driveshaft, making sure marks are aligned. It was very hard for me to get the M12 bolt and washer back into the U-joint and started into the rear driveshaft half. If the front half is fully seated on the rear, you can't get the 18mm wrench into the U-joint, FML! So pull the front half slightly away from the rear to fit the wrench inside the joint. If you have the 5-speed, this won't be an issue.
    8. Don't reconnect front half to transmission until you've reconnected it to the rear half. Don't secure CSB to body before reinstalling guibo!


    Old and new guibos. Old rubber not cracking much but internal threads visible in several spots. Was installed incorrectly 30,000 miles (2.5 years) ago and I think that's part of why the threads are showing. Plus the AutoX usage.
    Name:  BothGuibos_small.JPG
Views: 37318
Size:  97.3 KB

    Old CSB, completely separated. The deeper side of the rubber cup facing the camera is what faces forward towards the transmission. The intermediate ring can be seen sitting loosely on top of the bearing inside the cup. I had trouble pressing the new bearing into the new CSB rubber cup. I scraped off most of the butyl rubber and stuck it to the new CSB carrier.
    Name:  FailedCSB_small.JPG
Views: 41303
Size:  96.1 KB

    Driveshaft centering sleeve. I have one on order but didn't actually see it during my DIY. Not sure if it sits on front end of driveshaft or rear end of output shaft. Picture courtesy of ECS Tuning.


    Self-locking M12 nut for guibo bolts, courtesy of ECS Tuning


    New CSB in carrier. My bearing came separate so I had to pound it into the carrier. Courtesy ECS Tuning
    Last edited by LivesNearCostco; 04-01-2013 at 09:46 AM.

  8. #8
    Join Date
    Oct 2011
    Location
    Silicon Valley
    Posts
    1,630
    Part VI -- installing new guibo
    1. If you want to replace centering bushing at front of driveshaft, do it while driveshaft front is out. I heard you pound 14mm plastic dowel into center with some grease to pop off the old bushing and tap new one in with rubber mallet or dead-blow hammer, but I didn't replace mine yet.
    2. Put new butyl tape onto new CSB carrier, or be cheap like me and scrape old butyl tape off old carrier and mold it onto new one. The warmer it is the easier to mold but the bigger a mess it all makes.
    3. I held driveshaft and guibo to transmission flange and put one bolt through guibo and driveshaft flange. Whoops, that didn't hold it, since no one bolt goes through all 3 parts. I now think wise answer is loosely bolt guibo to transmission flange with 3 bolts, then fit driveshaft to transmission and bolt driveshaft to guibo.
    4. As noted in multiple places, the arrows on the guibo must point to the 6 flanges (3 driveshaft, 3 transmission). I installed the bolts pointing with the arrows so the nuts tighten against the flanges, but some people just install all 6 bolts facing the same way.
    5. Don't tighten nuts yet. You should use 6 new nuts because they deform on installation, one-time use. I re-used mine with a drop of blue Loctite on each.
    6. Were you going to replace your shifter, shifter bushings, transmission selector rod join (or seal), transmission output seal, or clutch? If yes, do that now. Actually do that before reconnecting front driveshaft.
    7. Loosely bolt up CSB to body with 2 x 13mm nuts. Spin driveshaft by hand to make sure all is operating smoothly. Seating it into the butyl tape takes some effort, especially if it's cold.
    8. Make sure bolt or locking collar holding driveshaft together is fairly snug (can tighten more later) and driveshaft spins smoothly. Make sure arrows on guibo are pointing to the flanges.Then tighten 6 guibo bolts. Torque spec is either 60 or 74 foot-lbs, depending what you read. If you have only 1 18mm wrench or socket, lock rear wheels with e-brake to tighten
    9. Tighten driveshaft bolt or collar (lock e-brake if you didn't do so earlier). Don't know torque spec but I just made it "guttentight" around 40 foot-lbs.
    10. Push CSB towards front of car to pre-load it. I pushed it almost all the way forward but since read you should only pre-load it 4mm forward, so my bad. Then tighten two 13mm nuts while holding it forward. This will push it into the butyl tape.
    11. Reinstall transmission brace, I think torque is 16 foot-lbs on bolts. Lower nuts for transmission mounts torque to between 13 and 18 ft-lbs, depending what brand of mounts you have.
    12. Reinstall rear heat shield (4 10mm bolts) then front heat shield (3 10mm speed nuts).
    13. Reinstall exhaust. Not sure what is best way, probably slide front on to manifold studs first then raise up middle or rear using friend/jack. Bolt up middle brace, then muffler and transmission brace. Bolt those 8 loosely for now.
    14. Reattach 4x15mm nuts to manifold. Make sure your new (or old) gaskets were in there, and don't forget reinforcing flange which fits over 3 of the 4 studs. Torque spec probably 24 ft-lbs.
    15. Tighten up 8 exhaust bolts/nuts with 13mm socket (and extension for muffler, and 13mm wrench for transmission brace). Reinstall extra center brace with 2x13mm bolts. Torque spec for all 13mm bolts/nuts is probably 16 ft-lbs.
    16. Replace wheels if needed.
    17. Lower car, torque wheel bolts properly. Clean butyl tape off tools (WD-40) and dirt and soot off friend who helped lift exhaust. Test drive.


    Photos of new guibo, courtesy of Pelican Parts. Shows arrow that should point to driveshaft or transmission flange.


    Bokchoy's photo showing guibo installed first on transmission (with arrows pointing at flanges), probably how I should have done it. See the small cylinder in the middle of the transmission output shaft (center of guibo hole)? I'm not sure if that's the driveshaft centering sleeve or the driveshaft centering sleeve installs into the driveshaft and fits over that bit on the output shaft.


    A photo of my rear driveshaft after removing old CSB, with half of old butyl tape dangling from tunnel. You can see the splined section of rear half is much shorter than on the 5-speed and there's no place to put a lock ring/circlip. Also note central M12 threads where bolt goes to hold halves together.
    Name:  DriveShaftRear_OldButyl_small.JPG
Views: 39930
Size:  87.5 KB
    Last edited by LivesNearCostco; 04-02-2013 at 10:31 AM.

  9. #9
    Join Date
    Oct 2011
    Location
    Silicon Valley
    Posts
    1,630
    And more pictures....

    Rear ZHP driveshaft showing where the bearing sits. Note no place for circlip. Also the splined area is short enough a big socket should be enough to seat the bearing if needed, though again I just pushed it on by hand. Notice my sophisticated driveshaft support tool.
    Name:  RearDriveshaftBearingSeat_small.JPG
Views: 46435
Size:  81.5 KB

    Speaking of sockets or drifts, to seat bearing in carrier (hopefully yours came pre-installed), looks like a 2 1/16" or 2 1/8" OD (or 52-54mm OD) driver or socket is needed. To seat bearing on shaft may require a 1 1/8" or 1 1/4" ID (27-30mm ID) socket--possibly a deep socket--or PVC pipe and a mallet, if you can't just push it on.
    Name:  CSB_BearingDriver_mm_small.JPG
Views: 36350
Size:  95.6 KB

    Close-up of new intermediate ring, which arrived after my project.
    Name:  Driveshaft_IntermediateRing_small.JPG
Views: 36088
Size:  86.8 KB

    Back and front of old CSB, showing how it sits in the carrier.
    Name:  OldCSB_Back_small.jpg
Views: 36191
Size:  99.9 KBName:  OldCSB_Front_small.jpg
Views: 36053
Size:  94.2 KB

    Also note the guibo reinforcing fibers are fabric, not metal as I first thought.
    Last edited by LivesNearCostco; 04-02-2013 at 10:25 AM.

  10. #10
    Join Date
    Jan 1970
    Location
    ND
    Posts
    1,456
    Nice work dude! Bookmarked for future reference.

Page 1 of 4 123 ... LastLast

Similar Threads

  1. FS: e46 Center Support Bearing assembly
    By Lanister in forum ZHP-Related Parts & Accessories (no vehicle sales)
    Replies: 5
    Last Post: 03-04-2014, 02:08 PM
  2. Replies: 9
    Last Post: 01-09-2014, 10:29 AM
  3. Driveshaft Center Mount bearing removal
    By Lanister in forum Mechanical | Troubleshooting
    Replies: 2
    Last Post: 11-14-2013, 12:08 PM
  4. Input shaft bearing or throwout bearing?
    By Stu in forum Mechanical | Troubleshooting
    Replies: 3
    Last Post: 07-31-2013, 06:29 AM
  5. For Sale: BMW 330 ZHP driveshaft 6MT
    By Marcus-SanDiego in forum ZHP-Related Parts & Accessories (no vehicle sales)
    Replies: 7
    Last Post: 02-22-2011, 04:29 PM

Posting Permissions

  • You may not post new threads
  • You may not post replies
  • You may not post attachments
  • You may not edit your posts
  •