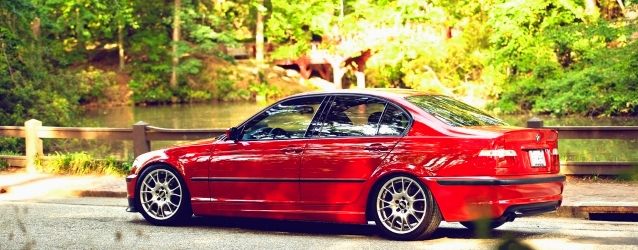
Materials to Maintain Your ZHP IIIII Hand Protection IIIII Tools to Maintain Your ZHP
Amazon Link for ZHPMafia ZHP
Page 4 of 9 FirstFirst ... 23456 ... LastLast
Results 31 to 40 of 82
  1. #31
    Join Date
    Nov 2015
    Location
    College Station, Texas
    Posts
    244
    Front suspension refresh - Koni struts, OEM mounts, tower reinforcements, powerflex black FCAB's

    I had a couple days off of work (spring break is starting here - everything shuts down) and made the most of it. I installed new Koni front sport struts with new lemforder strut mounts and strut tower reinforcement plates. I went ahead and replaced the FCAB's as well since they looked worn, and chose power flex blacks on the recommendation of a friend who's driven, fixed, and tracked many BMW's. This was a challenging job since it was my first time doing a front suspension refresh. There's reasonably good DIY's online, but here's a few tips I learned along the way. Feel free to critique/correct in the comments if there was a better way to tackle these challenges.

    1) You need a very unusual, thin 18mm wrench to remove/install the sway bar end links. I got lucky - I found one in the back of a tool drawer (pic below). But without it, I would have been up a creek. There's flats on the sway bar housing, but they are very thin and bounded, so you can not get a normal open wrench on them. This was one of those moments when I felt like BMW engineers must have a competition with one another over who could design a part that required the most obscure tools.
    Name:  wrench.JPG
Views: 518
Size:  136.4 KB

    2) Spring compressors take some trial and error. The stock springs on stock struts require a LOT of compression. Below is a picture of the setup that finally worked for me. I did, unfortunately, have to clamp the lower seat on the stock strut to get enough travel with the particular spring compressors I borrowed. That meant I couldn't remove the spring while compressed. I had to release it, move it to the new strut, and recompress. A power drill makes this go a LOT faster (or air tools if you have them).
    Name:  compressed.JPG
Views: 447
Size:  205.6 KB

    3) Be very careful to make sure you get all the washers moved over to the new strut and top mount. As you'll see in the pics below, I missed one. I didn't realize it till I was cleaning up and saw that the old mounts didn't match! I had to remove the passenger side strut and add the washer. The good news was that by this point in time, my technique was much improved and the job only took about a quarter of the time.
    Name:  mounts.JPG
Views: 513
Size:  352.1 KB

    4) It's difficult to loosen or tighten the top nut on both the stock and Koni struts. In both cases, the interface that allows you to hold the piston while turning the nut (a hex socket on the OEM units; external flats on the Koni's) is on the top of the piston... exactly where you need to get your socket to turn the top nut. There's a variety of specialty tools described online, which I did not have. Instead, I used vice grips with a 3" piece of old engine belt. It worked perfect. I was able to clamp the piston shaft with sufficient force to break the old nut free and torque the new nut, and there were no marks left on the shaft.
    Name:  strut top nut technique.JPG
Views: 510
Size:  181.5 KBName:  vice grips.JPG
Views: 513
Size:  167.9 KB

    5) I will never again try to press old FCAB's out of their housings! That was incredibly hard. I ended up ruining my 3-jaw pullers (stripped threads). Just buy new lollipops with OEM bushings preinstalled - or get empty ones if you're doing poly like me. Here it is with the job done and new power flex bushes installed... finally!
    Name:  puller.JPG
Views: 512
Size:  279.1 KBName:  fcabs.JPG
Views: 487
Size:  247.2 KB


    Alright... so here's my first impressions after going for a spirited drive and impromptu autocross in an empty parking lot. The new Koni's are superb. They are soft at the moment since Koni wants you to do 500 miles at full soft. But the ride is so much improved. It's smoother, quite, and there's less jounce. I'm very pleased, and look forward to stiffening them up. The new FCAB's are also excellent. I expected them to be a bit harsh. They are not. Turn in is quicker and the car feels more responsive and planted. Overall, the front suspension is now tighter and I'm hearing less of the clunks and pops that I heard before. Now one caveat... I was replacing stock struts with 100k miles on them. So ANY suspension would be an improvement

    Blake - 2005 330i ZHP 6-sp

  2. #32
    Join Date
    Nov 2014
    Location
    Portland, OR
    Posts
    10,323
    Sounds good

  3. #33
    Join Date
    Jan 1970
    Location
    Liberty Township, OH
    Posts
    37,982
    Awesome work.

    Sent from an S6 Edge
    Call Me Dane l 2/2004 330i ZHP l 18x8 ET45 BBS CK's wrapped with Michelin Pilot Sport AS3+ @ 245-40-18 l KW V1 Coilovers in front l KW V1 springs w/ Bilstein B8 dampeners in rear l BMW Performance Rotors l UUC StrutBarbarian l Racing Dynamics Rear Strut Bar l Jim Conforti Shark Injector l Light Birch Interior Trim l Bimmian Celly Mount l M3 Trunk Mat l l e90 Performance E-Brake & Shift Knob l M3 Tri-Stitched Boots l AL Headlight Retrofit with ZKW Lenses l CobyWheel Wrap w/M3 Stitching l LCM sw 4.5 triple blink and rear fogs l Maple Interior Trim

  4. #34
    Join Date
    Nov 2012
    Location
    22841
    Posts
    9,980
    Tomorrow should be fun. Thanks for the tips on the front Springs.

    His - 2004 Imola Red / Alcantara 330i | 6MT | ZHP |

    Her's - 2005 Black Sapphire Metallic / Black Leather 330i | 6MT | ZHP |

  5. #35
    Join Date
    Nov 2015
    Location
    College Station, Texas
    Posts
    244
    Quote Originally Posted by Vas View Post
    Tomorrow should be fun. Thanks for the tips on the front Springs.
    Good luck Vas! I hope it goes well for you.

    Blake - 2005 330i ZHP 6-sp

  6. #36
    Join Date
    Nov 2015
    Location
    College Station, Texas
    Posts
    244
    Refinish OEM M3 Strut Brace

    I recently bought a used OEM M3 strut tower brace for my ZHP off e46fanatics. Unfortunately the seller was not totally honest in regards to the condition of the bar. When I received it, I noticed a large gash on the top/middle of the bar. Looked like a hacksaw went at it. Fortunately, it wasn't very deep and was oriented longitudinally instead of transverse. So I wasn't worried about it compromising the strength of the bar. But it looked crappy. So I chose to use this as an opportunity to improve my refinishing skills

    Here's the bar as received, with a nice gash in the most visible spot.
    Name:  gash.JPG
Views: 441
Size:  152.4 KB

    First, I filled the gash with JB Weld. It's much stronger and more heat resistant than bondo and is easy to sand.
    Name:  patch.JPG
Views: 440
Size:  226.3 KB

    After drying overnight, I sanded the patch down with 300 grit on a block, then sanded and prepped the whole bar with 800 grit. Finally, I hung the bar, taped up the studs, and painted the bar and braces with Rustoleum high-temp engine bay spray paint. 2 light coats, another 800 grit sanding, and then 5 light finish coats.
    Name:  Paint.JPG
Views: 455
Size:  198.8 KB

    She'll be ready to install tomorrow... if only I had those hard to find collar nuts! I may have to shell out $60 to ecstuning, which kills me. $10 a nut is crazy. Oh well. Lesson learned.

    Blake - 2005 330i ZHP 6-sp

  7. #37
    Join Date
    Jan 1970
    Location
    Southern California
    Posts
    18,061
    Good werk

    Sent from my SM-G900V using Tapatalk
    Randeaux/Rando/John/jr - '06 Cic ZHP; Southern California
    "ZHP or not, I still like you"


    ZHP Performance Package, Cold Weather Package, Leather, Jet Black/Black/BlackCube, NAV, Anthracite Black "my individual" interior trim
    ESS Stage 1 Twin Screw Supercharger, Sprint Booster, BMW Perf Intake, Magnaflow Exhaust, Dinan TB & STEP S/W, UCC Sway Bars, Apex EC-7 18x8.5 ET38
    Suspension: AST 44100 dampers, Bimmerworld front adjustable end links, Swift springs (8K front, 10K rear), Vorshlag camber plates
    Dynavin D99+, Hardwire V1 (w/V1 Connection), BSW Stage 1 Speakers, Kicker Amp/Subwoofer
    BMW Performance Strut Brace, Orion V2 Angel Eyes, No-holes License Plate, SMG Paddle Shift Mod, Besian VANOS, Gold DISA, Fan Delete, M3 Side Mirrors
    Note: Actual car no longer resembles signature picture

  8. #38
    Join Date
    Feb 2013
    Location
    Austin TX
    Posts
    7,927
    Pics after install pls ! I'm considering one for my car, too.

  9. #39
    Join Date
    Nov 2015
    Location
    College Station, Texas
    Posts
    244
    Quote Originally Posted by fredo View Post
    Pics after install pls ! I'm considering one for my car, too.
    Will do! Just got to get those nuts.

    Actually, I'd have to wait anyways. This high-temp engine paint says it won't fully cure for 7 days. But I'll post pics when done. I don't think it's going to be the best looking bar by any means, but it's one of the better bars functionally since it has no pivots.

    Blake - 2005 330i ZHP 6-sp

  10. #40
    Join Date
    Nov 2014
    Location
    Portland, OR
    Posts
    10,323
    Nice work, in for pics as well on the finished product.

Page 4 of 9 FirstFirst ... 23456 ... LastLast

Similar Threads

  1. Mike Miller Old School Maintenance Schedule for BMW
    By kayger12 in forum Maintenance
    Replies: 27
    Last Post: 02-04-2014, 12:21 PM
  2. Replies: 9
    Last Post: 10-14-2013, 10:13 AM
  3. School me on tinting
    By az3579 in forum General -- ZHP Related
    Replies: 24
    Last Post: 07-02-2012, 01:26 PM
  4. Replies: 17
    Last Post: 01-05-2011, 11:34 AM

Posting Permissions

  • You may not post new threads
  • You may not post replies
  • You may not post attachments
  • You may not edit your posts
  •