

Since the day I purchased my car, the drivers side footwell light has been burnt out. I never really got around to doing anything about it because it wasn't a big deal to me and I had other concerns to take care of.
So about a week ago I decided to replace that burnt out bulb with the entire interior LED kit sold by Khoalty. I went with the 12 panel LED kit and I also purchased a resistor.
Note: I did not use or need the resistor for my car. I purchased it just in case I needed it and didn't want to spend an extra $8.50 for shipping if I needed it later.
This is the kit that I purchased
The Product
As far as performance, I am very pleased with this kit. Everything worked as it should and the price was right. However the build quality of some of the LED's seemed a little shady.
Some of them had all kinds of crap on the back like this one
At first glance, I held it in my hand and thought to myself "did they send me LED's that have already been used in someone elses car?"
Slight bend at the ends
An the 12 panel LED kit was soldered on slightly crooked so I had to twist the bulb holder ever so slightly to correct this.
The Install
The install was fairly simple once I got all of the information. Khoalty has a guide on their website found HERE, but it only helped so much.
The vanity lights are simple to pop out and replace. Just use the flathead screwdriver and safely pry out the plastic (There are indents on where to stick the flathead to make everything come out easier.)
The same goes for the the footwell lights. Just pry them off safely with a flathead screwdriver, pop out the old bulb and put in the new one. Note As Khoalty says, the LED's are polarized, so they only work if inserted in the proper orientation. If they don't work, you probably just need to turn it around (just like a battery in a remote has + and -)
Here's where things got a little frustrating for me. I managed to get the dome light housing out without much of a problem. (When you pry out the dome light the fabric will look a little smashed. This is ok, as long as you don't scratch it, it will puff back out and look normal)
So since I ordered the 12 panel LED I needed to take the plastic covering off of the dome light housing.
Khoalty posted this video showing that their kit is a true plug and play kit, which is awesome and mostly true. (If you bought the 12 or 18 panel LED kit then you still have to remove the plastic covering, but the video does not show you how)
When you try to pry the plastic cover off, part of it wants to give, but the other half is locked into place. I messed with it for 5 minutes or so before I almost tried to just snap it off thinking it was supposed to be tough.
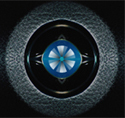
There are two small screws you need to remove to completely detach the plastic piece from the dome light housing. The screw marked red is located in the hole marked by the arrow.
After putting everything in, just put the screws back into the dome light housing, and pop the housing back into place. Pretty simple. Just make sure that the LED's work before you close everything up.
Ok now the back seat lights were a little bit of a pain. You kinda have to pry pretty hard to get them to come out right. What I did was pry one side out a little bit, then slide in the plastic casing that the LED's came in to prevent it from going all the way back in, then prying out the other side. This way I didn't have to scratch up the fabric in the back. Just be careful when pulling them out, there are two clips (Maybe brass?) that usually fall out. One of mine fell out and went all the way down my C-Pillar...
Note Khoalty's guide says that you have to remove the plastic covering of the rear seat lights in order to get the bulbs out. This is false. You can pull out the bulbs without removing the plastic and put in the new LED's.
Trunk lights are pretty straight forward. Just pop out the little plastic covering and swap in an LED bulb. If you have Eagle Eye LED Tails like me the plastic covering is almost welded on and cant easily be removed. So just unscrew the plastic backing and pull out the rubber housing that holds the bulb. (Don't worry it goes in and out easily) Just make sure that you close your trunk for a minute to let the lights turn off and cool down. I went to grab the bulb and shouted "fuck" super loud in the driveway when my neighbors were out. Bulbs get very hot.
Now for the glovebox light. Again, Khoalty had no instructions on what to do here. At first glance I thought I was going to have to remove my glovebox or something to get to it because of a little plastic rod that sticks out, which turns the light on and off if the glovebox is closed or open. There is an indent on the right side, just stick in the flathead and pry it out. Simple.
The Verdict
Overall, I am very pleased with this kit. It works as intended, is EXTREMELY bright as advertised. (Seriously, I opened the mirror to activate the vanity light at nighttime, and almost blinded myself).
The build quality of the LED's seems a little sketchy, but as long as they work properly and last like they should I don't have a problem with it. It's not like the LED's are visible anyway.
The only thing that bothered me was the guide. It's frustrating when you buy a product and the guide that is provided does not include a full description of what you are supposed to do. It is also annoying when the guide tells you to remove things that you do not need to remove. (I had similar annoying problems following Khoalty's EE LED Tail install guide)
All that being said, I am happy with this product so far and would recommend it to anyone looking for an interior LED kit.


 Reply With Quote


![http://s900.photobucket.com/user/othibau/media/Junesig.jpg.html][IMG]http://i900.photobucket.com/albums/ac208/othibau/Junesig.jpg](image.php?s=1e57c02200d21b6faf2bc03ded1d16e5&u=605&type=sigpic&dateline=1367713585)