Just finished installing my SSK to replace my destroyed ZHP knob and sloppy shifter. Everyone always told me that you need to go under the car to reinstall the clip, but I did not have to do this. Just apply some flexible tools and some logic and you should be able to do this from the comfort of your front seat.
I really enjoy this mod, and the shifter feels stiff again!
Okay, so, you are going to need:
BMW Performance Short Shift Kit: 25110430356
Philips Screw Driver
Minus Screw Driver (I simply used a screwdriver with switchable heads)
You are going to need some sort of flexible gripper. Something that can bend and hold onto stuff (the questionable female clip, in this case).
An extendable magnet, just in case you drop the clip. I used it twice and it saved me from going under the car.
Some grease.
Patience.
Total time ~ 2 hours first time, ~1 hour on further installs.
First, remove your shifter surround, and remove the foam insert that is underneath it. Here is where I deviate: remove your storage compartments and switch panel as well. You are going to need the extra room, and it makes it much easier to gain leverage. These things are pretty self explanatory, so I'll spare you the walkthrough/pictures.
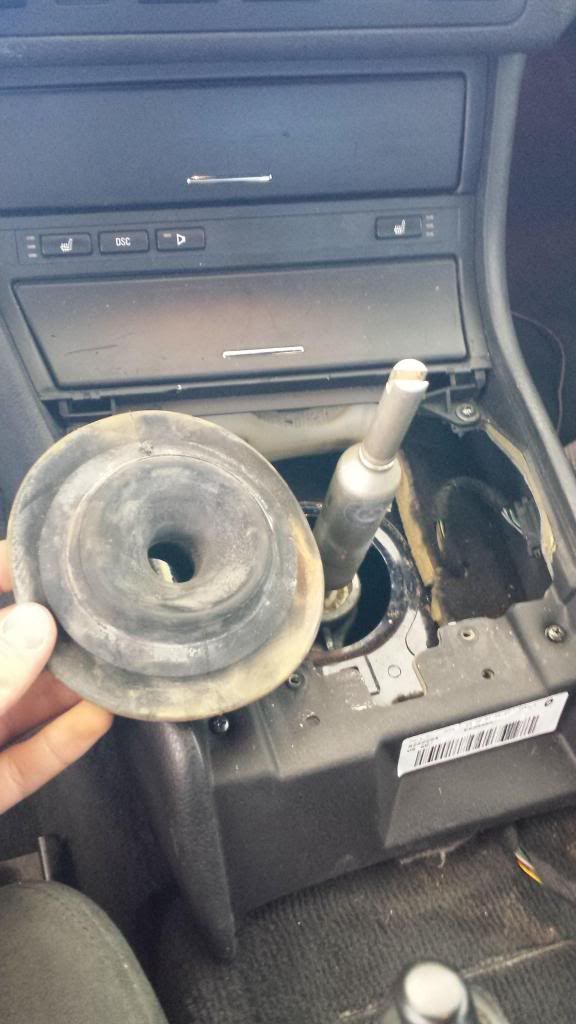
Next, remove the rubber boot at the base of the shifter. This is actually a pesky little thing. Starting at the bottom of the pattern (where 4th gear is located), start pulling the boot forward (towards 3rd gear) and up. I did this by alternating between left and right hands. Pull up as much as you can with your right, then hold it with your right and start pulling with your left, then right, then left, etc. The lip that holds the rubber boot under the metal is about an inch wide, so it'll take you a minute. Once you get the edge of the lip out, just pull on it to get the rest of the boot out, going around the hole in a circle.
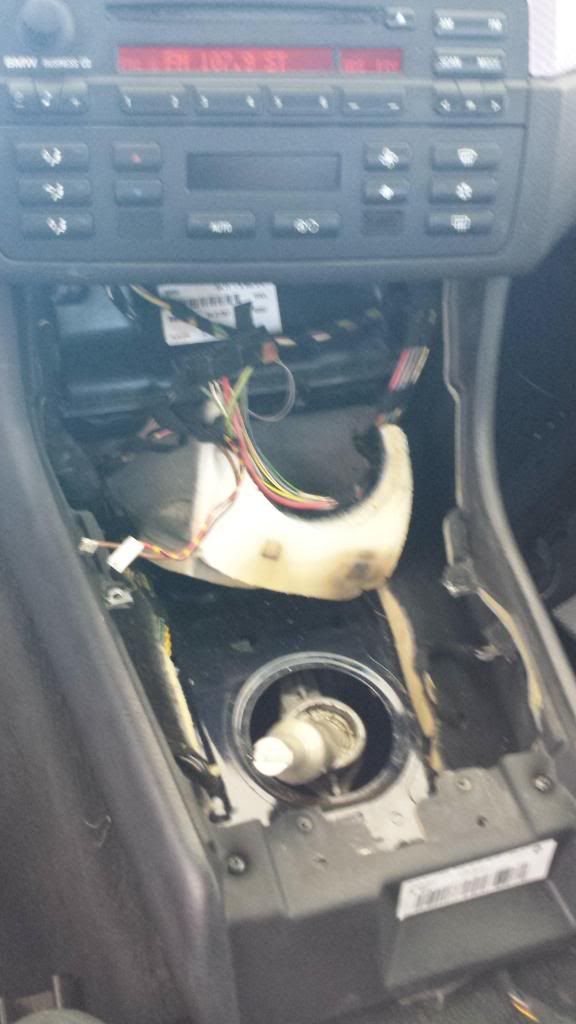
You should be seeing this, now:
Now to remove the clip: put the car in reverse! This is the easiest way (the only way) to get access to the clip from the top. Using either your flexible grab tool or extendable magnet, try to hold the clip. The reason you are doing this is so that the clip doesn't fall under the car when you remove it. Once you have the magnet next to the clip or you have the clip help by the extendable grip, use a screwdriver to push the clip out. You may have to rotate the clip around until you are able to push it off (in our case, down under the car). It spins freely around the shift rod pin.
Going to look like this: (except your right hand will be pushing the clip off)
Once you remove the clip, put the car into neutral. You are going to disengage the shifter rod from the shift lever. Take a screw driver and insert it in between the rod and the lever, and force it out. Use the base (where the white collar bushing is) as leverage. You will pull right and the screw driver will push left, and the shifter rod will disengage from the lever. The way they are held together is by a pin; the shift rod has a pin that slides into the base of the lever, and the clip holds that pin from the other side.
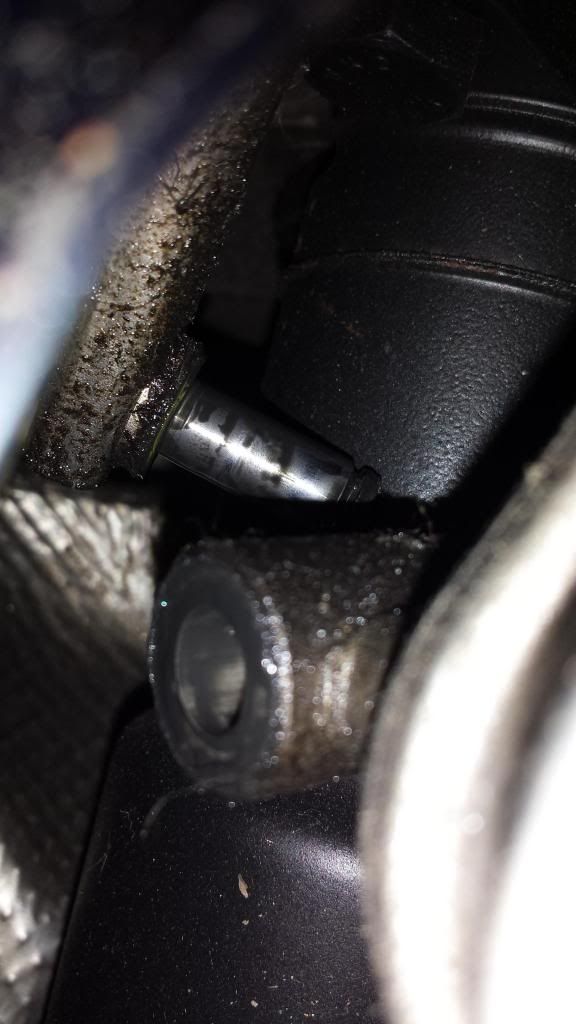
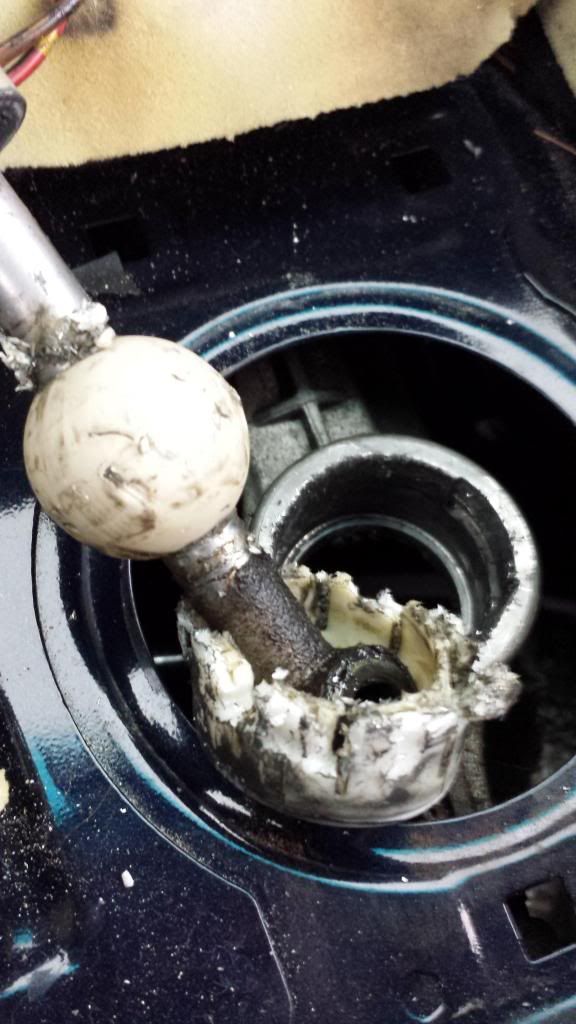
This is what it looks like. On the top left you see the guide pin coming from the shifter rod, and the hole on the shift level into which it enters. (I don't know why mine is covered in oil, but it seems I have a leak to find somewhere around my transmission). Hopefully, yours is clean.
Okay, now the hard part. You need to remove the lever and collar. This is, quite simply, a pain in the ass. You need to take the collar and rotate is as far as you can counter-clockwise. You will see two pins sticking up, one at 12 o'clock, one at 6 o'clock. Now you need to release all your pent up stress from the week and destroy this collar.
I have no pictures here, but this is how I did it: First, I destroyed the upper part of the clip, where 3rd gear is (this is where that extra room from removing the button panel comes in handy). Then I did this: Turn the collar back to the right (clockwise). At 135 degrees (roughly where first gear is relative to neutral), insert your two-prong clip puller in between the metal and the collar. Then, with the puller still in there, turn the entire thing back counter-clockwise. Your goal here is to have the clip puller be in between the collar and the metal at 180 degrees, towards reverse. The reason you can't really do this outright it because there is no room between the plastic and metal for you to get the puller in there. So we turn it, get the puller in there, then turn it back, so that now, the clip puller is between the collar and plastic on the left side of the shifter (180 degrees of a circle). Then, leverage it up. Pull the collar as high as you can while also pulling the shift lever up (would be better with two people, I did it myself). This should get the collar and shifter out as one piece.
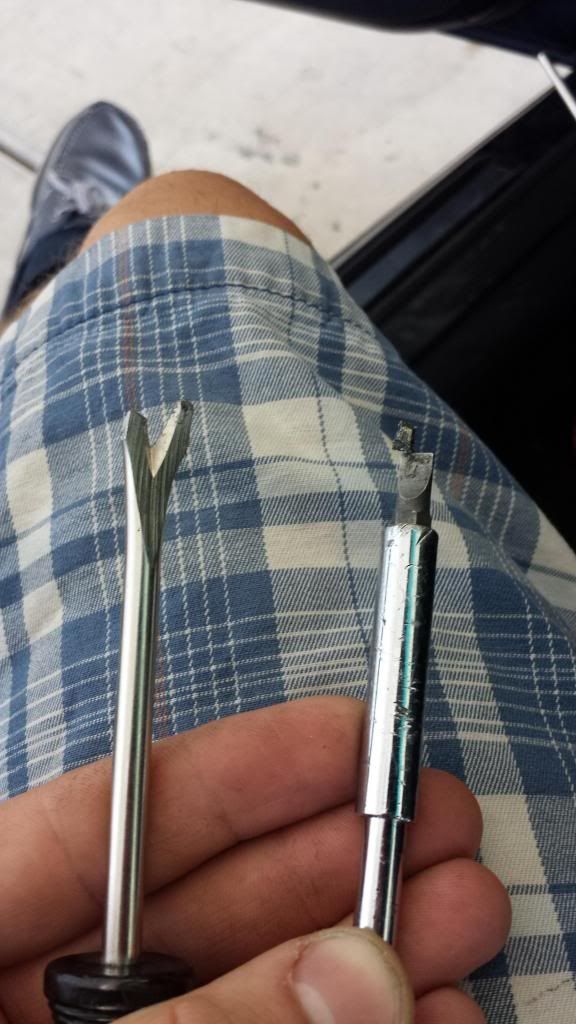
WARNING: this is a PAIN in the ass, and it broke my two prong clip puller: You can see the broken piece from my clip puller stuck to the magnetized screw driver. The piece was one inch from hitting my eye. BE CAREFUL!
Once you get it out, it'll look like this:
Thanks to Justin, it appears there is a much easier to remove the collar and lever:
If you are pissed off at this point, go take a break.
You are past the hard part.
Now, take your new collar and shifter (grease just the ball, not the whole shifter) and grease them. I used regular white grease. Use whatever you want, but some people say to get the thickest grease possible, but I think that's beyond anal.
After you have greased both the shift lever, lock the collar onto the ball of the shifter lever. CAREFUL: do not break the collar by forcing it over the bottom of the shift lever, there are four notches on the bottom (essentially making a square in the circle) of the collar designed to make it slide over the bottom of the shift lever! Match up the notches with the bottom of the shift lever (where the shifter rod pin is inserted) and it will get onto the lever. Now press the collar onto the ball. This will take a firm press, careful not to break the collar. The grease should make it fairly easy, however.
MAKE sure you install the lever in the correct direction! The bend should be facing the back of the car! The tip of the bend should be facing the BACK OF THE CAR! IF you do this backwards, you're going to have some fun.
Firmly press the new collar with shift lever back into the hole you removed it from. The pins should be at 12 o'clock and 6 o'clock when you do this.
From the pin on the shifter rod, remove all old washers. They are not needed, as the SSK has built in washers.
Now, use your flexible grabber and lift the shifter rod up and align the pin with the hole in the shift lever. The pin is actually not pointing straight to the right, it's more like a -15 degree angle. Hard to explain, but you'll see it. Once you get the tip of the pin aligned with the hole in the lever, take your clip puller once again and push the pin into the shift lever. You are going to use the metal of your car as a leverage point to do this. Your right hand will have to hold the lever to keep it from moving. You're going to have to do some jiggling and coaxing to get it in there, but it should be pretty easy. Once it slides in, make sure you still give it one more good push to make sure it's seated 100%.
Now the fun part, the clip!
Put the car back into reverse. Notice how the shift feels?
This is where most people give up and go under the car, which is, IMO, a shit tonne of work for a single clip.
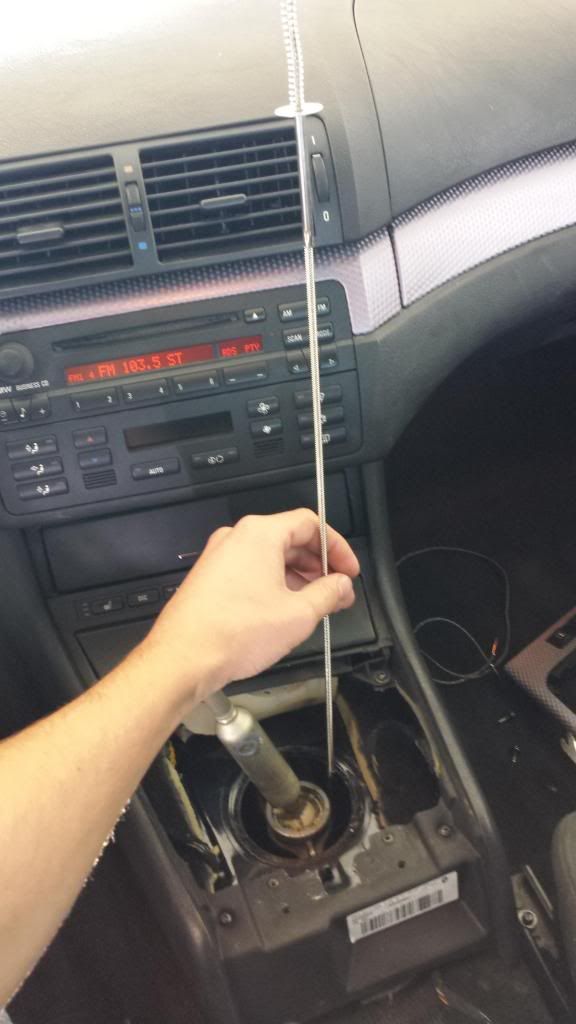
I have no pictures here because this is nearly impossible to photograph. Using your flexible puller, like the one I have here:
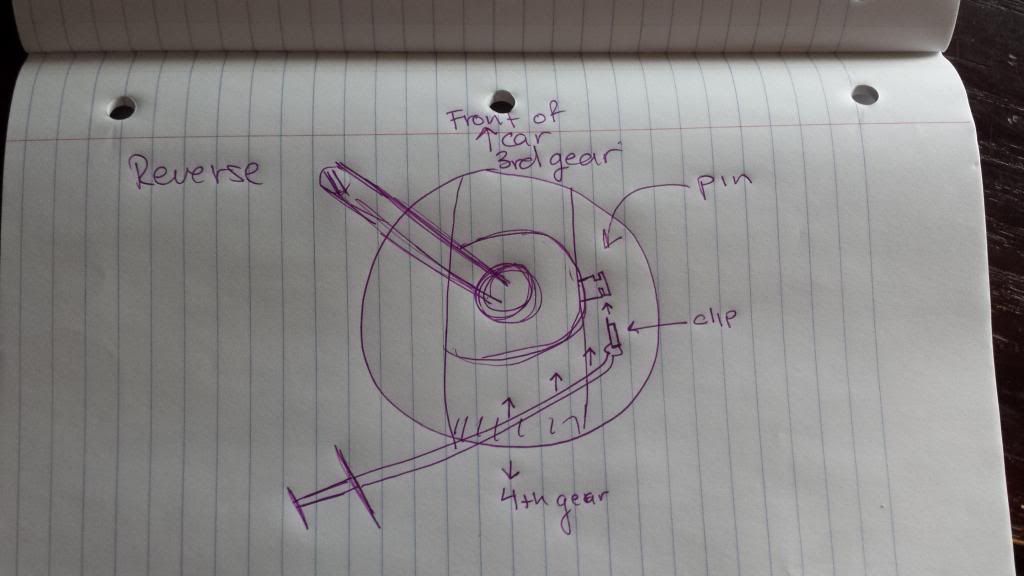
You are going to try to seat the clip only slightly onto the pin. I'll try to describe the best I can. You are going to use you flexible grabber to grab hold of this clip at a 135 degree angle relative to the back of the clip. Coming from the bottom of the hole, you are going to slide the clip a little bit onto the pin. Once it's holding there, you will disengage the clip from the grabber, and take your minus screwdriver, and push on the clip with the screwdriver to fully seat it.
Diagram:
You have to do this from the back of the shifter, 270 degrees, because there is little room on the side to fit the clip. The reason I couldn't do it from the side is because my flexible grabber was rigid for the last few inches. If yours is flexible all the way to the end, your life will be much easier and you can do it from the side.
There's only so much I can say about how to seat it, you need to use your own head and logic with the tools you have. But it's possible, and it's not that hard.
TIP: if you drop the clip onto the brace under the driveshaft, use the magnet! EVEN if you dropped the clip onto the right side of the brace, it'll probably end up on the left side of the shifter because of how the brace is slanted. Insert your magnet on the left side and move it back and forth. I dropped mine twice and easily recovered it both times.
Once you seat the clip, you're done! Reassemble the parts.
Grease the inside of the rubber dust boot and insert it back over the shifter. Too tacky to do it without grease or some other lube.
You will probably notice that your shifter vibrates at all times when the car is running, whether driving or at idle. That's normal, and is probably because your transmission/engine mounts are aging and need to be replaced. It's not because of incorrect installation.
Enjoy!
REVIEW:
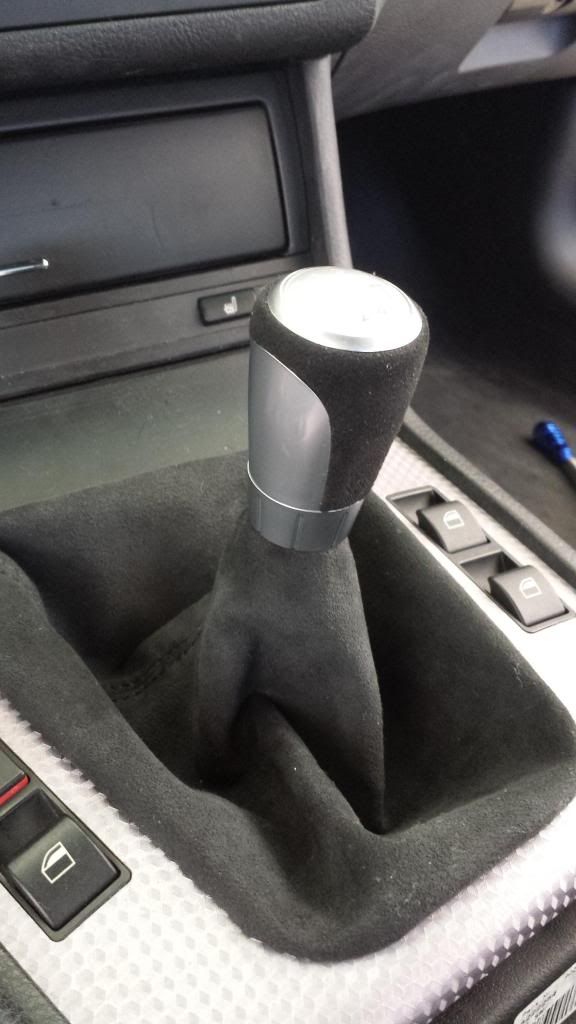
The shifts are much notchier and faster. 95% of slop eliminated. I also love the form of the Performance Knob. Well worth the money.





 Reply With Quote


