Undertook this project because of symptoms described here.
So I got the starter swapped out with way less of a headache than I expected. Spent two nights after work ~3hrs each including the 30 mins it takes to get the thing up on jack stands and properly secured. Sorry there are a lot less pictures than planned since my better half took the camera out of town forcing me to use my phone for the important things like recording where wires went etc.
So to start this is on a 2004 330Ci 6MT:
-Jack car up and safely secure it before crawling underneath and wrenching on stuff
-Disconnect battery in trunk
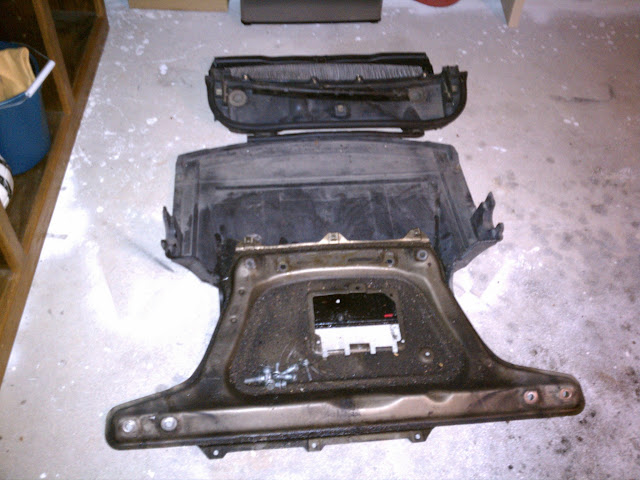
-Remove front plastic splash guard (7 phillips screws)
-Remove the aluminum belly brace (8 bolts 16mm I think)
*This is all I had to remove* - Didn't have to do anything from the top like the DIY's said since I could get both bolts from below using the contraption I'll describe below. Discovered this after already removing the cabin filter and housing of course.
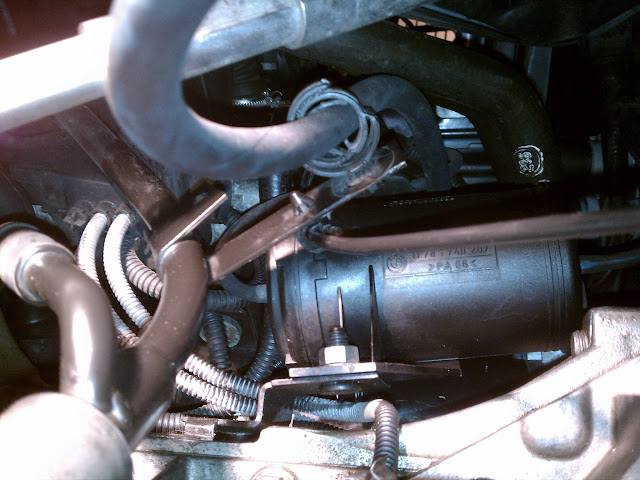
-It will look like this up where you're going to be poking around so clean it off. (view looking up at drivers side of tranny with rear of car to right)
-Should undo that hose guide (top middle of pic) to move the hose a little more out of the way.
-Same with the thin semi-rigid fuel line on the same support
-Remove the nut (lower middle of pic) to get the vacuum canister out of the way since the starter is directly behind it
-Now you have eyes on the starter and the real fun can begin
-Just feel around up there so you can get a sense of where things are and supposed to go since the bolt removal is almost entirely by feel.
-Build your extension & u-joint contraption:
_____-For the lower bolt it's much easier and you can get away with about a foot and a half of wobbly extensions (I used E12 socket-3 inch-Ujoint-6inch wobble-10in wobble)
_____-For the upper I used a bit more to get up the transmission tunnel, over towards the center, and up to the interface where the bolt is. E12 socket-3inch-U-joint-6inch straight-U-joint-6inch wobble-10inch wobble-ratchet-big box end wrench for torque) You'll have to guide it as it'll be long and floppy going into the tight space(yes I know how that sounds...)
-Once broken loose the bolts should come out relative easily
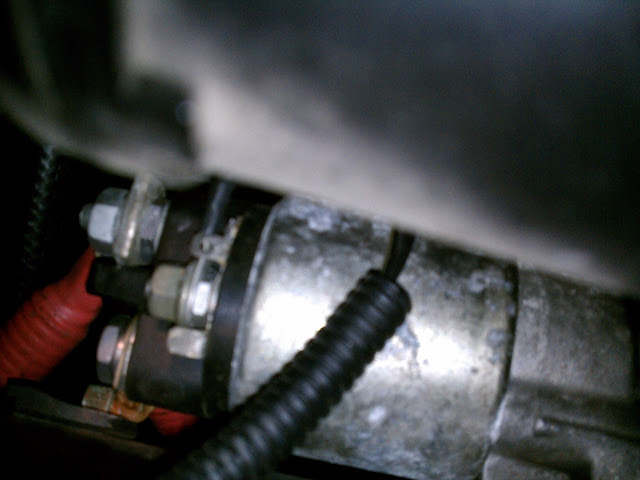
-Now go back up to the starter side and grab the starter and wiggle it loose (there's still a guide pin holding it on)
-You'll have to move the vacuum canister around if you didn't remove it but there's room to maneuver with it loose.
-Easier to get the wires off if you twist the starter vertical so the posts are facing down and can use a socket to loosen the connections.
Took a few more pics so I knew where the wires went but really isn't tricky at all. There are three different sized posts on the starter solenoid:
-The largest has two heavy gauge wires both with red coverings on the connectors
-The medium is the one on the bottom and is a small ~18ga black wire with a yellow maybe white stripe
-The smallest post is a plain black wire coming from the same loom as the one going to the medium post and is on the top side of the solenoid
-Once you've got the wires disconnected you can finangle the starter out of that cavity.
Check the starter/tranny for the guide pin as you'll need to reuse it with the new starter. Will probably also help to lightly sand/at least clean the pin so it goes onto the new starter easily as it'll be a pain later.
Pics via phone jammed up in the hole and rotated to fit.
Guide pin goes in the top right hole. Be sure not to drop it in the open hole into the transmission! I didn't do this but could see how it would be easy to do.
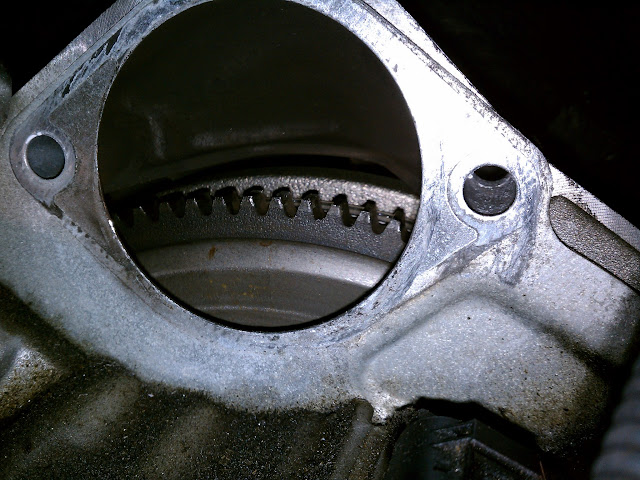
Check out your flywheel teeth
-Reassemble, reconnect battery and give it a try before you finish buttoning everything up and lowering car.
-Finish buttoning everything up and lower car
-Have a beer


 Reply With Quote