Part II: Transmission Removal
Tools:
1. 6-Speed Clutch Alignment Tool
2. 16mm, 14mm, 11mm, 10mm Wrenches/Sockets
3. External Torx socket set with sizes from E6 through E16
4. T25, T35, T50, and T60 Torx sockets. T60 isn’t standard with most kits.
5. Long socket extension (24”)
6. Short “wobbly” extension
7. Universal Joint
8. Breaker Bar
9. Long pry bar
10. Inspection Mirror
11. Bright Shop Light
12. 2 Jacks
13. Wood Block
Supplies:
1. Red Loctite
2. high quality, high pressure wheel bearing grease
3. White Lithium or Superlube
4. Gear Oil: 1 Qt Redline 75W140NS, and 1 Qt Redline MT-90
5. Copper anti-seize paste
6. Engine Degreaser
Torque Specs:
1. Crankshaft Bolts: 77lbs
2. Pressure Plate Bolts: 18lbs
3. Transmission to Engine: (M8: 16lbs), (M10: 32lbs), (M12: 53lbs)
4. Rubber Mount to: Body / Transmission: (15lbs)
5. Transmission Cross member to Chassis: 15lbs
6. Center Bearing Cap to Chassis: 15lbs
7. Guibo: 74lbs
8. Slave Cylinder to Transmission: 16lbs
9. Exhaust Pipe to Manifold: 22lbs
10. Front End Reinforcement to Chassis: 44lbs + 90*
1. Remove Shifter Boot. (This step is unnecessary if you are not replacing your shifter. However, even if you keep your shifter, it is helpful to have additional light from the cockpit into the transmission tunnel, and the procedure is fast and easy.) Pull up hard on the shift knob with your hands to remove; avoid hitting yourself in the face. Squeeze the edges of the alcantra boot to disengage from surround and remove. Gently pull foam surround up and out. Pull rubber boot edge base away from metal tunnel and lift up. Start at one point and work your way around. Lift up and away from shifter.
[IMG]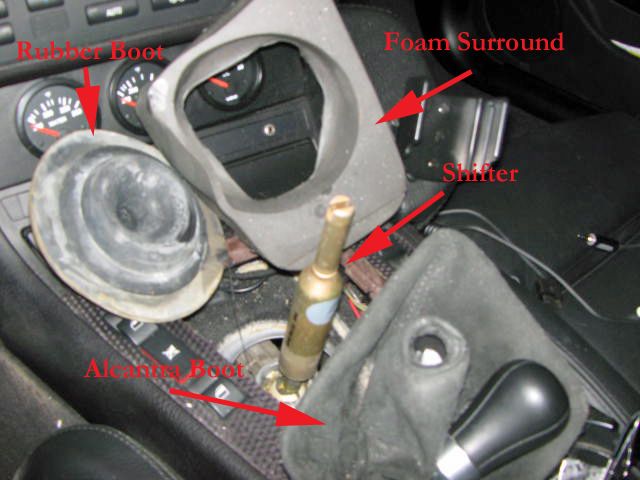 [/IMG]
2. Lift up the car. I lifted the car up high so that I could use my creeper. Due to its low stance, a floor jack won’t fit under it. So, lifting the car requires a process of using a small jack on a front jack point to bring the front of the car up high enough so that I can use my large floor jack. It is time consuming, so I use ramps whenever possible. Lift the car high enough that you can get yourself under the whole car (higher if you use a creeper) and slide the transmission out from under it, but not so high that you have difficulty accessing the top bell housing bolts.
[IMG]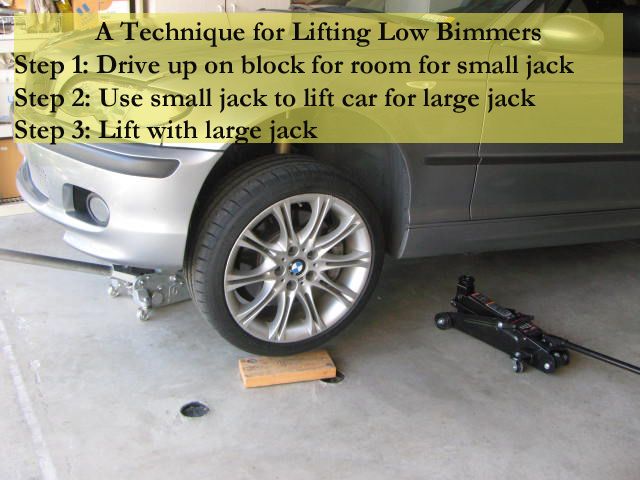 [/IMG]
[IMG]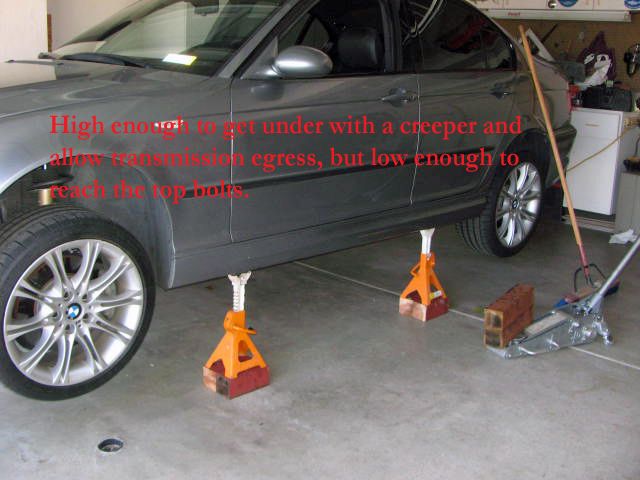 [/IMG]
3. Remove the front wheels. This will allow more light, easier ingress, and better positioning during the process.
4. Remove the under tray and front suspension reinforcement plate. The under tray is held on with screws and plastic rivets; the reinforcement plate with 16mm bolts. Do not reuse reinforcement plate bolts. You better wear eye protection, because a lot of debris will likely fall onto your face.
[IMG]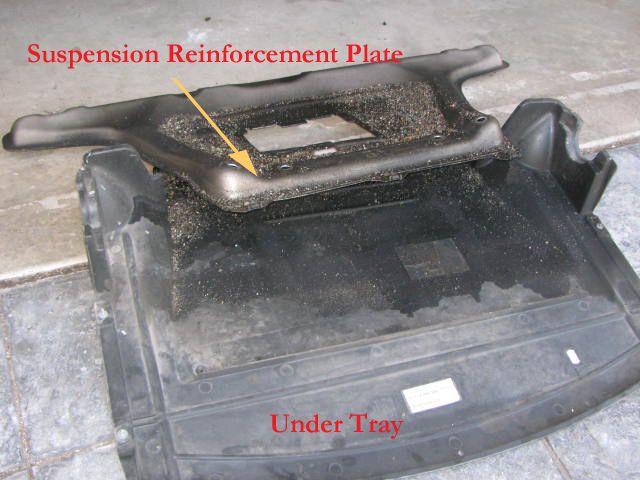 [/IMG]
5. Remove the exhaust and heat shield. Spray exhaust manifold nuts and any other nuts on/near the exhaust with a penetrating fluid like “PB Blaster” to free up stuck nuts. Remove exhaust. Then, remove heat shield. This would be a good time to drain your transmission fluid if you haven’t recently.
[IMG]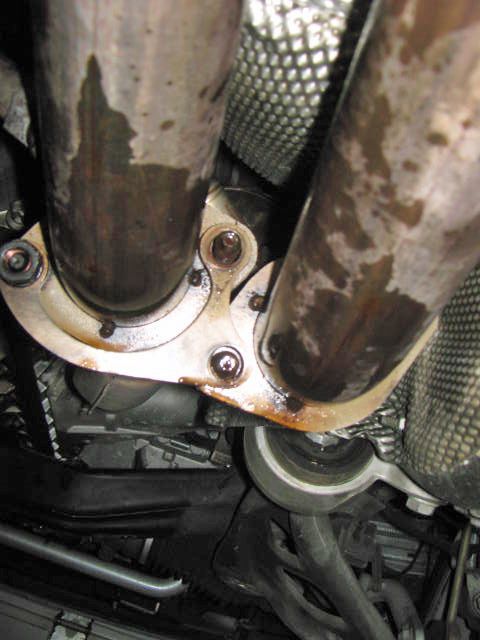 [/IMG]
[IMG]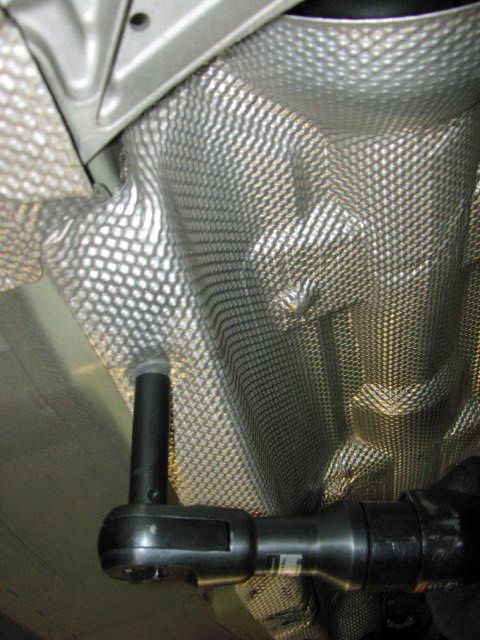 [/IMG]
6. Remove the transmission mount cross member. Mark the location of the cross member relative to the chassis; you want to ensure the cross member (and driveline) are reinstalled exactly as original (use a pencil to outline the cross member). Support the transmission with a jack. Remove the two (2) lower 13mm nuts of the rubber mounts and the four (4) 13mm nuts holding the cross member. Remove the rubber transmission mounts (13mm) at the cross member. You can remove the cross member without supporting the transmission, but there isn’t any reason to stress the drive shaft center bearing.
[IMG]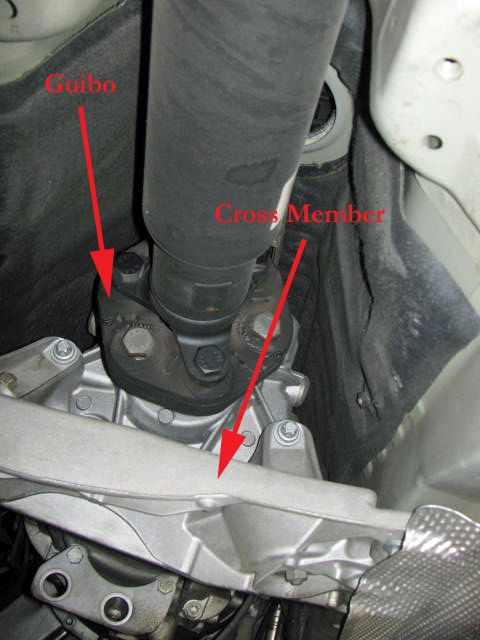 [/IMG]
[IMG]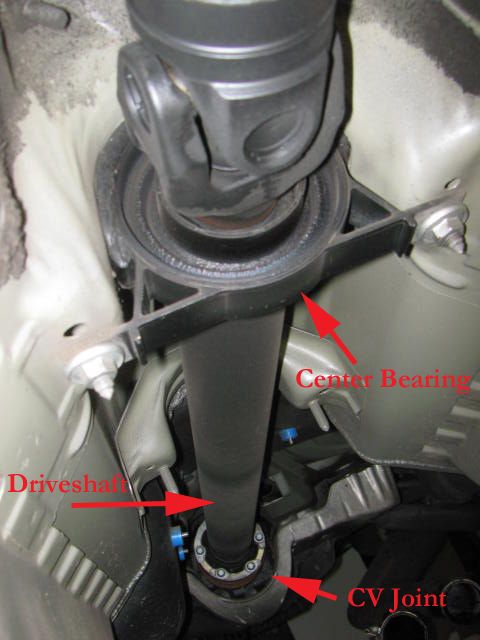 [/IMG]
7. Remove driveshaft. Remove the nuts securing the driveshaft to the flex joint (guibo). Nuts are 19mm and torqued to 74lbs. Remove the driveshaft center bearing cap. Leave the driveshaft bolted to the differential (final drive) and secure it out of the way (I used a coat hanger). ZHPs use a constant velocity (CV) joint between the driveshaft and differential, not a universal joint. Do not allow weight on the driveshaft because it can pinch and tear the CV joint. Clean the sticky black Butylene from the center bearing cap and chassis (I scraped it off with a putty knife and then cleaned it with acetone).
[IMG]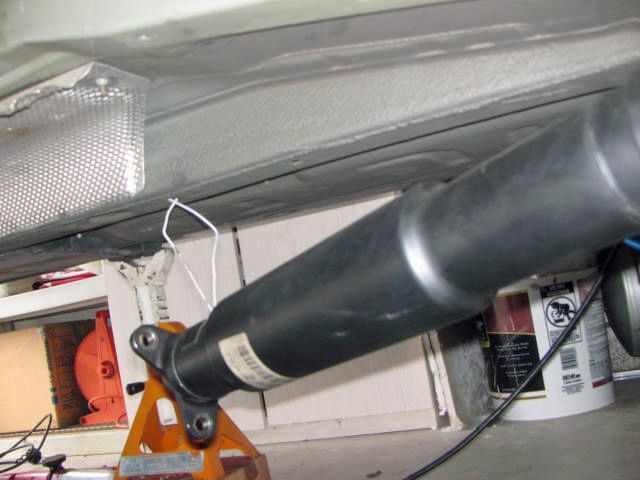 [/IMG]
[IMG] [/IMG]
[IMG]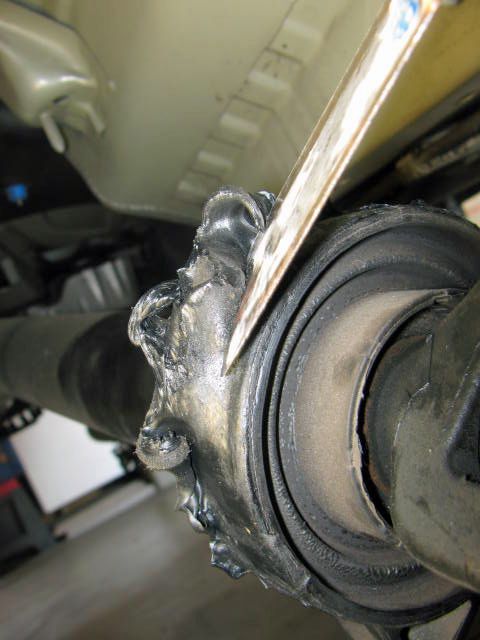 [/IMG]
8. Disconnect the shifter. There are two places you have to disconnect it from; the selector rod from the shifter and the carrier from the top of the transmission. The two (2) carrier pins clip onto the transmission on either side; unclip the pins and pull out.
[IMG]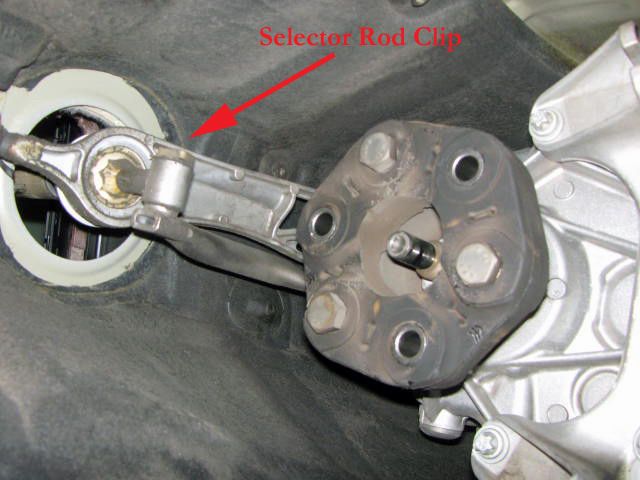 [/IMG]
[IMG]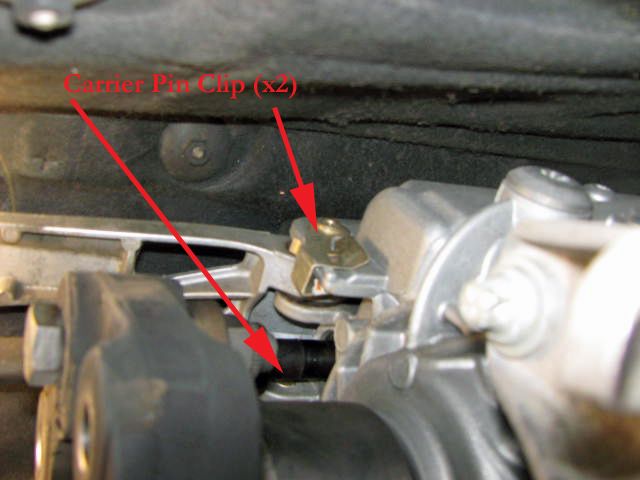 [/IMG]
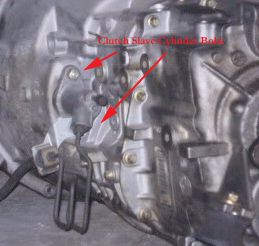
9. Remove clutch slave cylinder. Unbolt the slave cylinder (13mm) and secure it on top of the left A-arm; don’t remove the hydraulic line. Disconnect the backup lamp plug and detach its harness.
[IMG]
 [/IMG]
10. Lift front of engine. Place a wood block under the area where the air conditioning pump and idler pulley mount and jack up the front of the engine. Ensure only the engine lifts, not the whole front. This will give you additional room to gain access to the transmission bell housing bolts.
11. Remove transmission bell housing bolts. Undo the nine (9) Torx bolts and one (1) standard bolt that hold the transmission to the engine. See the chart for correct socket sizes. Be sure to note where each bolt goes, because they are different lengths and sizes. The M12 and M10 bolts are on very tight, so you will have to use a breaker bar (although the torque spec is 53lbs, corrosion and time required about 75lbs of effort to break it). The two bolts at the top of the engine near the cylinder head (#2 and #3) are very difficult to remove.
a. In order to remove bolt #2, I used a short wobbly extension and a long 24” extension. The total length should clear the back of the transmission enough to get a breaker bar on it when the socket is around the bolt, but not so long that it is difficult to control. I was unable to see or touch the bolt because of the narrow space between the chassis and bell housing, so I used an inspection mirror to view the bolt and maneuver the socket onto it. I wedged my shop light between the chassis and transmission. Feed the socket and long extension from the back/top of the transmission towards the bolt.
b. Bolt #1 is difficult, but at least you can touch it. Use the same wobbly and long extension you used for bolt #2.
c. I used the long extension and a universal joint for bolt #3. I had to use a long pry bar to help position the socket onto bolt. Again, feed the socket and long extension from the back/top of the transmission towards the bolt. The farther the bolt unscrews from the bell housing, the tighter the space becomes.
[IMG]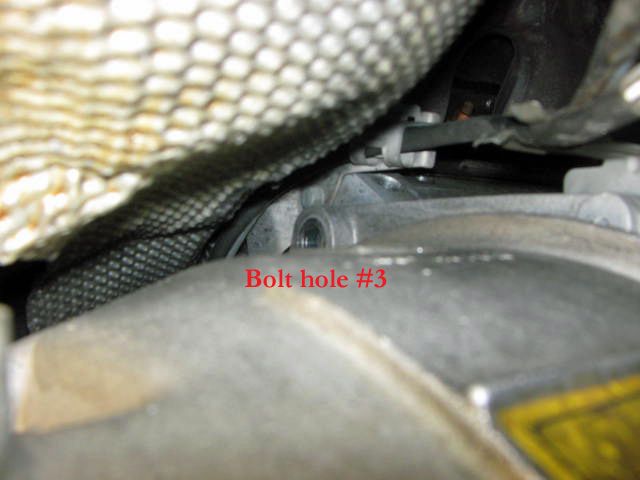 [/IMG]
d. Bolt #4 (10mm) is a standard bolt that secures an oxygen sensor cable holder and the metal transmission gasket to the transmission. It faces the front of the transmission, and not the back like the Torx bolts. It is easy to overlook because it is different.
[IMG]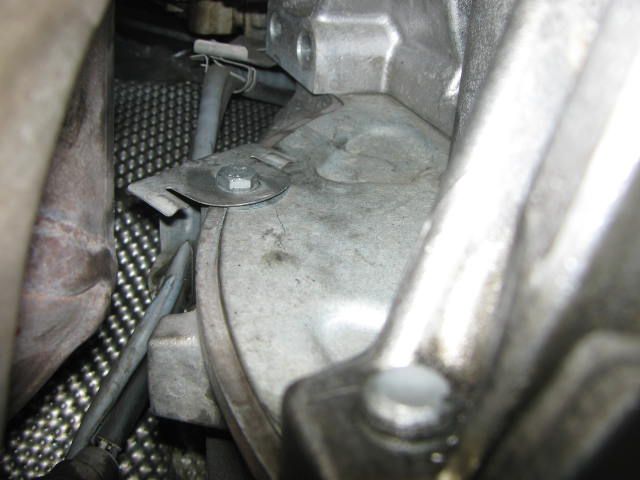 [/IMG]
e. The other bolts are easy to remove. Note that the arrow labeled #11 in the picture is not a bolt, it is a dowel attached to the transmission. The purpose of the dowel is to align the starter motor; this fact is significant when you install the transmission.
[IMG]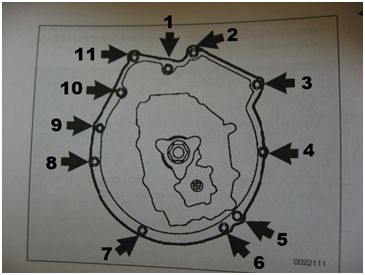 [/IMG]
[IMG]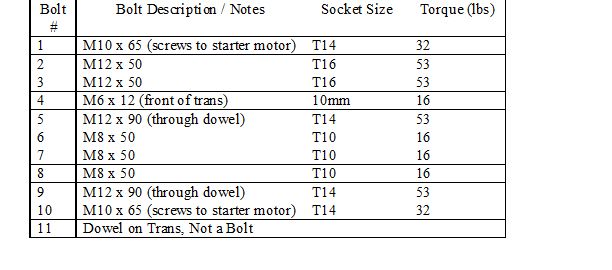 [/IMG]
[IMG]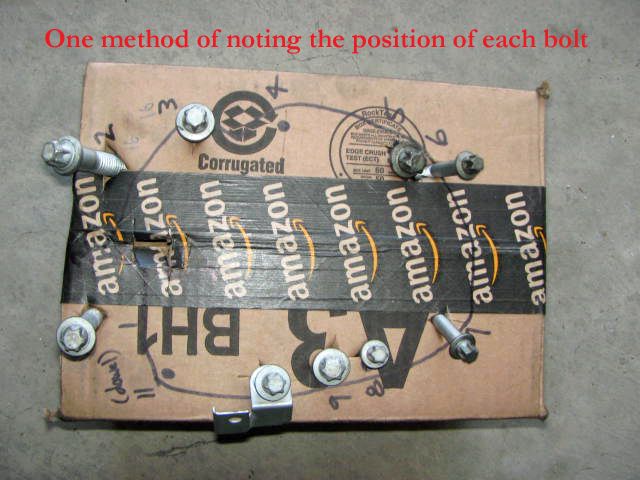 [/IMG]
12. Pull the transmission away from the engine. Be sure that the transmission is well supported - don't let it hang on the center input shaft as that could cause it to bend. You can use a floor jack, but you have more control with two people under it (one under the bell housing to rotate and pull and the other at the rear to shake and pull). Aggressively shake and rotate the transmission until it comes free and the input shaft clears the engine. My transmission separated from the engine easily (it’s a California car), but I have read of others who had difficulty. The engine/transmission dowels can get corroded from salt/moisture. If so, 1) ensure all bolts are removed, and 2) use a pry bar between engine/transmission, or 3) use a pneumatic hammer. Gently set the transmission on the ground. Celebrate.
Last edited by lkstaack; 03-12-2013 at 12:48 PM.
___________
Lars
2004 BMW 330iZHP: ESS TS-2 Supercharger, Limited Slip Differential, Koni FSD Shocks/Eibach Springs, Sway Barbarians


[/IMG]

 Reply With Quote
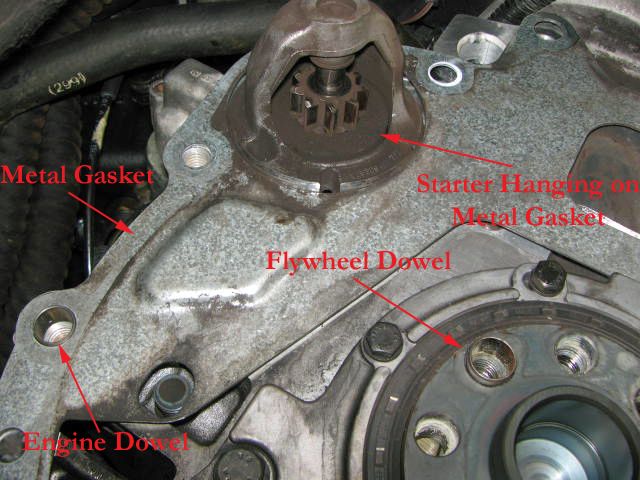 [/IMG]
 [/IMG]
 [/IMG]
 [/IMG]
 [/IMG]
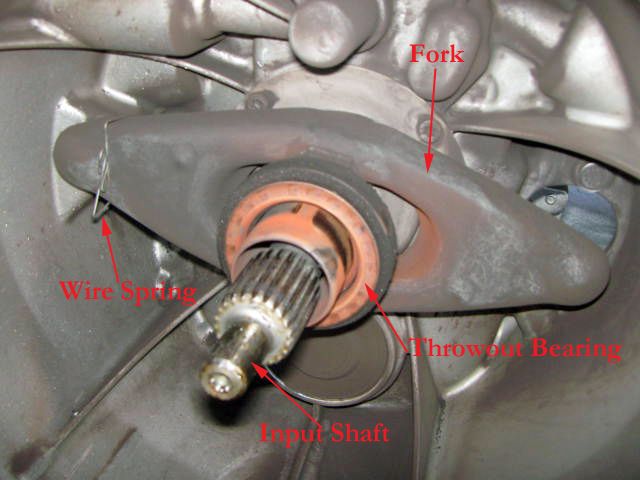 [/IMG]
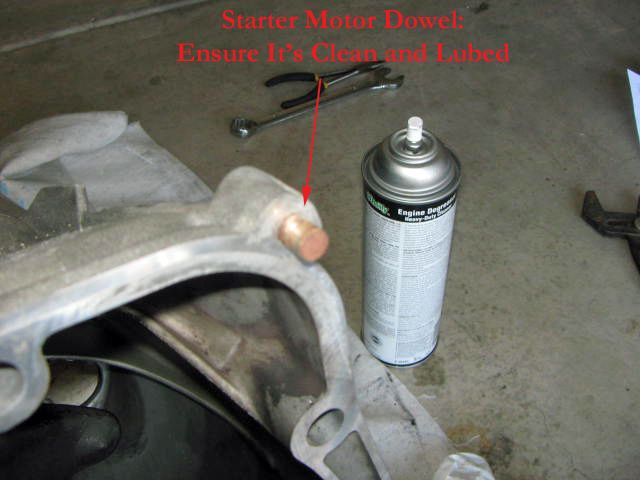 [/IMG]
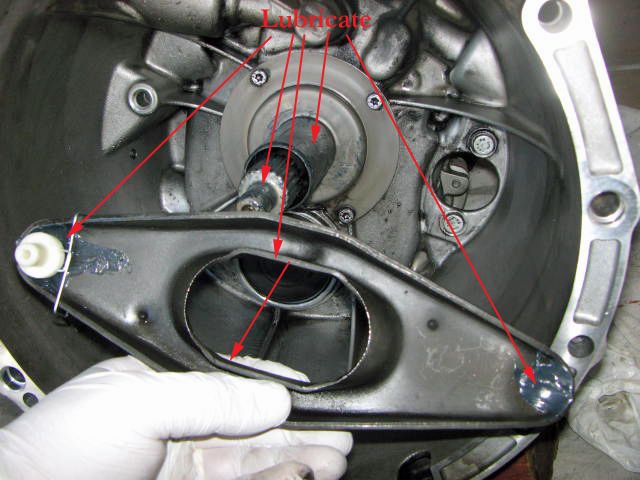 [/IMG]
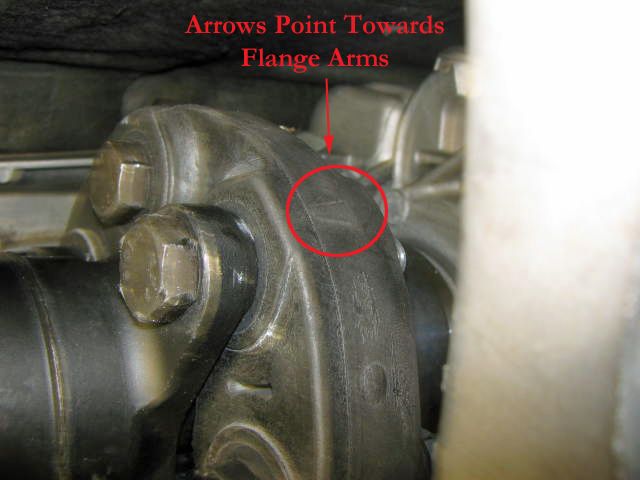 [/IMG]
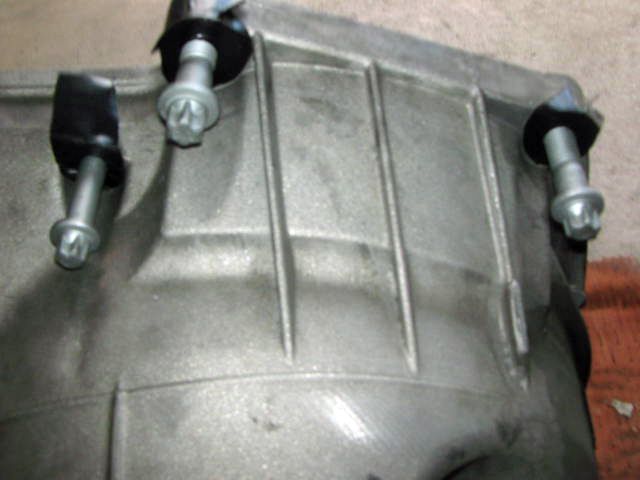 [/IMG]
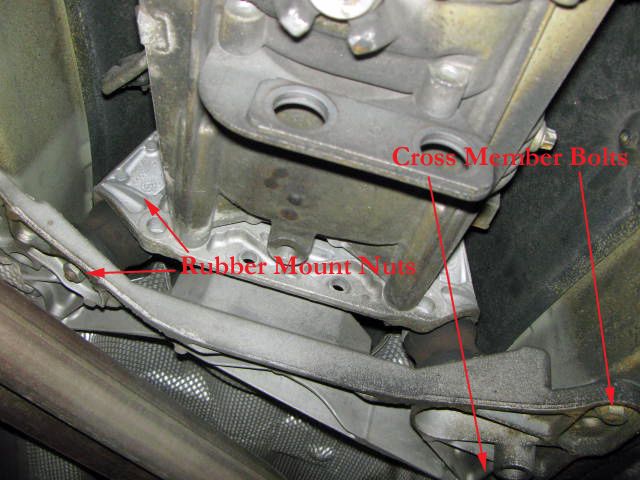 [/IMG]
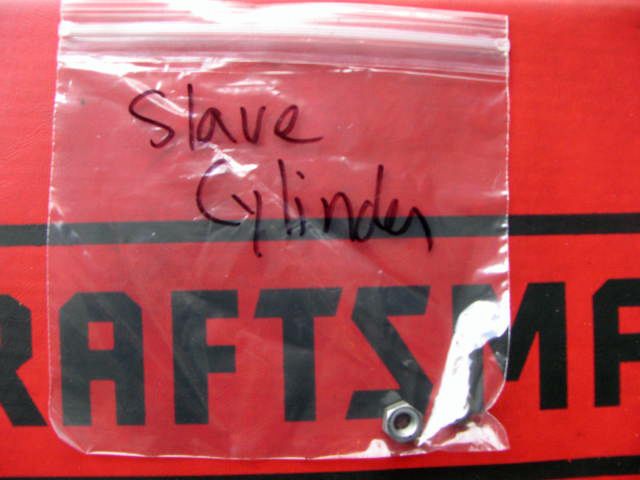 [/IMG]
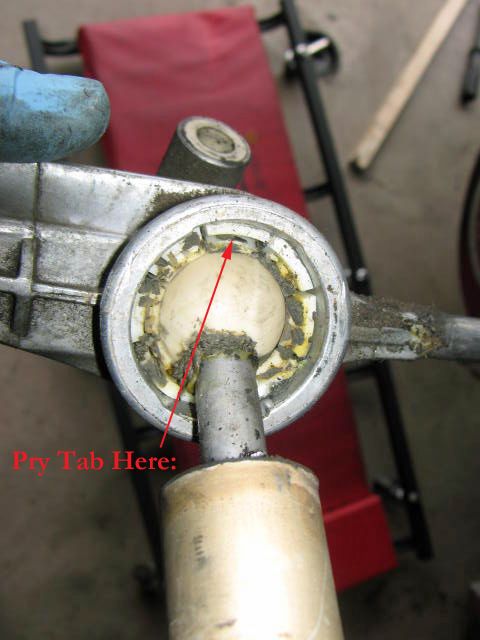 [/IMG]
 [/IMG]
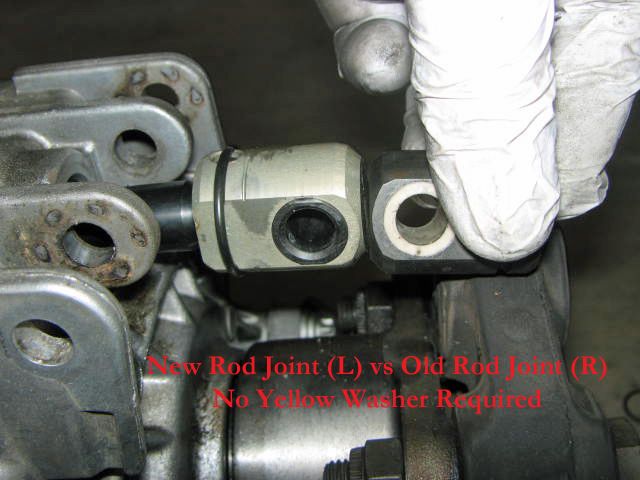 [/IMG]
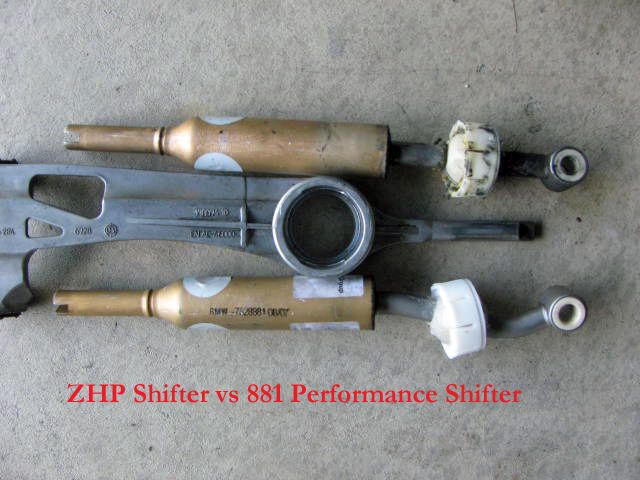 [/IMG]
 [/IMG]
 [/IMG]
 [/IMG]


