Part III: Remove and Replace Clutch Parts
We’ll first turn our attention to the engine.
1. Remove pressure plate. Remove the 6 hex bolts (E6). You can reuse these bolts if needed.
2. Remove flywheel. Remove the eight (8) bolts (T60). Use a small pry bar to gently pry off flywheel from supporting dowels if needed.
[IMG]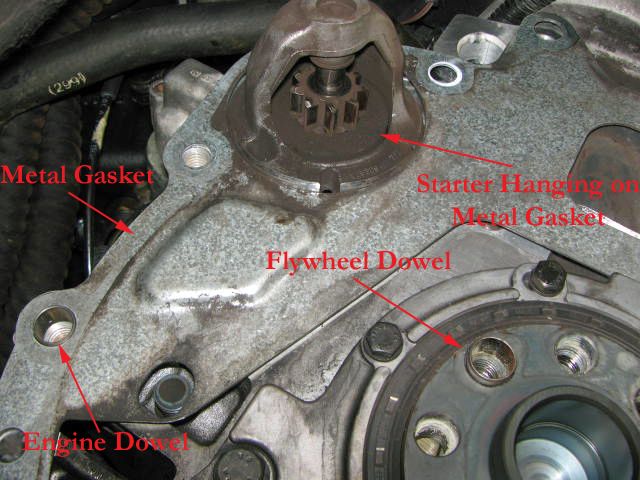 [/IMG]
3. Install new flywheel. Align the flywheel onto the dowel, push it on, and start the bolts. The flywheel is going to turn when you torque the bolts unless you lock it down. You can 1) have a buddy wedge a pry bar against the flywheel teeth, or 2) bolt a strip of metal between the flywheel and bell housing using a bell housing bolt a pressure plate bolt. Technique one is simplest, but requires a second person and a lot of strength. Technique two requires fabricating the metal strip. Use Red Loctite on the bolts and torque flywheel in star pattern. Don’t worry about installing a fresh Pilot Bearing because 6-Speed flywheels come with them integrated into the flywheel.
[IMG]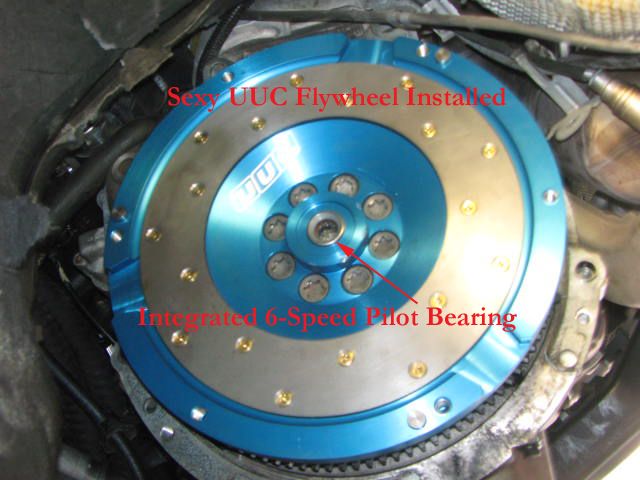 [/IMG]
4. Install clutch disk and pressure plate. Insert clutch alignment tool through clutch disk and into pilot bearing. Alignment tool fits snuggly into the pilot bearing and will keep the clutch disk centered and steady. Install pressure plate over clutch disk with alignment tool protruding from the center of the pressure plate. Torque bolts in star pattern. Remove clutch alignment tool.
[IMG]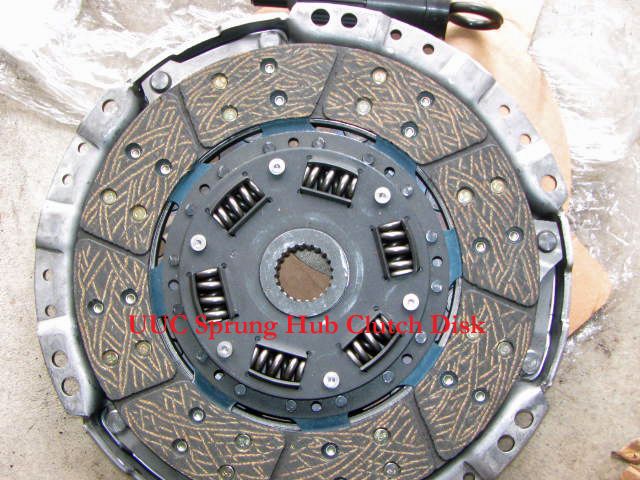 [/IMG]
[IMG]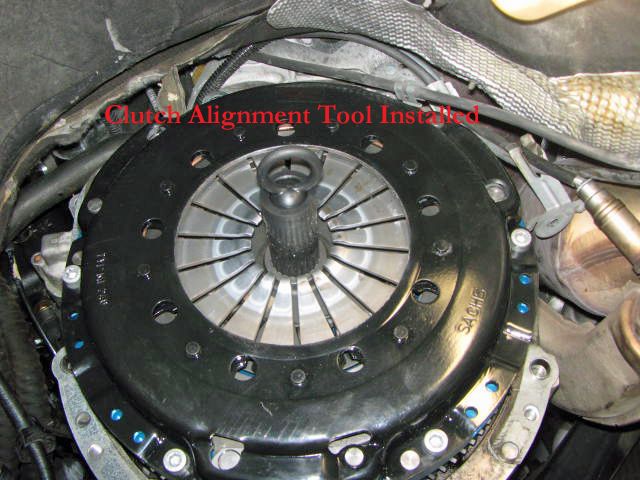 [/IMG]
Now let’s work inside the transmission bell housing.
1. Remove the Fork and Throwout Bearing. Pull out the old Throwout Bearing. Pop out the small plastic pivot from the hole behind the bell housing and remove the fork. Remove the wire spring from the pivot and fork.
[IMG]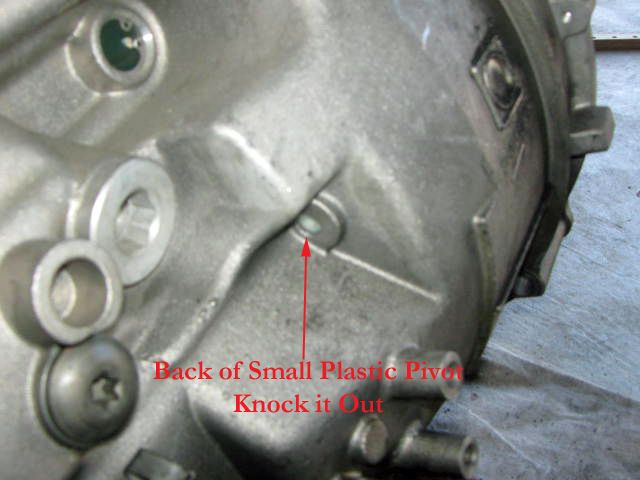 [/IMG]
[IMG]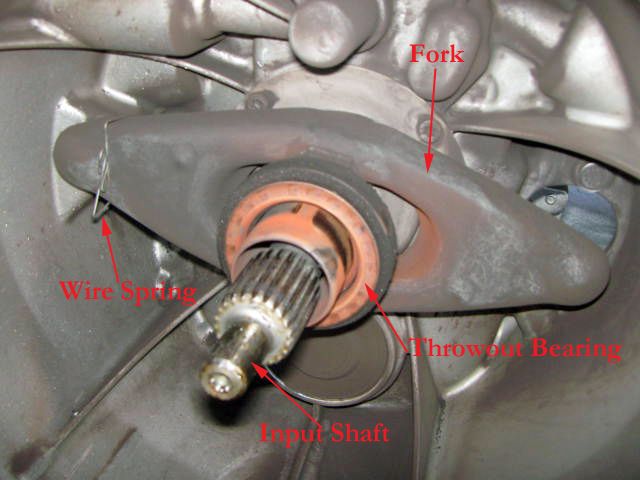 [/IMG]
2. Clean the bell housing. Use some cleaner to clean the inside of the bell housing, the shifter fork, and the input shaft. Ensure there isn’t any dirt, grease, rust or corrosion within the input shaft splines.
[IMG]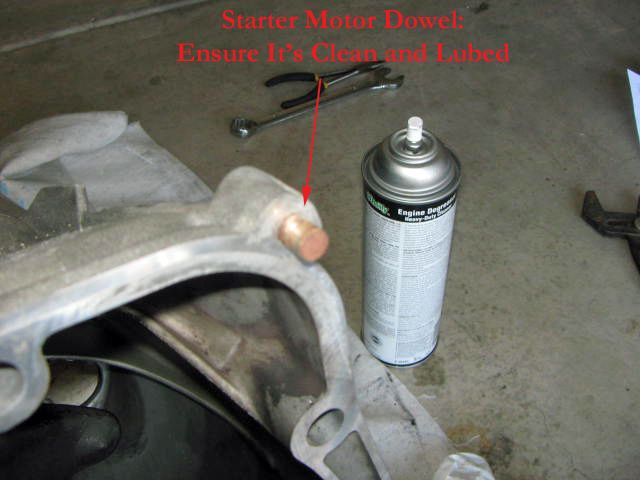 [/IMG]
3. Lubricate. Grease everything that is a friction point with high pressure wheel bearing grease. Put as much as you can on without risking it flying off and contaminating the clutch disk. Lubricate:
a. Gearbox input shaft splines.
b. Clutch fork where it contacts the pivot head.
c. Clutch fork where it contacts the slave cylinder piston on the other side.
d. Clutch fork where it contacts the clutch release bearing in the center.
e. Throwout Bearing flange.
f. Starter motor dowel pin.
g. Tips of the pressure plate where they contact the clutch release bearing
[IMG]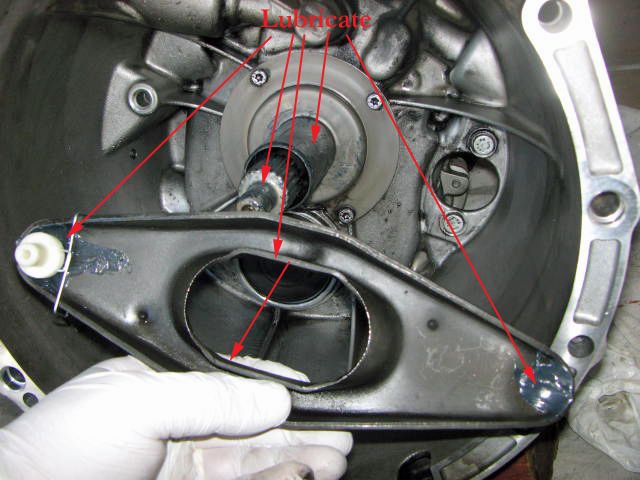 [/IMG]
4. Reattach Everything. Reassemble the fork and pivot. Push the pivot into the hole in the bell housing. Install the new throw-out bearing. Install a new flex disk (guibo) if you wish and torque to spec (19mm and 74lbs). Ensure the “arrows” point towards the flange arms.
[IMG]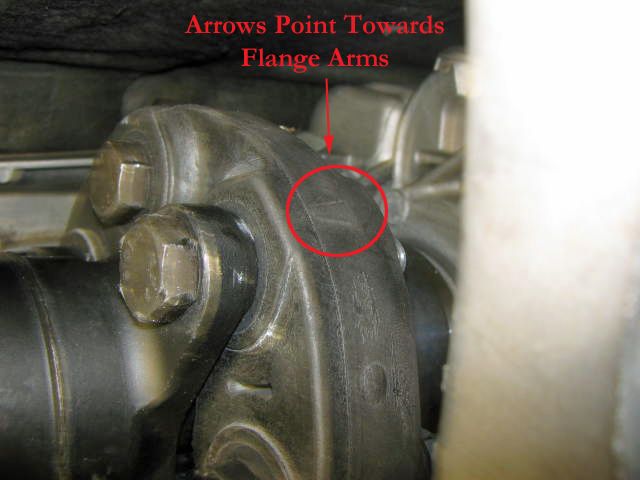 [/IMG]
5. Fill Transmission with oil. Filling a transmission will never be this easy again. Capacity is 1.7 quarts. Don’t worry about over-filling, you can release excess oil when the transmission is reinstalled.
Last edited by lkstaack; 03-12-2013 at 12:50 PM.
___________
Lars
2004 BMW 330iZHP: ESS TS-2 Supercharger, Limited Slip Differential, Koni FSD Shocks/Eibach Springs, Sway Barbarians


 Reply With Quote