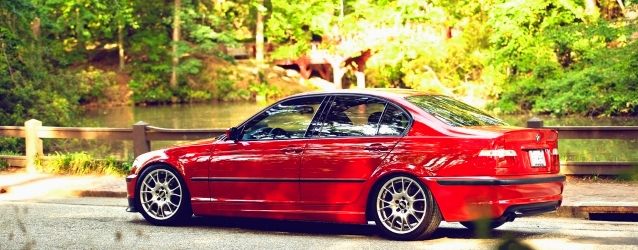
Materials to Maintain Your ZHP IIIII Hand Protection IIIII Tools to Maintain Your ZHP
Amazon Link for ZHPMafia ZHP
Page 389 of 2631 FirstFirst ... 2893393793873883893903913994394898891389 ... LastLast
Results 3,881 to 3,890 of 26307
  1. #3881
    Join Date
    Jan 1970
    Location
    Liberty Township, OH
    Posts
    37,982
    Looks great.
    Call Me Dane l 2/2004 330i ZHP l 18x8 ET45 BBS CK's wrapped with Michelin Pilot Sport AS3+ @ 245-40-18 l KW V1 Coilovers in front l KW V1 springs w/ Bilstein B8 dampeners in rear l BMW Performance Rotors l UUC StrutBarbarian l Racing Dynamics Rear Strut Bar l Jim Conforti Shark Injector l Light Birch Interior Trim l Bimmian Celly Mount l M3 Trunk Mat l l e90 Performance E-Brake & Shift Knob l M3 Tri-Stitched Boots l AL Headlight Retrofit with ZKW Lenses l CobyWheel Wrap w/M3 Stitching l LCM sw 4.5 triple blink and rear fogs l Maple Interior Trim

  2. #3882
    Join Date
    Jul 2013
    Location
    Harrisburg PA
    Posts
    396
    Quote Originally Posted by saace7 View Post
    The C's are the easiest. I believe depending on the year, the process might be a little different. Mine is a 2004 so, for the C's, just pop out the light with a flat head screw driver. You need to kind of dig in there to get it to pop out. Having a 2nd flat head handy is helpful too. Once it is out, unplug light. Older models I think there is a 25torx holding it in. Mine didn't. Use the open hole as a way to grab the panel and there are two clips at the top you will pop out. Then the rest just pulls out. For the A's, you will remove that little strip on the pillar with a flat head. Then there will be 3x 25torx screws that need to be taken out. They are in an annoying angle so be patient. Once you remove the screws, the rest will just pop and slide out. I used Krylon Easy Tack adhesive. Seem to work perfect. You have to time when you stick the fabric back because if to soon it won't stick because it is too wet and if to late it wont stick because it dried up. So about 15-30 seconds seems to work best. The trick is to get it to stick and spread evenly across the pillar. It is forgiven so don't worry about messing up. Also applying in small like 2-3 sq. inch sections seemed to work best for me.
    Awesome, I've removed the A pillars on my last E46 before so I know all about those pesky torx screws.

    I have a can of 3M spray adhesive, I may give this a try this week.

  3. #3883
    Join Date
    Jun 2011
    Location
    VA/DC
    Posts
    14,444
    Quote Originally Posted by TomTomTuning View Post
    Awesome, I've removed the A pillars on my last E46 before so I know all about those pesky torx screws.

    I have a can of 3M spray adhesive, I may give this a try this week.
    Just be careful not to get the fabric wet with the glue...don't ask...

  4. #3884
    Join Date
    Mar 2011
    Location
    Washington, DC
    Posts
    1,983
    low beams and halos


    - Stuart


    /_________\
    OO=[][]=OO

  5. #3885
    Join Date
    Jan 2013
    Location
    Mud Island (Memphis), TN
    Posts
    1,135
    ^ so jealous bro

    - 2021 Tesla Model Y LR-AWD '21-
    - 2014 CPO i01 BEV Capparis White Tera World, '17-'20
    - 2015 CPO i01 BEV Laurel Grey Tera World, '17-'18 R.I.P
    - 2015 i01 REx Laurel Grey Tera World, '15-'17
    - 2003 CPO 330i ZHP Imola Red Build 03/03/03, '06-'15

  6. #3886
    Join Date
    Aug 2011
    Location
    Las Vegas, NV
    Posts
    5,876
    Quote Originally Posted by saace7 View Post
    Did my A and C pillars... Some before and afters. Both the rears were in the same droopy condition.

    Attachment 9540 Attachment 9541
    Are these the "C Pillars"? Mine look exactly like that. I have the adhesive already maybe I will do these bad boys.
    BAV Stage 1 - BlueBus - UltraGauge - V1 - Orion V4's - ARC-8's - Brembo 996
    TTFS Engine/SMG Tune/CSL 255 - SGT Headers/Sect 1/SCZA - Evolve Eventuri
    VIS XTS CF Hood - CF Lip/Console/Diffuser - OE CSL Trunk - BWS 500S 9k/11k

  7. #3887
    Join Date
    Jan 1970
    Location
    Liberty Township, OH
    Posts
    37,982
    Quote Originally Posted by WOLFN8TR View Post
    Are these the "C Pillars"? Mine look exactly like that. I have the adhesive already maybe I will do these bad boys.
    Yes

    HTC DNA, Williamsburg, VA
    Call Me Dane l 2/2004 330i ZHP l 18x8 ET45 BBS CK's wrapped with Michelin Pilot Sport AS3+ @ 245-40-18 l KW V1 Coilovers in front l KW V1 springs w/ Bilstein B8 dampeners in rear l BMW Performance Rotors l UUC StrutBarbarian l Racing Dynamics Rear Strut Bar l Jim Conforti Shark Injector l Light Birch Interior Trim l Bimmian Celly Mount l M3 Trunk Mat l l e90 Performance E-Brake & Shift Knob l M3 Tri-Stitched Boots l AL Headlight Retrofit with ZKW Lenses l CobyWheel Wrap w/M3 Stitching l LCM sw 4.5 triple blink and rear fogs l Maple Interior Trim

  8. #3888
    Join Date
    Aug 2011
    Location
    Las Vegas, NV
    Posts
    5,876
    Cool Ima Gonna Doo it. Thanks.
    BAV Stage 1 - BlueBus - UltraGauge - V1 - Orion V4's - ARC-8's - Brembo 996
    TTFS Engine/SMG Tune/CSL 255 - SGT Headers/Sect 1/SCZA - Evolve Eventuri
    VIS XTS CF Hood - CF Lip/Console/Diffuser - OE CSL Trunk - BWS 500S 9k/11k

  9. #3889
    A pillars = pillars by front windshield with little strips.
    B pillars = pillars where the seat belt is attached to the side.
    C pillars = pillars on rear, by rear windshield. Pillar C has a light in it.

  10. #3890
    Join Date
    Jun 2013
    Location
    Honduras, Central America
    Posts
    137
    Quote Originally Posted by saace7 View Post
    The C's are the easiest. I believe depending on the year, the process might be a little different. Mine is a 2004 so, for the C's, just pop out the light with a flat head screw driver. You need to kind of dig in there to get it to pop out. Having a 2nd flat head handy is helpful too. Once it is out, unplug light. Older models I think there is a 25torx holding it in. Mine didn't. Use the open hole as a way to grab the panel and there are two clips at the top you will pop out. Then the rest just pulls out. For the A's, you will remove that little strip on the pillar with a flat head. Then there will be 3x 25torx screws that need to be taken out. They are in an annoying angle so be patient. Once you remove the screws, the rest will just pop and slide out. I used Krylon Easy Tack adhesive. Seem to work perfect. You have to time when you stick the fabric back because if to soon it won't stick because it is too wet and if to late it wont stick because it dried up. So about 15-30 seconds seems to work best. The trick is to get it to stick and spread evenly across the pillar. It is forgiven so don't worry about messing up. Also applying in small like 2-3 sq. inch sections seemed to work best for me.
    I did my A pillars a couple of days ago, boy those torx screws are a pain!! Doing the C pillars tomorrow!

Page 389 of 2631 FirstFirst ... 2893393793873883893903913994394898891389 ... LastLast

Similar Threads

  1. Mini Meet and Shoot
    By M0nk3y in forum Everything Non ZHP (the place for non-ZHP photos)
    Replies: 11
    Last Post: 06-30-2011, 08:14 AM

Posting Permissions

  • You may not post new threads
  • You may not post replies
  • You may not post attachments
  • You may not edit your posts
  •