Materials to Maintain Your ZHP IIIII Hand Protection IIIII Tools to Maintain Your ZHP
Page 1 of 11 123 ... LastLast
Results 1 to 10 of 103
  1. #1
    Join Date
    Jun 2011
    Location
    Northborough, MA
    Posts
    304

    135 6-piston OEM Brembo Retrofit... The DIY.

    ************************************************** *********************************
    * As you know with any other DIY your proceeding at your own and sole risk, I'm not liable for anything. *
    ************************************************** *********************************

    I got tired of thread jacking other people's posts so here's my DIY for retrofitting the OEM 135i e82, Gray 6 Piston Brembo calipers onto an e46 or e36. This would also work for the yellow calipers if you were so lucky as to find a pair in need of a rebuild, as they are mechanically identical.

    I am just starting this build, as the piston rebuild parts just showed up today, but I should have everything completed in the next few weeks to complete my DIY writeup, at which point I will post my final layout to the DIY section.

    Parts you will need to start:
    (2) Front 135i performance 6 piston calipers.


    (2) Oem 135i caliper mounts that come with the 6-piston calipers.


    You can source these parts wherever you want or can... I got mine from a fellow BMWCCA member (thanks LarryN).

    If you find a set with healthy ceramic caps on the pistons, and you don't intend to take your car on the track, you might be able to just use the calipers as they are, only requiring a modification of the bracket to get these installed on your car.

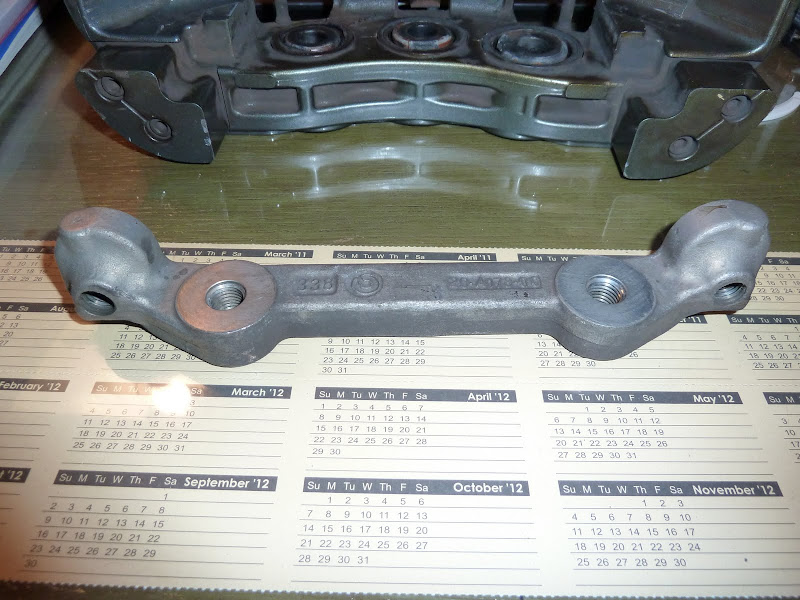
    The factory bracket mounts right up to the e46/e36 brake mounting points, but the 135 had a 338mm rotor diameter, where the e46 330 rotors used with this retrofit are 325mm. This requires us to do some modifications of the bracket to move it 6.5mm in to properly sit on the rotors.

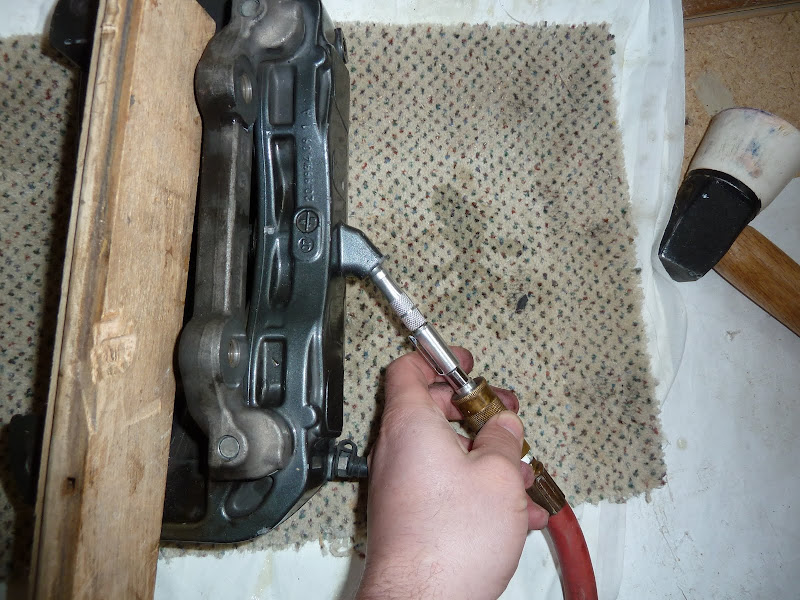
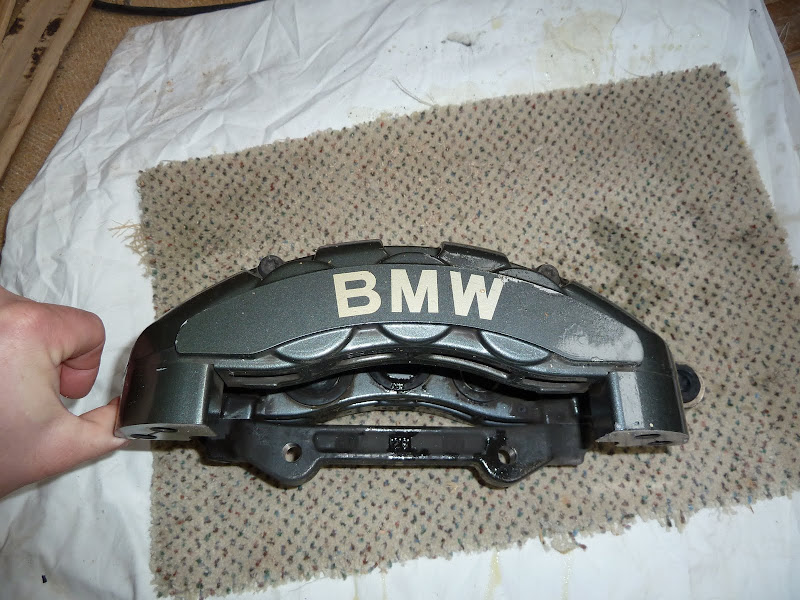
    here's a photo of the calipers and brackets, as it comes from the factory for the 135, this photo is without brake pads(and just for clarification, you obviously use 135i brake pads, not 330 pads)


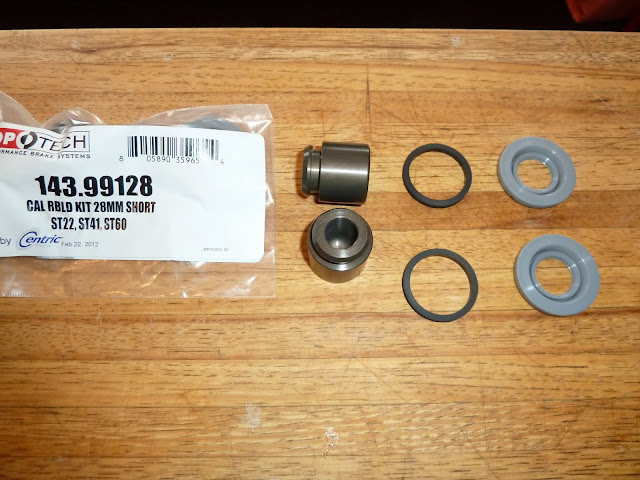
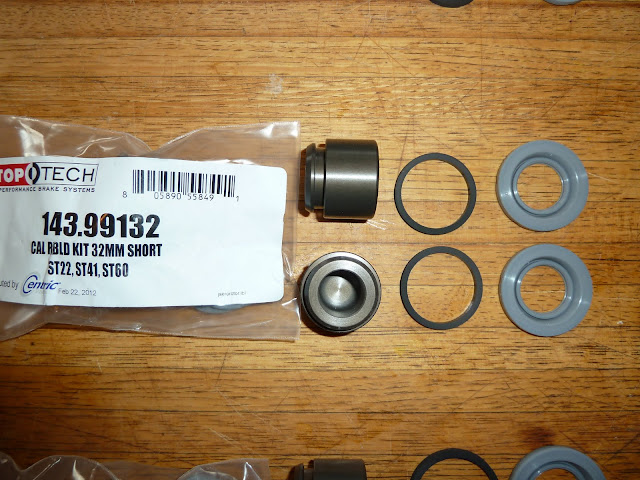
    In my case, I do plan to track the car, and the previous owner removed them because he fried the piston's ceramic caps, boots and etc. So, mine required a rebuild. I did some research and was able to find most of the information I needed on what to order but was almost misled by a few posts into ordering the incorrect parts... that's partially why I chose to put together a complete front to back DIY for this project.

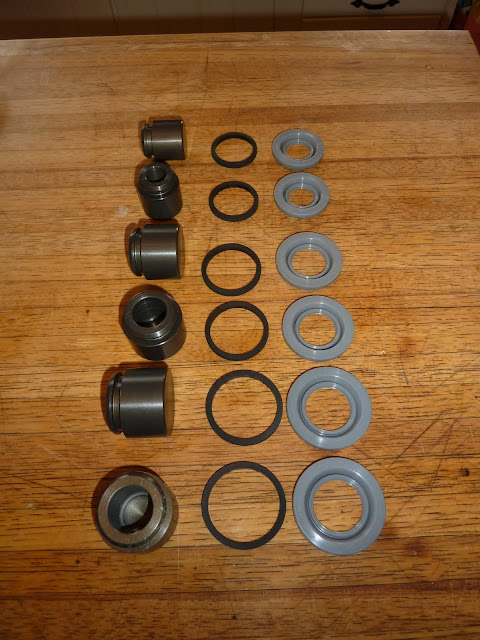
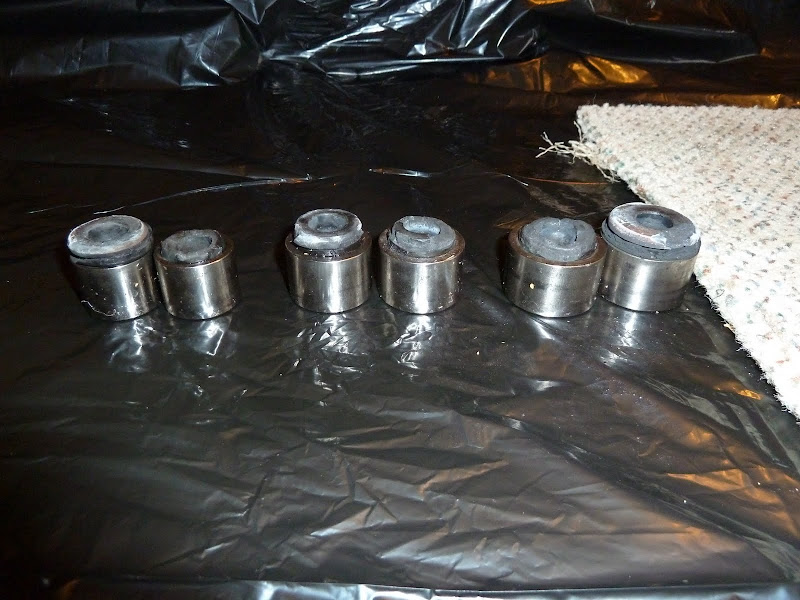
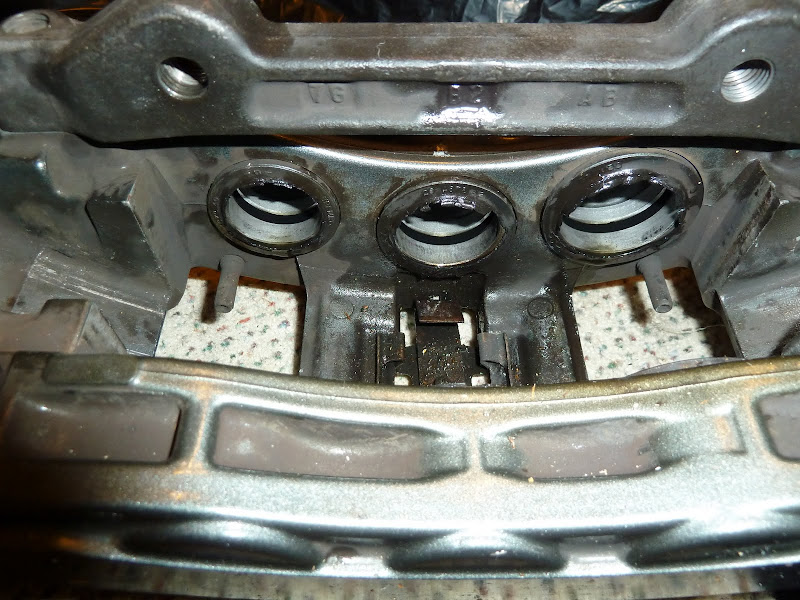
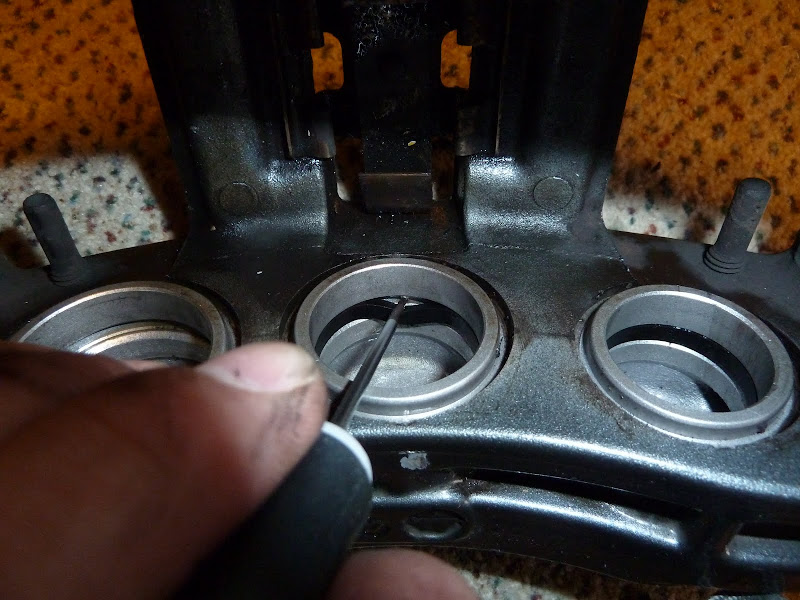
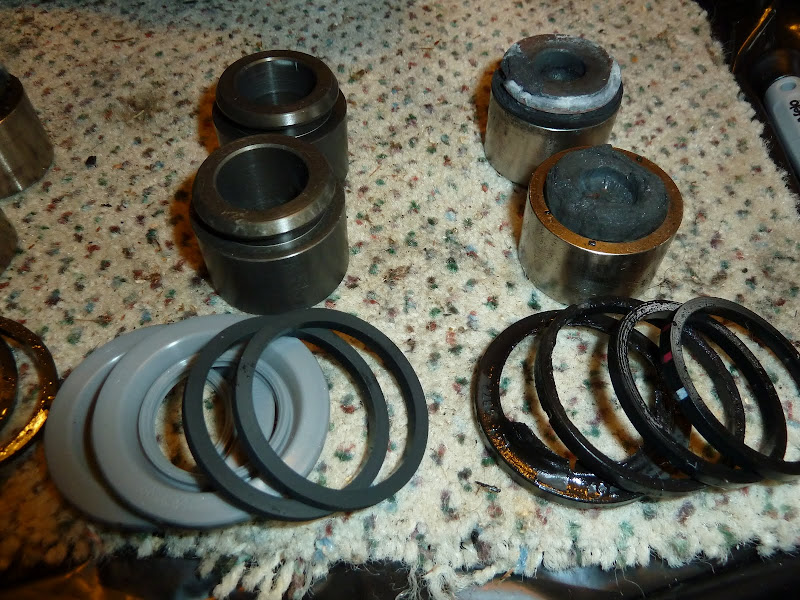
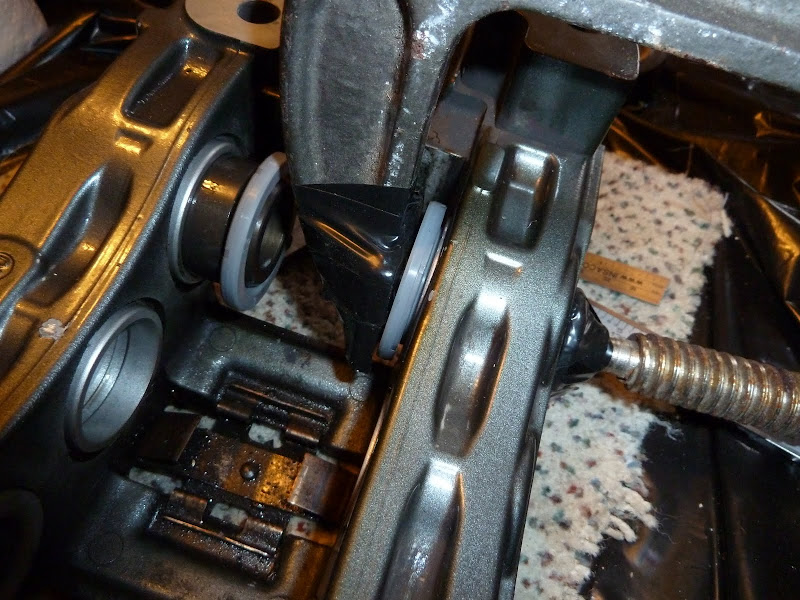
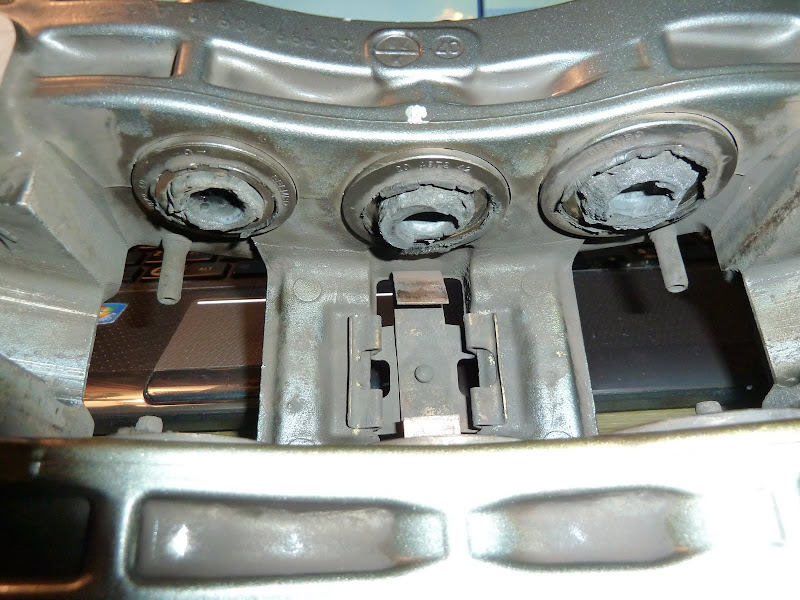
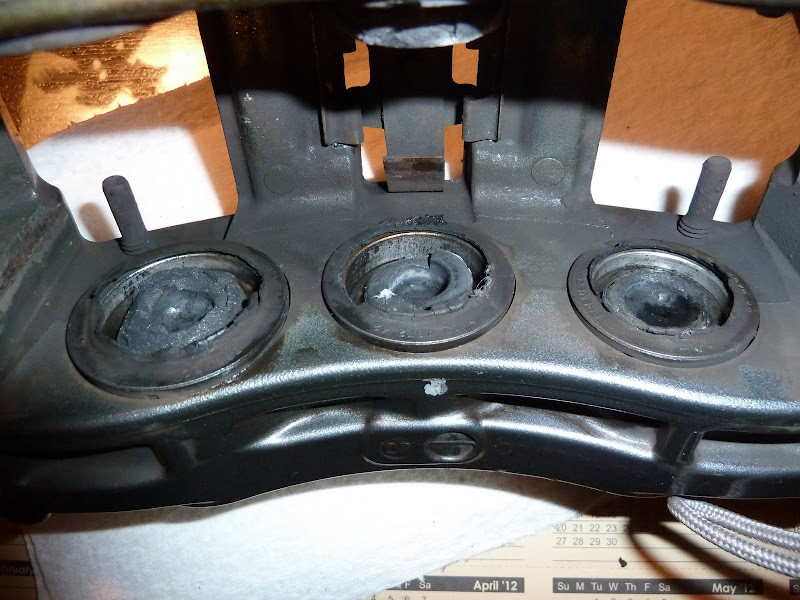
    Here are some photos of what happens to these on the track...


    Don't be worried by these photos, the brakes shold be perfectly fine, just needing new pistons and dust boots, but while you're in there just replace the compression seal also.
    Last edited by Chad44; 03-01-2012 at 03:44 PM.

  2. #2
    Join Date
    Jun 2011
    Location
    Northborough, MA
    Posts
    304

  3. #3
    Join Date
    Jun 2011
    Location
    Northborough, MA
    Posts
    304
    I will be modifying the brackets in the coming weeks when I find time to set up the milling machine to do so...

    But, for now- I'll be laying out what is needed to rebuild the calipers with new pistons.

    I ordered complete rebuild kits online, these kits come with 2 pistons, 2 pressure seals, and 2 dust boots each. This means that you must order 2 of each sized kit (28mm, 32mm, 36mm) in order to rebuild a pair of calipers.

    Parts ordered, and price I paid:

    $363.36Stoptech rebuild kits Incl. Aluminum short pistons, Pressure Seals & Dust Boots
    -(2) StopTech Rebuild Parts (143.99128) For ST-28 Calipers
    -(2) StopTech Rebuild Parts (143.99132) For ST-32 Calipers
    -(2) StopTech Rebuild Parts (143.99136) For ST-36 Calipers


    This is as far as I have gotten so far, I will rebuild the calipers in the next few days and then update the thread.
    Last edited by Chad44; 02-29-2012 at 08:27 PM.

  4. #4
    Join Date
    Jun 2011
    Location
    Northborough, MA
    Posts
    304
    When it comes time to rebuild the calipers, the first thing you need to do is clean them... they are likely very dirty and cleaning them before hand will keep you clean(er), and help to keep dirt and debris out of the calipers that could damage the piston bores...

    I cleaned mine 3 times with a brush and engine degreaser, which got most of the crap off them and whats left I will just be careful not to dislodge... The primary thing is to hand clean and wipe down all surfaces around the pistons as this is the most likely culprit of knocking crap into the piston holes..

    Once clean, we work on removing the old pistons... Mine were crumbling and gave me nothing to hold them with... and while I was playing with them last week I had managed to push the pistons all the way into their bores.

    I used air from my air compressor to get the pistons out enough to grab them with a set of water pump pliers. For this, you need to put something in the middle of all the pistons to keep them from popping out, since as soon as one breaks the seal you have no pressure and the others will not pop out. I used a couple pieces of wood.


    Once they are out, enough, grab them and pull them out.... twisting helps here. I wrapped the jaws of my pliers in electrical tape so as not to mark the surfaces, just in case... though I'm planning to throw the old pistons away, who knows... maybe I'll make aluminum caps that press into the old pistons, allowing them to live again...


    The next step is to remove the old dust boots and pressure seals.
    For this, I used a small electronics screw driver, getting it into the edge of the seam and giving it a few gentle taps with something helps to get it down below the metal ring of the dust boot, then it pries out very easily.... repeat for all 6 boots.


    Here's a look into the piston bore at the pressure seal. When removing the pressure seal be extremely careful not to scratch or nick the aluminum walls.
    I used 2 small precision screw drivers, one to get the seal out of the groove, and the other to pull it away. This may be able to be done with your fingernails, but I had just cut mine the night before.


    https://lh5.googleusercontent.com/-S...0/P1030163.jpg


    Once all the dust boots and seals are removed, carefully clean the area around the pistons again, and inside the piston bore... but be careful not to leave any paper or cotton fibers from your cloth.

    I laid out all my parts and had a look at the new and the old, this is where things went wrong for me...


    The company had shipped all the correct parts, except the 32mm pistons were not correct, they had put 34mm pistons in the kit... so as soon as you get your parts, it's a good idea to check to be sure they are correct.
    This can be done easily without measuring tools; the dust boot is printed with it's size. The pressure seal nests perfectly inside the dust boot and came shipped to me in this way. So far you can confirm the size of those two parts that way, next you take the pressure seal out of the dust boot and it should slip easily over the piston, a perfect fit... this is how I knew mine weren't right- they didn't fit the rest of the kit.

    Anyways, getting back to the process- carefully put the new pressure seals back into the grooves using only your fingers. Also be sure that the seal is seated flat and is not twisted.

    Once the seals are in, you can put the dust boots onto the pistons, making sure that you pull them down until the boots fits correctly in the groove.
    Then, use some fresh brake fluid to lubricate the piston bore, pressure seal, and new piston... carefully push the piston into the bore, making sure it is straight.

    I found that the 28mm pistons pressed in fairly easily with some light spinning, but the 36mm required a bit more grunt than I could give them with my fingers... so i took a large metal clamp, wrapped the ends in electrical tape, and pressed them in slowly, only proceeding when I was sure that the pistons were straight in the bores and that the piston was started in the pressure seal... the fought for a second them pressed right in easily.


    The final product... sans my 32mm piston that I will have to wait for to finish.

    Last edited by Chad44; 02-29-2012 at 08:32 PM.

  5. #5
    Join Date
    Jun 2011
    Location
    Northborough, MA
    Posts
    304
    Bracket modification place holder.

  6. #6
    Join Date
    Jan 1970
    Location
    Asheville, NC
    Posts
    2,591
    Sweet. Subscribed.
    "No, Donny, these men are nihilists, there's nothing to be afraid of"

    09 135i Msport 6mt
    04 330i ZHP (sold)
    David

  7. #7
    spencers Guest
    Subbed fo' sho'

  8. #8
    Join Date
    Jan 1970
    Location
    Liberty Township, OH
    Posts
    37,935
    Thanks for the DIY Chad.

    HTC Thunderbolt+TT
    Call Me Dane l 2/2004 330i ZHP l 18x8 ET45 BBS CK's wrapped with Michelin Pilot Sport AS3+ @ 245-40-18 l KW V1 Coilovers in front l KW V1 springs w/ Bilstein B8 dampeners in rear l BMW Performance Rotors l UUC StrutBarbarian l Racing Dynamics Rear Strut Bar l Jim Conforti Shark Injector l Light Birch Interior Trim l Bimmian Celly Mount l M3 Trunk Mat l l e90 Performance E-Brake & Shift Knob l M3 Tri-Stitched Boots l AL Headlight Retrofit with ZKW Lenses l CobyWheel Wrap w/M3 Stitching l LCM sw 4.5 triple blink and rear fogs l Maple Interior Trim

  9. #9
    Join Date
    Aug 2011
    Location
    The Windy City
    Posts
    9,155
    nice. never woulda sold my 135i Performance Brake kit if I knew they'd fit this car.
    Call me Seth
    CURRENT: 2016 Long Beach Blue BMW /// M2
    RETIRED: ‘15 F22 M235i | '08 E90 M3 DCT "GoinHAM3" | '04 E46 M3 6MT "WEGOHAM"
    '04 330i ZHP | '11 E82 135i | '08 E90 328xi | 07 E91 328xi SportWagon

    Quote Originally Posted by danewilson77 View Post
    If I wore panties, I'd be dropping them right now.

  10. #10
    Join Date
    Sep 2011
    Location
    San Francisco, CA
    Posts
    6,847
    Those parts should work out!

Page 1 of 11 123 ... LastLast

Similar Threads

  1. DIY OEM Bluetooth Retrofit doityourself
    By Crickett in forum DIY
    Replies: 28
    Last Post: 02-03-2018, 03:01 PM
  2. PDC retrofit?
    By otisdog in forum General -- ZHP Related
    Replies: 24
    Last Post: 11-09-2014, 07:09 PM
  3. Replies: 74
    Last Post: 03-02-2012, 11:41 AM
  4. The retrofit source sale
    By spoonerDee in forum Lighting
    Replies: 2
    Last Post: 12-01-2011, 09:36 AM
  5. Bluetooth retrofit with factory Nav?
    By aurelius in forum Audio | In Car Entertainment (ICE)
    Replies: 1
    Last Post: 05-12-2011, 08:48 AM

Posting Permissions

  • You may not post new threads
  • You may not post replies
  • You may not post attachments
  • You may not edit your posts
  •